How to Properly Shut Down Your Traeger Grill

As the final embers of a delightful grilling session fade into the twilight, a ritual of equal importance beckons – the proper shutdown of your trusted Traeger grill. Beyond the delectable flavors and aromatic indulgence, the act of bidding adieu to your grill holds paramount significance for safety, maintenance, and the longevity of your prized culinary companion.Just as a chef values precision, your Traeger grill demands a meticulous shutdown to ensure safety. A thorough shutdown extinguishes any lingering flames and minimizes the risk of potential flare-ups, ensuring your cooking area remains hazard-free.Part 1: How to Properly Shut Down Your Traeger GrillStep 1: Turn Off the ControllerYour grill’s controller boasts a power button, often adorned with a recognizable icon. It’s your gateway to control. Gently press the power button and hold it down. This initiates the shutdown sequence, signaling the controller that it’s time to bid adieu. Depending on your Traeger model, a confirmation prompt might appear on the digital display. Confirm your intention to shut down. With the digital display’s acknowledgment, your Traeger grill gracefully begins its descent into standby mode. Allow it a moment to relinquish its culinary duties and embrace tranquility.Step 2: Let it Cool DownAs the final sizzles of your culinary masterpiece fade, a crucial interlude beckons – allowing your Traeger grill to cool down before embarking on the shutdown process. This pause isn’t just a momentary breather; it’s a safety measure of paramount importance. It demands respect and cautious interaction. Allowing your Traeger grill to cool down provides a protective cushion, ensuring you can navigate its components without the risk of burns or singed fingers.Step 3: Power OffA red-hot grill can pose unforeseen dangers, from accidental contact with searing surfaces to inadvertent spills. By giving your grill time to cool, you eliminate the risk of hasty mistakes that could lead to injury or mishaps. Beyond personal safety, cooling down ensures that the grill’s components have a chance to shed excess heat. This gentle cooldown period safeguards against potential damage to sensitive parts, allowing them to gracefully transition from scorching to ambient temperatures.

Step 4: Empty Pellet HopperCast your gaze toward the power cord, the lifeline that connects your Traeger grill to its energy source. Whether it’s tucked discreetly or proudly on display, you’ll find it near the grill’s base. Pellet hoppers are susceptible to the silent intrusion of moisture, a culprit that can compromise the integrity of your pellets. By diligently emptying the hopper, you prevent moisture from infiltrating and undermining your pellets’ quality, ensuring they remain ready to infuse your dishes with unparalleled flavor.Step 5: Remove Grease TrayAs the delectable scents of your culinary creation disperse, a vital chore awaits – the meticulous cleaning of your grease tray. This task extends beyond mere neatness; it’s a fundamental element of safety and fire prevention in your Traeger grilling odyssey. The grease tray isn’t just a receptacle for drippings; it’s a frontline defender against potential hazards. Clearing the Traeger grill of residual grease ensures unimpeded airflow and minimizes the risk of flare-ups.Step 6: Brush the GratesBrushing the grates isn’t just a chore; it’s a secret weapon in your grilling arsenal. By removing food residue and maintaining a clean cooking surface, you’re setting the stage for grilling greatness. Bid adieu to lingering flavors from past cookouts. Brushing the grates ensures that your current masterpiece shines through, delivering pure and unadulterated flavors. A clean cooking surface ensures consistent heat distribution. No more hotspots or cold corners – just evenly cooked perfection that delights every bite.

Step 7: Cover Your GrillImagine your Traeger grill as a work of art – a masterpiece that deserves protection and preservation. This simple yet mighty accessory plays a pivotal role in safeguarding your grill from the unpredictable elements, ensuring its longevity and uninterrupted performance. Whether it’s scorching sun, torrential rain, or winter’s icy grasp, a grill cover stands as the first line of defense against nature’s whims. Shielding your Traeger from these elements prevents rust, corrosion, and wear and tear.Part 2: Mastering Rainy Day Shutdown for Your Traeger GrillGrilling in the rain can infuse your culinary creations with a unique charm, but a proper shutdown is crucial to protect your Traeger grill from the elements. Follow these extra steps for a rainy-day shutdown:

  1. Rain-Resistant Area

Position your grill under a sheltered spot, like a patio awning or overhang, to minimize direct exposure to rain. This provides a degree of protection during cooking and shutdown.1. Grill Cover PlacementBefore shutdown, ensure the grill cover is securely in place. This prevents rainwater from seeping into the grill’s components and ensures a dry interior for your next grilling session.2. Dry Before CoveringBefore covering your grill, make sure it’s completely dry. Wipe down any wet surfaces to prevent moisture from getting trapped under the cover.3. Ventilation MattersIf your grill has vents, ensure they’re not obstructed by the cover. Proper ventilation prevents condensation buildup inside the grill.4. Regular InspectionAfter the rain has subsided, perform a quick visual inspection to ensure no water has pooled on the grill or seeped in through any gaps.

Note: By incorporating these extra steps into your rainy-day shutdown routine, you’re taking proactive measures to protect your Traeger grill from the rain’s impact. This ensures that your grill remains in optimal condition, ready to deliver exceptional grilling experiences rain or shine.ConclusionA successful grilling session doesn’t end with the last sizzle – it concludes with a careful and calculated shutdown. This essential process isn’t just about turning off the grill; it’s a cornerstone of safety, maintenance, and the key to unlocking exceptional grilling experiences.FAQsCan I shut down the grill immediately after cooking?It’s advisable to allow the grill to cool down for a bit before shutting it down. This prevents any sudden changes in temperature that could affect the grill’s components.How long should I wait before cleaning the grill grates?Wait until the grill has cooled down to a safe temperature before cleaning the grates. This prevents accidental burns and ensures safe handling.Is it necessary to clean the grease tray after every use?Yes, cleaning the grease tray after each use is important to prevent grease buildup, fire hazards, and maintain a clean cooking environment.

from FOX HEIGHTS https://foxheightspubandgrill.com/post/how-to-properly-shut-down-your-traeger-grill
via IFTTT

from Fox Heights Pub and Grill https://foxheightspubandgrill.blogspot.com/2023/08/how-to-properly-shut-down-your-traeger.html
via IFTTT

Troubleshooting Guide: Why Is My Gas Grill Not Getting Hot? Common Issues and Solutions

What should you do if the grill is struggling to reach the desired temperature? The frustration is palpable, akin to an unwelcome guest at your culinary celebration. 

A hot grill is the heartbeat of successful outdoor cooking. It’s the gateway to achieving those coveted grill marks, sealing in juices, and imparting that unmistakable smoky flavor. The temperature intricacies play a pivotal role in transforming raw ingredients into mouthwatering masterpieces.

But fear not, for this culinary conundrum is not insurmountable. In this article, we’ll delve into the crucial nuances of grill temperature, unearthing the common culprits behind the temperature struggle and providing actionable solutions. Elevating your grilling game begins with understanding the pivotal role of grill temperature, identifying the obstacles, and embarking on a journey to ensure that every cookout is a resounding success. Let’s uncover the secrets to grill mastery and let your culinary creations thrive in the realm of perfectly heated grills.

gas grill heat

Part 1: Gas Supply Issues for Gas Grill: Ensuring a Steady Flow of Flames

Gas Tank Level: Diminished Power Source

When it comes to grill performance, the heartbeat lies within your propane tank. A low or, worse, an empty tank can spell disaster for achieving optimum heat output. Propane is the fuel that drives the fiery dance on your grill grates, and its depletion means a feeble flame – a far cry from the searing power you seek. With dwindling gas, the grill’s capability to reach high temperatures diminishes, leaving your culinary dreams in the lurch.

Regulator Problems: The Symphony of Gas Flow

Meet the regulator – the unsung hero that orchestrates the delicate ballet of gas flow. Like any maestro, it thrives on harmony, but disruptions can lead to a disappointing performance. Blockages or malfunctioning regulators can throttle gas flow, robbing your grill of the intense heat needed for grilling glory. Imagine a bottleneck in a bustling city – traffic stalls, movement falters, and the destination remains elusive. Similarly, regulator hiccups can hinder gas flow, translating to lackluster temperatures and underwhelming results.

Leaking Gas Hose: Protecting Heat and Safety

Regularly checking for gas leaks is paramount. Beyond disrupting heat distribution, leaks pose grave safety risks. Escaping gas combined with flames can lead to flare-ups, fires, and potential harm. Prioritizing leak checks ensures not only optimal grilling performance but also a secure and enjoyable cooking experience. gas supply system

Part 2: Ignition and Burner Woes: Navigating Grill Hindrances

Ignition Failure: Sparking Disappointment

In the realm of grilling, a well-functioning ignition system is akin to a magician’s wand – it ignites the fiery spectacle that turns raw ingredients into gastronomic marvels. Yet, a faulty ignition system plays the role of a reluctant performer, robbing you of the grand opening act. Picture this: the anticipation of flames dancing on the grates, only to be met with an eerie silence. A malfunctioning ignition switch, a worn-out electrode, or electrical glitches – any of these can shatter the ignition’s magic, denying the burners their much-needed spark. The result? A culinary canvas left untouched, dreams of a sizzling masterpiece unfulfilled.

Burner Blockages: Hindrances to Heat Harmony

Imagine the burners as the heart of your grill – pumping out heat to transform ingredients into succulent wonders. But even a heart can succumb to blockages. Debris, grease, and tiny trespassers like insects can infiltrate, leading to clogged burner pathways. Much like a traffic jam on a bustling highway, this obstruction disrupts the flow of heat, resulting in uneven cooking and frustrated taste buds. The consequence of this blockade extends beyond impaired heat distribution; it’s a setback that dulls the thrill of grilling creativity. ignition and burner woes

Part 3: Ventilation and Airflow: The Breath of Grilling Power

Blocked Venturi Tubes: A Stifled Dance of Elements

Picture your grill as a symphony of elements – gas and air coming together in perfect harmony. Enter the venturi tubes, the conduits of this elegant dance. When these vital tubes are obstructed, their ability to blend air and gas into the ideal mixture is stifled. Imagine a maestro being handed a mute instrument – the symphony falters, and so does your grill’s heat generation. Blocked venturi tubes disrupt the delicate equilibrium, resulting in diminished flames and thwarted cooking ambitions.

Clogged Air Vents: Navigating the Heat Control

Now, consider air vents as the conductors of your grill’s heat orchestra. These vents are gatekeepers, regulating the flow of oxygen that fuels the fiery performance. But even conductors can falter when confronted with obstructions. Clogged air vents deprive your grill of the oxygen it craves, much like a singer struggling to catch their breath mid-performance. The result? Poor heat control, erratic temperatures, and lackluster culinary outcomes.

blocked venturi tube

Part 4: Worn or Damaged Components: Culprits of Heat Deterioration

Worn Heat Diffusers: Dimming the Flame’s Embrace

In the theater of grilling, heat diffusers play the role of spotlight holders, distributing radiant warmth to every corner of the stage – your grill grates. Over time, these unsung heroes can become worn, battered by the relentless heat and grease. With their integrity compromised, their ability to evenly spread heat wanes. Picture a flickering spotlight – some areas shine brightly while others remain shrouded in darkness. Similarly, worn heat diffusers lead to uneven heat distribution, casting shadows over your culinary aspirations.

Damaged Burners or Igniters: Igniting the Heat Conundrum

Burners and igniters are the dynamic duo behind the fiery spectacle of grilling. But even heroes age and succumb to wear. Worn burners struggle to generate the intense heat needed for culinary excellence, while malfunctioning igniters refuse to initiate the dazzling performance. Imagine a performance without its protagonists – lackluster, devoid of energy, and far from memorable.

As the mercury drops, so can your grill’s performance. Colder temperatures constrict the gas within your propane tank, leading to reduced gas pressure. This drop-in pressure hinders the grill’s ability to reach and sustain high temperatures. It’s akin to an athlete performing in freezing weather. damaged components

Part 5: Troubleshooting Steps to Fix Gas Grill Not Getting Hot

Gas Tank Check and Replacement: Propane Prowess

Before firing up your grilling escapade, conduct a propane patrol. Ensure your gas tank is filled or adequately topped up. Running out of gas midway through a cookout is a culinary cliffhanger you’d rather avoid. If the gauge signals emptiness, embrace a timely refill or replacement to keep the fiery spectacle ablaze.

Regulator Inspection: Nurturing the Gas Flow

The regulator – your grill’s airflow maestro – deserves regular scrutiny. Gently inspect and clean it, ensuring unobstructed passages. Clear away dirt, grime, or anything that dares hamper the gas flow. A regulator in pristine condition orchestrates a symphony of gas and air, breathing life into the flames.

Burner and Ignition Maintenance: Flawless Flare Creation

Elevate your grilling act by giving burners and igniters their due attention. Wipe away the residue of past performances, ensuring they’re clean and debris-free. Ignition systems deserve some extra love – ensure they spark with vigor, their role as flame-initiators unimpeded.

Ventilation and Airflow Adjustment: Oxygen’s Pas de Deux

Venturi tubes and air vents are the wind beneath your grill’s wings. If they’re obstructed, your culinary dance falters. Clear venturi tubes of any blockages, letting gas and air pirouette effortlessly. Unshackle air vents from debris, allowing them to control the oxygen’s delicate ballet for optimal heat harmony.

Component Replacement: A Refresh for Grill Vitality

Worn parts can dampen your grilling symphony. Reinvigorate your grill by swapping out damaged components. New heat diffusers, spry burners, and eager igniters breathe fresh life into your culinary stage, ensuring every performance is a resounding success. 

Conclusion

When your gas grill’s heat falters, it’s often due to issues like low gas levels, regulator problems, clogged components, or chilly weather. Don’t despair – troubleshooting is your secret weapon. Start with a gas tank check, then inspect and clean the regulator. Nurture burners and igniters, clear venturi tubes, and embrace component replacements when needed. Through these steps, you’ll reignite the flames of culinary glory. Remember, regular maintenance is the key to grill longevity and impeccable performance. A little care goes a long way – ensuring consistent heat, flavors, and unforgettable grilling moments.

FAQs

How do I check the gas tank level?

To check the gas tank level, carefully lift the tank and gauge its weight. Alternatively, you can use a scale to measure its weight. If the tank feels significantly lighter or the weight is low, it’s time for a refill or replacement.

What should I do if the regulator is malfunctioning?

Inspect the regulator for any visible damage or blockages. Clean it gently if needed. If the issue persists, consider replacing the regulator. A functional regulator ensures proper gas flow and optimal heat.

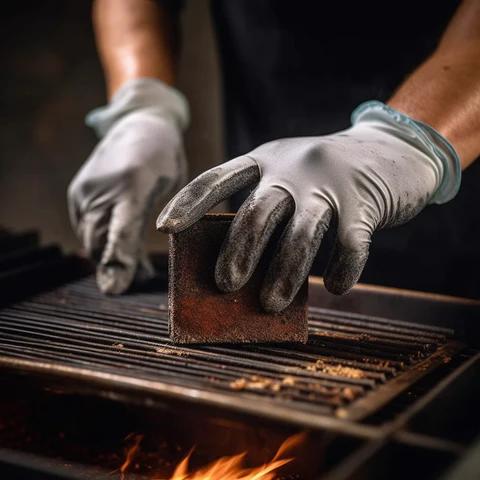
How can I clear clogged burners?

Carefully remove the burners and clean them with a wire brush or grill brush. Make sure to clear any debris, grease, or residue that might be obstructing the burner ports. Properly cleaned burners ensure even heat distribution.

from Fox Heights Pub and Grill – BBQ Recipes https://foxheightspubandgrill.com/blogs/bbq-recipes/troubleshooting-guide-why-is-my-gas-grill-not-getting-hot-common-issues-and-solutions
via IFTTT

from Fox Heights Pub and Grill https://foxheightspubandgrill.blogspot.com/2023/08/troubleshooting-guide-why-is-my-gas.html
via IFTTT

Can You Use a Propane Grill Indoors? Exploring Safety, Regulations, and Alternatives

Grilling – it’s more than just a cooking method; it’s a sensory experience that ignites the senses and tantalizes the taste buds. The crackling of flames, the aroma of sizzling meat, and the anticipation of a perfectly charred crust – these are the elements that define the allure of grilling. But what happens when the weather doesn’t cooperate, or you simply yearn for that smoky goodness within the comforts of your home?

Enter the intriguing notion of indoor grilling. The desire to bring the joy of outdoor barbecues into the cozy embrace of your kitchen is a sentiment shared by many culinary enthusiasts. The very thought of enjoying grilled delicacies while being shielded from the elements holds an undeniable charm.

Yet, a critical question lingers: Can you safely use a propane grill indoors? As the flames of curiosity flicker, we embark on a journey to uncover the truth behind indoor grilling with propane. We delve into the realm of safety, regulations, and alternatives to provide you with the insights you need to make informed choices. So, let’s explore whether the captivating world of grilling can gracefully transition from the open outdoors to the heart of your home, all while ensuring your safety and culinary satisfaction.

Part 1: Safety Concerns and Considerations for Using Propane Grill Indoors

Fire and Carbon Monoxide Risks

Grilling with propane indoors introduces a host of serious risks, primarily centered around fire hazards and the insidious threat of carbon monoxide poisoning. Propane grills are designed for outdoor use, where ample ventilation disperses flammable gases and fumes. Bringing them indoors concentrates these gases, increasing the potential for fire outbreaks, especially in spaces not equipped to handle open flames.

Equally menacing is the specter of carbon monoxide, a colorless, odorless gas that can prove fatal in high concentrations. Incomplete combustion of propane generates carbon monoxide, and when confined indoors, its accumulation can lead to poisoning. Symptoms range from dizziness and nausea to unconsciousness or worse.

Ventilation and Air Quality

Adequate ventilation is the keystone of indoor grilling safety. Proper airflow facilitates the removal of smoke, fumes, and gases, preventing their buildup. Inadequate ventilation can quickly turn indoor grilling into a perilous endeavor, compromising air quality and increasing health risks. Ensuring open windows, exhaust fans, or dedicated ventilation systems can greatly mitigate these hazards.

Regulations and Local Codes

The safety concerns associated with indoor propane grill use have prompted many jurisdictions to enact regulations and local codes strictly prohibiting their use indoors. These rules serve as a safeguard against potential accidents, protecting both occupants and property. It’s crucial to familiarize yourself with local regulations and prioritize safety over convenience, as non-compliance can lead to dire consequences.

Note: Navigating these dangers demands unwavering caution. The allure of indoor grilling must be weighed against the risks, and alternative methods should be explored to ensure culinary enjoyment without compromising safety.

propane grill indoors

Part 2: Propane Grill Alternatives for Indoor Grilling

What should be the best propane grill alternatives for indoor grilling? When the desire for delectable grilled dishes meets the limitations of indoor cooking, alternatives to propane grills come to the rescue, promising a tantalizing culinary adventure without compromising safety. Let’s explore a trio of indoor grilling alternatives, each with its own unique charm and mouthwatering potential.

Electric Grills: Indoor Grilling Reimagined

Electric grills stand as a beacon of hope for those yearning to bring the flavors of outdoor grilling into their kitchens. Purpose-built for indoor use, these grills offer a seamless solution, eliminating open flames and the risks associated with propane. With precise temperature controls and even heat distribution, electric grills empower you to grill to perfection without the need for outdoor space. electric grill

Stovetop Grilling: Mastering the Art of Adaptation

Harnessing the power of your stovetop, stovetop grilling opens up a world of possibilities. Grill pans, with their distinctive ridges, create tantalizing grill marks while channeling excess fats away from your food. By utilizing your stovetop’s-controlled heat, you can recreate the essence of grilling without stepping foot outdoors. It’s a culinary metamorphosis that transforms your kitchen into a haven of smoky goodness.

stovetop grilling

Indoor Smokeless Grills: Innovation Meets Flavor

Bringing the outdoors in, indoor smokeless grills harness advanced infrared technology to replicate the essence of outdoor grilling without the smoke and fumes. These ingenious contrivances ensure that the spirit of grilling remains intact, gracing your dishes with that coveted smoky aroma, all while maintaining a safe and smoke-free indoor environment.
indoor smokeless grills

The culinary landscape has evolved to accommodate your cravings for perfectly grilled masterpieces, even within the cozy confines of your kitchen. By embracing electric grills, mastering stovetop grilling techniques, or embracing the innovative world of indoor smokeless grills, you embark on a journey that combines safety, flavor, and the artistry of grilling – all in the comfort of your home. So, fire up your creativity, experiment with these propane grill alternatives, and let the aromas of indoor grilling transport you to a realm of gastronomic delight, all while keeping safety at the forefront.


Part 3: Safety Precautions and Practices for Using Propane Grill

Outdoor Use Only: Prioritizing Safety Above All

When it comes to the realm of propane grills, a golden rule stands unwavering: outdoor use only. The manufacturer’s instructions serve as a steadfast guide, outlining not only optimal performance but, more importantly, the fundamental tenets of safety. These grills are meticulously designed for well-ventilated outdoor spaces, where open air acts as a buffer against potential hazards. 

Regular Maintenance: Nurturing Longevity and Safety

The path to a safe grilling experience lies in the realm of regular maintenance. Treat your propane grill with the care it deserves by embracing routine checks and upkeep. A thorough inspection ensures that burners, hoses, regulators, and connections remain in pristine condition, safeguarding against leaks and malfunction. A well-maintained grill is not merely a tool of culinary delight but a testament to your commitment to safety.

Carbon Monoxide Detectors: A Guardian of Indoor Air Quality

As an added layer of protection, consider the installation of carbon monoxide detectors in living spaces adjacent to your grilling area. These unassuming devices act as sentinels, ever vigilant for any rise in carbon monoxide levels, issuing timely alerts should a threat arise. This proactive measure ensures that your indoor air quality remains uncompromised and that potential hazards are swiftly addressed.

In the harmonious symphony of outdoor grilling, adherence to safety protocols is the conductor that orchestrates a flawless performance. By reserving propane grill usage exclusively for outdoor realms, committing to meticulous maintenance routines, and introducing carbon monoxide detectors as vigilant allies, you forge a path to grilling excellence that is not only culinary but, above all, inherently safe. In the end, your grill transforms from a mere cooking apparatus into a realm of epicurean adventures, where flavor, joy, and security intertwine seamlessly.

Conclusion

In the quest for convenient indoor grilling, the allure of using a propane grill must be tempered with a clear understanding of the associated risks. Fire hazards and carbon monoxide poisoning underscore the importance of never compromising safety. Fortunately, alternatives like electric grills, stovetop methods, and indoor smokeless grills provide flavorful avenues without endangering indoor environments.

As culinary enthusiasts, we urge you to prioritize safety above all else. Embrace alternative methods that allow you to indulge in the joy of grilling indoors without jeopardizing well-being. Proper ventilation, adherence to manufacturer guidelines, and the installation of carbon monoxide detectors offer layers of protection. In your gastronomic adventures, let the tantalizing flavors of outdoor-style grilling be savored responsibly. By exploring safe alternatives and respecting established safety protocols, you can relish the delightful intersection of taste and security.

FAQs

What’s the best way to enjoy outdoor flavors indoors?

Consider electric grills, stovetop methods, or indoor smokeless grills. These alternatives offer safe and flavorful indoor grilling experiences.

Can I retrofit my propane grill for indoor use?

Retrofitting is not recommended and can compromise safety. Propane grills are engineered for outdoor use and altering them for indoor use may increase risks.

How do I choose the right indoor grilling alternative?

Evaluate your preferences, available space, and safety considerations. Research reputable brands and ensure the chosen alternative aligns with your needs.

from Fox Heights Pub and Grill – BBQ Recipes https://foxheightspubandgrill.com/blogs/bbq-recipes/can-you-use-a-propane-grill-indoors-exploring-safety-regulations-and-alternatives
via IFTTT

from Fox Heights Pub and Grill https://foxheightspubandgrill.blogspot.com/2023/08/can-you-use-propane-grill-indoors.html
via IFTTT

The Ultimate Guide to the 4-2-10 Brisket Method: A Culinary Journey with the World’s Top Chef

Introduction

Ah, the brisket! A cut of meat that has tantalized taste buds for centuries and has been the centerpiece of many a barbecue feast. But today, dear reader, I’m about to introduce you to a method that will revolutionize the way you cook this beloved cut: the 4-2-10 Brisket Method. As the world’s top chef, I’ve had the privilege of experimenting with countless cooking techniques, and this one, my friends, is a game-changer. So, grab your apron, and let’s embark on this culinary journey together.

The 4-2-10 Brisket Method is not just a cooking technique; it’s an art form. It’s about understanding the meat, respecting the process, and, most importantly, savoring the results. Inspired by the practices of big BBQ restaurants and the insights from Smoke Trails BBQ, this method promises a brisket that’s smoked to perfection, juicy, and bursting with flavor.


Part 1: Understanding the 4-2-10 Brisket Method

The Basics

  • 4 Hours: Begin by smoking the brisket at a medium temperature. This initial phase is all about infusing the meat with that rich, smoky flavor we all love.

  • 2 Hours: Crank up the heat for a short burst. This step helps in developing a beautiful bark and rendering out the fat.

  • 10 Hours: Finally, steam the brisket at a low temperature. This ensures the meat remains juicy and tender, achieving that melt-in-the-mouth texture.


Part 2: Preparing Your Brisket

Trimming and Seasoning

Trimming and Seasoning, for 4-2-10 Brisket Method

  1. Start by selecting a high-quality brisket, preferably a Black Angus cut. The quality of the meat plays a significant role in the final outcome.
  2. Trim the fat, but not too much. You want a nice layer on top to keep the meat moist during the smoking process. However, trim the sides to prevent them from burning.
  3. Season generously with coarse salt. Don’t cover the brisket entirely; let some of the meaty goodness show through.
  4. Now, for the pièce de résistance: black pepper. Coat the brisket until it’s almost entirely black. This will give you that classic Texas bark that’s crispy, flavorful, and utterly irresistible.

Part 3: The Smoking Process

Achieving the Perfect Smoke

  1. Fire up your smoker. For best results, I recommend using a stable smoker like the Borniak smoker.
  2. Set the temperature to 120°C (248°F). This is your standard low smoking temperature, perfect for infusing the meat with smoky flavors.
  3. After 4 hours, when the brisket has absorbed enough smoke, increase the temperature to 140°C. This will help evaporate any accumulated fat on the brisket’s surface.
  4. Two hours later, it’s time to wrap your brisket in butcher’s paper. But here’s a trick: brush the paper with the rendered fat. This keeps the brisket moist and adds an extra layer of flavor.

Part 4: The Final Stretch

Steaming to Perfection

4-2-10 Brisket Method

  1. Place the wrapped brisket in a tray and cover it with aluminum foil.
  2. Reduce the smoker’s temperature to 65°C. By now, your brisket should have reached an internal temperature of around 80°C.
  3. Let the brisket steam at this low temperature for about 10 hours. Yes, it’s a long wait, but trust me, it’s worth it.
  4. The next day, you’ll be greeted with a brisket that’s perfectly steamed to around 94°C. The bark will be impeccable, the smoke profile just right, and the meat ready to be sliced and savored.

Part 5: The Secret Sauce

Elevating Your Brisket Game

Every top chef knows that while the meat is the star of the show, the sauce can elevate a dish to celestial heights. For our 4-2-10 brisket, a rich, smoky, and slightly tangy sauce is the perfect accompaniment.

  1. Ingredients: Gather smoked paprika, apple cider vinegar, brown sugar, Worcestershire sauce, garlic powder, onion powder, and a dash of cayenne pepper.
  2. Preparation: In a saucepan, combine all the ingredients. Simmer on low heat until the sauce thickens. Adjust the seasoning to taste.
  3. Serving: Drizzle the sauce over the sliced brisket or serve on the side for dipping.

Part 6: Pro Tips from the World’s Top Chef

Ensuring Brisket Perfection Every Time

  1. Quality Matters: Always choose a high-grade brisket with good marbling. This ensures tenderness and flavor.
  2. Temperature Check: Invest in a good meat thermometer. Monitoring the internal temperature is crucial for perfect results.
  3. Resting is Key: After smoking, let the brisket rest for at least 30 minutes before slicing. This allows the juices to redistribute.

Tips for 4-2-10 Brisket Method from World-Class Chief


Conclusion

The 4-2-10 Brisket Method is more than just a cooking technique; it’s a celebration of the art of barbecuing. By understanding the meat, respecting the process, and adding a touch of culinary flair, you can achieve brisket perfection every time. So, the next time you’re in the mood for some mouth-watering brisket, remember the lessons from the world’s top chef and let the 4-2-10 method guide your way.


Frequently Asked Questions

What is the 3 2 1 method for smoking brisket? The 3-2-1 method is popular for smoking ribs. It involves smoking the ribs for 3 hours, wrapping and cooking for another 2 hours, and finally, unwrapping and cooking for 1 more hour with sauce.

How do you make 4 2 1 brisket? The 4-2-1 method for brisket involves smoking the brisket for 4 hours, increasing the temperature and cooking for 2 hours, and then wrapping and steaming for 1 hour.

What is the best cooking method for brisket? The best method varies based on personal preference. However, slow smoking followed by steaming, as in the 4-2-10 method, is highly recommended for tender and flavorful brisket.

How long does it take to smoke a 2.5 kg brisket? A 2.5 kg brisket typically takes about 5-6 hours to smoke at a temperature of 225°F (107°C). However, it’s essential to monitor the internal temperature, aiming for 195°F (90°C) for optimal tenderness.

from Fox Heights Pub and Grill – BBQ Recipes https://foxheightspubandgrill.com/blogs/bbq-recipes/4-2-10-brisket-method
via IFTTT

from Fox Heights Pub and Grill https://foxheightspubandgrill.blogspot.com/2023/08/the-ultimate-guide-to-4-2-10-brisket.html
via IFTTT

Perfect Grilling: How Long to Grill Burgers at 350 Degrees

Indulge in the irresistible allure of sinking your teeth into a juicy, perfectly grilled burger – a quintessential emblem of outdoor culinary pleasure. The sizzle on the grill, the tantalizing aroma wafting through the air – it’s a sensory symphony that beckons to every palate. To achieve burger nirvana, precision is paramount. The pursuit of that immaculate balance between grilling time and temperature is the culinary compass guiding you toward optimum succulence.

In this gastronomic journey, discovering how to grill burgers at 350 degrees Fahrenheit is pivotal. This magic number promises a harmonious blend of sear and tenderness, where flavors meld into each bite. With each sizzle, you inch closer to burger perfection, unraveling the secret behind the ideal grilling time and temperature – the gateway to unlocking a savory masterpiece that’s bound to captivate your taste buds.

Part 1: Grilling Time Guidelines for Grilling Burgers at 350 Degrees

a. Medium-Rare Burgers:

For those seeking a luscious, pink center, grill medium-rare burgers at 350°F for approximately 4-5 minutes per side. This gentle sear preserves the natural juices, ensuring a tender and succulent burger.

b. Medium Burgers:

If your preference is a slightly more cooked center with a touch of pink, aim for medium doneness. Grill the burgers for around 5-6 minutes per side at the same 350°F temperature. This duration strikes a delightful balance between tenderness and a satisfying char.

c. Well-Done Burgers:

For well-done burgers with no hint of pink, extend the grilling time. Cook them for about 6-7 minutes per side at 350°F. The longer cooking duration ensures a thoroughly cooked patty while maintaining a delectable crust.

Remember, these times are approximate and can vary based on patty thickness and grill performance. To guarantee burger perfection, use a meat thermometer to ensure your burgers reach an internal temperature of 160°F (71°C) for well-done, 150°F (66°C) for medium, and 130°F (54°C) for medium-rare. With these time guidelines and temperature insights, you’ll master the art of grilling burgers to your desired level of succulence.

how long for 350 degree grill

Part 2: Using a Meat Thermometer to Monitor the Temperature

The best temperature to grill burgers typically falls within the range of 350°F to 400°F (175°C to 200°C). This temperature range allows for a perfect balance between achieving a flavorful sear on the outside and ensuring that the inside cooks thoroughly and evenly.

Utilizing a meat thermometer is an essential tool in your quest for flawlessly grilled burgers. It’s not just about achieving the perfect level of doneness; it’s also about ensuring the safety of your culinary masterpiece. The meat thermometer acts as your culinary guardian, providing accurate readings that guarantee your burgers reach a safe internal temperature, eliminating any risk of foodborne illnesses.

The meat thermometer offers precision, elevating your grilling prowess to ensure both taste and safety. By adhering to these recommended internal temperatures, you’re not only savoring the pinnacle of burger perfection but also fostering a dining experience that’s deliciously memorable and worry-free. 

grill beef ground

Part 3: Tips for Grill Mastery to Grill Burgers at 350 Degrees

1. Avoid Flipping Too Soon:

Patience is a virtue when grilling burgers. Resisting the urge to flip them too soon allows a delightful phenomenon to occur – the formation of a flavorful crust. When burgers make contact with the grill, heat triggers a chemical reaction called the Maillard reaction. This reaction transforms amino acids and sugars on the patty’s surface into a complex web of flavors and enticing aromas. Allowing the burger to cook undisturbed for a few minutes ensures this reaction takes place, resulting in a mouthwatering crust that seals in juices and intensifies taste.

2. Monitoring and Adjusting:

Vigilance is key to burger mastery. Keep a watchful eye on the cooking process and be ready to adjust grilling time as needed. Factors like patty thickness, grill temperature fluctuations, and weather conditions can impact cooking times. Adapting to these variables ensures your burgers achieve the desired doneness without becoming undercooked or overdone.

3. Resting Period:

Just as a symphony requires a finale, your burgers deserve a moment to harmonize their flavors. After grilling, allow the burgers to rest for a few minutes before serving. This resting period allows the juices to redistribute within the meat, resulting in a more succulent and evenly tender bite. It’s the crucial step that transforms a good burger into an exceptional one.

Experimenting with Flavors:

Elevate your burger adventure by embracing creativity in toppings, cheeses, and seasonings. From classic lettuce and tomato to gourmet truffle aioli, the possibilities are endless. Try a variety of cheeses, like melted blue cheese or creamy brie, and explore unique seasonings to infuse your burgers with unexpected, tantalizing flavors. This experimentation not only adds a personalized touch but also elevates your burger experience into a culinary journey that delights the senses and sparks endless enjoyment.

make burger with grilled beef ground

Conclusion

Mastering the art of grilling perfect burgers involves essential factors: precise grilling time guidelines tailored to your desired doneness, the indispensable role of a meat thermometer in ensuring both taste and safety, and the art of patience and vigilant monitoring to achieve a delectable crust and consistent results.

By embracing these insights, you’re poised to create grill-perfect burgers that boast the ideal balance of juiciness, flavor, and doneness. Applying these techniques at a temperature of 350 degrees Fahrenheit guarantees a culinary masterpiece that delights the senses and elevates your outdoor cooking experience. With each sizzle on the grill, you have the power to craft burgers that are not only a treat to your taste buds but also a testament to your grilling prowess. So, fire up your grill, armed with these techniques, and embark on a journey of crafting burgers that are the epitome of juiciness, flavor, and perfection.

FAQs

Can I grill frozen burgers at 350 degrees?

Yes, you can grill frozen burgers at 350 degrees. However, you may need to extend the grilling time. It’s recommended to thaw burgers before grilling for more even cooking.

What if my burgers are not cooked to my desired level of doneness?

If your burgers are not cooked to your liking, you can continue grilling them for an additional minute or two per side until they reach the desired internal temperature.

Are there any safety precautions I should take while grilling burgers at 350 degrees?

Yes, ensure that the burgers reach a safe internal temperature to prevent foodborne illnesses. Clean and oil the grates to prevent sticking, and handle the burgers using utensils to avoid burns.

from Fox Heights Shop – BBQ Recipes https://foxheightspubandgrill.com/blogs/bbq-recipes/perfect-grilling-how-long-to-grill-burgers-at-350-degrees
via IFTTT

from Fox Heights Pub and Grill https://foxheightspubandgrill.blogspot.com/2023/08/perfect-grilling-how-long-to-grill.html
via IFTTT

Can I Use My Traeger in the Rain? Tips and Precautions

Grilling in rainy weather can be a challenging but rewarding experience for Traeger grill owners. While the allure of sizzling meats and smoky flavors remains enticing, it also raises common concerns and questions about safety, grill performance, and potential damage. In this article, we will explore the ins and outs of using a Traeger grill in the rain, addressing important safety considerations and providing practical tips to ensure a successful and enjoyable grilling session even when the skies are less than clear. Whether you’re a seasoned griller or a newcomer to the Traeger experience, understanding how to navigate wet weather grilling will help you make the most of your outdoor cooking adventures.

Part 1: Understanding Your Traeger Grill in the Rain

A Traeger grill is a type of pellet grill, also known as a wood-pellet grill, that uses wood pellets as its primary fuel source. It operates on a simple yet innovative concept. The grill consists of a hopper where the wood pellets are stored. These pellets are automatically fed into a fire pot by an auger (a screw-like device). An electronic controller manages the temperature and controls the rate at which the pellets are fed into the fire, ensuring consistent heat and smoke production.

The grill has a fan that circulates the smoke and heat throughout the cooking chamber, imparting a smoky flavor to the food. The cooking temperature can be adjusted using the controller, allowing users to cook at low and slow temperatures for smoking, or higher temperatures for grilling and searing.

Traeger grills are typically constructed using durable and high-quality materials to withstand outdoor conditions and ensure longevity. Some common materials used include:

  1. Steel: The main body of Traeger grills is often made from heavy-duty steel, providing sturdiness and heat retention.
  2. Porcelain-Coated Grates: The cooking grates are usually coated with porcelain, which prevents sticking and makes them easier to clean.
  3. Stainless Steel Components: Many internal components, such as the fire pot and drip tray, are often made from stainless steel to resist corrosion.
  4. Powder-Coated Finishes: Exterior surfaces are often powder-coated, providing a protective layer against rust and environmental factors.

Traeger Grill in the rain 

Part 2: Traeger’s Rain-Resistant Features

1. Rain-Resistant Features of Traeger Grill Models

Some Traeger grill models come equipped with rain-resistant features that are designed to protect the grill’s components and ensure safe operation during light rain. These features may include:

  1. Water-Resistant Construction: Certain Traeger grills have weather-resistant housing and components, such as a sealed controller panel and rainproof hopper lids. These help prevent rainwater from seeping into sensitive parts of the grill.
  2. Durable Materials: High-quality materials, such as stainless steel and powder-coated finishes, are used in the construction of rain-resistant Traeger grills. These materials are less prone to rust and corrosion when exposed to moisture.
  3. Grease Management System: Some models have an effective grease management system that funnels excess grease away from crucial components. This prevents water from mixing with the grease and potentially causing damage to the grill.


  1. Cover or Lid Options: Traeger offers grill covers and lids that can protect the entire grill from rain when not in use. These covers are designed to fit specific models snugly, providing an additional layer of protection.


2. Protection and Safe Operation in Light Rain

The rain-resistant features of Traeger grills aim to safeguard the grill’s components and ensure safe operation even when exposed to light rain. Here’s how they contribute to protection and safety:

  1. Preventing Water Damage: The water-resistant construction and sealed components help prevent water from infiltrating the critical parts of the grill, such as the electronic controller and auger system. This minimizes the risk of electrical malfunctions and damage to the grill’s internal circuitry.
  2. Enhanced Durability: By using durable materials, rain-resistant Traeger grills are better equipped to withstand exposure to moisture and the elements. This enhances the grill’s overall longevity and minimizes the need for frequent repairs or replacements.
  3. Reduced Risk of Accidents: The grease management system ensures that water and grease do not mix, reducing the likelihood of flare-ups or potential accidents that could occur when water comes into contact with hot grease.

Traeger's Rain-Resistant Features

3. Limitations and Importance of Additional Precautions

While rain-resistant features offer protection during light rain, it’s essential to be aware of their limitations and take additional precautions when grilling in wet conditions:

  1. Not Fully Waterproof: Most rain-resistant features are designed to handle light rain, but they may not provide complete protection during heavy downpours or prolonged exposure to water.
  2. Electrical Safety: Even with rain-resistant features, it’s crucial to exercise caution when using electrical appliances outdoors in wet conditions. Avoid direct exposure of the grill’s electrical components to rain.
  3. Proper Grill Placement: Choose a sheltered grilling location, such as under an awning or a covered patio, to minimize direct exposure to rain.
  4. Use a Grill Cover: When not in use, always cover the grill with a suitable grill cover to provide an extra layer of protection from rain and other environmental factors.
  5. Regular Maintenance: Perform routine maintenance, such as cleaning and inspecting the grill, to ensure that rain-resistant features remain effective and functional over time.

By understanding the rain-resistant features and taking appropriate precautions, Traeger grill owners can enjoy outdoor grilling in light rain while protecting their investment and ensuring a safe cooking experience.
safety tips

Conclusion

Grilling in the rain can pose various safety risks, including slip hazards, flare-ups, and electrical issues. Prioritizing safety is crucial to prevent accidents, injuries, and damage to the grill. Following safety guidelines, using proper equipment, and being prepared for emergencies are essential for a safe grilling experience.

FAQs

1. What are the best tips for Traeger grilling in the rain?

Just choose the right location under a covered area, check for wind direction, use a high-quality grill cover, keep the grill clean, preheat the grill longer, maintain the temperature, plan your cooking in advance, use a grill umbrella, and even use foil packets to protect them from the rain and maintain their moisture.

2. What are the potential risks of using your Traeger in the rain?

Here are some of the main risks associated with Traeger grilling in wet conditions, such as slip and fall Hazards, flare-ups and grease fires, temperature control challenges, rust and damage, electric grill risks, food safety concerns, wind and flying debris, and even the structure damage.

3. How to maintain your Traeger grill after raining?

Besides the regular maintenance, you can turn off and unplug the grill, let the grill cool down, remove grease and ash, scrape the grill grates, check for rust, dry the grill thoroughly, clean the pellet hopper, cover the grill, and store in a dry place, especially during prolonged periods of rain or inclement weather.

from Fox Heights Shop – BBQ Recipes https://foxheightspubandgrill.com/blogs/bbq-recipes/can-i-use-my-traeger-in-the-rain-tips-and-precautions
via IFTTT

from Fox Heights Pub and Grill https://foxheightspubandgrill.blogspot.com/2023/08/can-i-use-my-traeger-in-rain-tips-and.html
via IFTTT

Butter of the Gods, Everything You Should Know About

When you happened to have a taste of the special flavor bone marrow butter, you should know another name of the it as butter of the Gods. Why? Most of bone marrow butter, elevating the flavors of your dishes with its rich, savory, and luxurious qualities compared to the others. What are the special features of the butter of the Gods? How to use it to add a special flavor? Here is everything you should know about.

Part 1: Why Name Bone Marrow Butter as Butter of The Gods

Butter of the Gods is used to describe bone marrow butter due to its rich and luxurious qualities. With its combination of creamy butter and the flavorful essence of roasted bone marrow, can create a truly indulgent and heavenly taste experience.

It conveys a sense of exceptional quality, richness, and divine flavor. It emphasizes the intense and savory characteristics of bone marrow butter, which can elevate the taste of various dishes.

The use of such descriptive language helps to capture the imagination and evoke a sense of delight and luxury associated with enjoying this unique and flavorful butter. It paints a picture of a culinary creation that is so indulgent and exquisite that it could be considered a divine or heavenly treat.

Ultimately, referring to bone marrow butter as Butter of the Gods is a way to convey the exceptional and indulgent qualities that it brings to the table, inviting the imagination to envision a truly remarkable and heavenly culinary experience.

butter of god

Part 2: What is the Special Flavor of Butter of The Gods

Just as mentioned above, the bone marrow butter or butter of the Gods has rich and luxurious qualities. It offers a distinct and rich flavor that is highly sought after by food enthusiasts. The flavor profile of butter of the Gods can be described as:

Umami: Bone marrow is known for its intense umami flavor, which is often described as a savory, meaty, and almost buttery taste. When combined with butter, the umami notes are further enhanced, creating a luxurious and indulgent experience.

Richness: The combination of bone marrow and butter results in a buttery richness that coats the palate. It adds a velvety and luscious quality to the flavor, contributing to a truly decadent experience.

Slightly Nutty: Bone marrow can have a subtle nutty undertone, which can add depth and complexity to the overall flavor profile of the butter. This nuttiness can vary depending on the specific animal and diet.

Meatiness: Due to its origin from the marrow of animal bones, bone marrow butter can carry hints of meaty flavors. This adds a layer of depth and richness reminiscent of slow-cooked or roasted meats.

The flavor of butter of the Gods is robust, indulgent, and often described as a taste sensation that elevates the dishes it accompanies. It pairs well with various meats, vegetables, and bread, infusing them with its unique umami and richness, creating a truly memorable culinary experience.

Part 3: How to Use Butter of The Gods with BBQ Dishes

Before using the butter of the Gods with BBQ dishes, such as grilled seafood, you can learn more about the recipe of bone marrow butter if you need to do it yourself. Of course, you can also find bone marrow butter on sale directly.  Using smoked bone marrow butter with grilled seafood can create a delectable flavor combination.

Step 1: Select your preferred seafood options for grilling, such as shrimp, scallops, lobster tails, or fish fillets. Opting for seafood that pairs well with rich and savory flavors of the butter of the Gods.

Step 2: Preheat your grill to medium-high heat, ensuring it is clean and well-oiled to prevent sticking.

Step 3: Clean and pat dry the seafood of your choice. Season lightly with salt and pepper or your favorite seafood seasoning.

Step 4: Place the seafood on the preheated grill. Cook each piece according to its thickness and type. For example, shrimp and scallops may take a few minutes per side, while lobster tails and fish fillets may require longer cooking times. Flip the seafood once halfway through to ensure even grilling.

Step 5: As the seafood nears completion, remove it from the grill and place it on a serving platter. While the seafood is still hot, top each piece with a small pat of the butter of the Gods.

Step 6: The residual heat from the grilled seafood will cause the smoked bone marrow butter to melt and create a luscious coating. Let it rest for a minute or two to allow the flavors to meld.

Step 7: Arrange the grilled seafood on a platter, ensuring the melted bone marrow butter is showcased. Garnish with fresh herbs, a squeeze of lemon juice, or a sprinkle of flaky sea salt, if desired. Serve immediately while the seafood is still warm and the butter is velvety.

The smoked bone marrow butter will add a layer of richness and depth to the grilled seafood, complementing its natural flavors with a luxurious touch. It imparts a smoky, savory essence that enhances the overall taste experience.

Remember to adjust the amount of smoked bone marrow butter according to your preference and the quantity of seafood being grilled. The goal is to accentuate the seafood without overpowering its inherent qualities.

butter of god for dishes

Conclusion

When you need to learn more about butter of the Gods, here is a simple guide you should follow, especially for using them to elevate the flavors of your dishes. Of course, you can also find the frequently asked questions from the article.

FAQs

What are the Differences between Butter of the Gods and Others?

It has a unique and pronounced flavor profile compared to regular butter. Bone marrow butter has a luxurious and velvety texture. It requires an additional step in its preparation compared to regular butter. But it has a higher fat content compared to regular butter.

What are the Special Tips for Using Butter of the Gods?

Just before serving, add a pat of butter of the Gods on top of grilled or roasted meats to let it melt and create a deliciously decadent finishing touch. This works especially well with steaks, lamb chops, or roasted chicken.

What are Things to Avoid When Making Butter of the Gods?

Improper storage can affect the quality and shelf life of butter of the Gods. Store it in an airtight container in the refrigerator for up to a week or freeze it for longer-term storage. Ensure that the container is sealed tightly to prevent exposure to air.

from Fox Heights Shop – BBQ Recipes https://foxheightspubandgrill.com/blogs/bbq-recipes/butter-of-the-gods-everything-you-should-know-about
via IFTTT

from Fox Heights Pub and Grill https://foxheightspubandgrill.blogspot.com/2023/08/butter-of-gods-everything-you-should.html
via IFTTT

A Step-by-Step Guide: How to Safely Turn Off Your Traeger Grill

Traeger Grills have revolutionized outdoor cooking with their innovative design and ease of use. Founded in 1985, Traeger is renowned for pioneering wood pellet grills that infuse mouthwatering smoky flavors into a variety of dishes. These grills have gained immense popularity among both novice and seasoned grillmasters due to their consistent performance and versatility.

While the thrill of grilling and enjoying sumptuous meals is undeniable, it’s equally crucial to prioritize safety when using your Traeger grill. Properly shutting down the grill after use not only ensures the longevity of the equipment but also safeguards against potential hazards. Failing to follow correct shutdown procedures could lead to flare-ups, pellet ignition, or other safety risks. By adhering to a few simple steps, you can enjoy worry-free cooking experiences and extend the life of your Traeger grill.

Part 1: Understanding the Importance of Proper Traeger Grill Shutdown

Potential Hazards of Improper Grill Shutdown

Fire Hazards: Improperly shutting down your Traeger grill may lead to the accumulation of unburned pellets in the firepot. This can result in flare-ups or even pellet ignition, potentially causing a fire.

Excessive Wear and Tear: Failure to shut down the grill correctly can lead to the buildup of ash and debris, which can accelerate wear and tear on the grill’s components, affecting its overall performance and lifespan.

Safety Risks: Leaving a grill unattended without proper shutdown can pose safety risks, especially if there are children or pets around. The residual heat and potential pellet ignition could lead to accidental burns or other injuries.

Inefficient Pellet Usage: When not shut down properly, a Traeger grill may continue burning pellets unnecessarily, leading to wastage of pellets and increased operational costs.

Extending Grill Lifespan Through Correct Shutdown

Reduced Wear on Components: Properly shutting down your Traeger grill prevents the accumulation of ash and debris, reducing the strain on vital components such as the auger, fan, and heat baffle. This extends the overall lifespan of the grill.

Preventing Corrosion: A thorough shutdown routine includes cleaning the grill grates and interior. By removing food residue and moisture, you help prevent corrosion, rust, and deterioration of the grill’s metal parts.

Optimal Performance: Regularly following correct shutdown procedures ensures that your grill operates at its best. This includes maintaining consistent temperatures, even heat distribution, and efficient pellet combustion.

grill cover

Part 2: Step-by-Step Guide: How to Turn Off Your Traeger Grill

Step 1: Gather the Necessary Tools and Materials. Before beginning the shutdown process, ensure you have heat-resistant gloves, grill brush or scraper, clean, damp cloth or paper towels, and grill cover (optional).

Step 2: Ensure the Cooking Process is Complete. Before shutting down the grill, make sure your food is fully cooked. Use a meat thermometer to ensure meats are at the appropriate internal temperature.

Step 3: Turn Off the Main Power Switch. Locate the main power switch on your Traeger grill. It is usually situated on the control panel or near the hopper. Switch the grill to the “Off” position. This will cut off power to the grill’s components.


Step 4: Allow the Grill to Cool Down. After turning off the power, give your Traeger grill some time to cool down. Depending on the temperature settings and cooking duration, this may take about 15 to 30 minutes.

Step 5: Empty the Pellet Hopper. Carefully open the pellet hopper lid. If there are pellets remaining in the hopper, use a small scoop or container to remove them. You can save unused pellets for your next grilling session by sealing them.


Step 6: Clean the Grill Grates and Interior. Using a grill brush or scraper, remove any food residue, grease, or ash from the grill grates and interior surfaces. Wipe down the grates with a clean, damp cloth or paper towels.

Step 7: Cover the Grill for Protection: If you have a grill cover, place it over your Traeger grill to protect it from the elements. A cover helps prevent moisture, dust, and debris from affecting your grill’s performance and appearance.


By following these steps, you’ll safely and effectively shut down your Traeger grill after each use. This not only promotes safety but also contributes to the grill’s longevity, ensuring you enjoy delicious meals and memorable grilling experiences for years to come.

clean the grill 

Part 3: 4 Additional Tips for Grill Maintenance

1. Regularly Clean the Grill to Prevent Buildup

To keep your Traeger grill operating efficiently, it’s important to clean it regularly. After every few uses, remove the grill grates and heat baffle. Use a grill brush to scrape off any residue or buildup on these surfaces. Additionally, empty the firepot of any ash. A clean grill ensures proper airflow and heat distribution, enhancing your cooking results.

2. Store Pellets in a Dry Environment to Maintain Quality

Pellet quality is crucial for consistent grilling. Store your pellets in a cool, dry place, away from moisture and humidity. Use airtight containers or sealed bags to prevent exposure to the elements. This helps maintain the pellets’ integrity and ensures optimal combustion during grilling.

3. Inspect and Clean the Drip Tray and Grease Pan

Check the drip tray and grease pan after each use. These components collect grease and drippings, which can lead to flare-ups and create a fire hazard if left unattended. Empty and clean them to prevent buildup. Line the drip tray with aluminum foil for easy cleanup or consider using disposable drip tray liners.

4. Check the Grill’s Components for Wear and Tear

Periodically inspect your Traeger grill’s components for signs of wear and tear. This includes the gaskets, seals, wiring, and other parts. Look for any frayed wires, rust, or damage. If you notice any issues, address them promptly to ensure the grill continues to function safely and effectively.

clean up the grill

Conclusion

In the world of outdoor cooking, the thrill of creating delectable dishes on your Traeger grill is undeniable. However, the journey doesn’t end when your meal is served. Properly shutting down your Traeger grill is a critical step that ensures both safety and longevity. From preventing fire hazards and wear and tear to enhancing the performance of your grill, the significance of following correct shutdown procedures cannot be overstated.

FAQs

What’s the best way to clean the grill grates and interior?

Use a grill brush or scraper to remove food residue and buildup from the grates. For the interior, a clean, damp cloth or paper towels can be used to wipe surfaces. Regular cleaning prevents ash accumulation and ensures even heat distribution.

How often should I inspect my grill for wear and tear?

It’s a good practice to inspect your grill’s components periodically, such as the gaskets, seals, and wiring. Regular checks will help you identify any issues early and address them before they lead to more significant problems.

Can I reuse pellets from the firepot for the next cook?

Reusing pellets from the firepot is not recommended. They may have absorbed moisture or been partially burned, affecting their quality and combustion. It’s best to empty the firepot and start with fresh pellets for each cook.


from Fox Heights Shop – BBQ Recipes https://foxheightspubandgrill.com/blogs/bbq-recipes/a-step-by-step-guide-how-to-safely-turn-off-your-traeger-grill
via IFTTT

from Fox Heights Pub and Grill https://foxheightspubandgrill.blogspot.com/2023/08/a-step-by-step-guide-how-to-safely-turn.html
via IFTTT

Why Is My Chicken Sticking to the Grill? Common Causes and Proven Solutions

Grilling chicken is a culinary art that promises mouthwatering flavors and succulent textures. However, there’s a universal frustration that has likely plagued many backyard chefs – the unwelcome phenomenon of chicken sticking to the grill. This culinary hiccup can turn an anticipated feast into a challenge, resulting in torn pieces, uneven cooking, and a less-than-perfect presentation.

The impact on cooking quality is significant. Sticking chicken not only mars the appearance but can also lead to unevenly cooked portions, robbing the meat of its tenderness and juiciness. This issue can even discourage grilling enthusiasts from experimenting with this delicious protein altogether. How to prevent chicken sticking on BBQ? Here is the detailed guide you should know. 

Part 1: The Culprits: Why Chicken Sticks to the Grill

a. Inadequate Preheating:

Not preheating the grill properly should be a significant factor contributing to chicken sticking during grilling. Preheating serves as a crucial step to create a non-stick cooking surface and ensure even cooking. This initial high heat promotes the Maillard reaction – a chemical process that enhances flavor and creates a natural non-stick surface on the grates.

b. Effective Oil Application:

Properly oiled chicken forms a protective layer between the meat and the grill grates, reducing the risk of sticking and promoting a beautifully caramelized, non-stick exterior. This method ensures your grilling endeavors result in perfectly cooked and visually appealing chicken every time. Before oiling, pat the chicken dry with paper towels. Excess moisture on the surface can hinder the oil from adhering effectively. 

c. Overcrowding the Grill:

To ensure optimal results, you can give each chicken piece ample space on the grill. This promotes proper airflow, even cooking, and the opportunity for a superior sear. Embrace the “less is more” approach, and your grilled chicken will showcase that sought-after combination of a crisp, flavorful crust and tender, succulent interior to prevent chicken sticking on BBQ.

d. Grill Temperature Fluctuations:

To create a non-stick surface, pat dry chicken, then apply a thin, even layer of high-smoke-point oil using a brush or cloth. Season after oiling. Avoid excess oil to prevent flare-ups. This protective oil barrier enhances flavor and promotes a flawless, non-stick grill experience. Properly oiled chicken forms a protective layer that prevents sticking and promotes a beautiful, golden sear. prevent sticking for chicken grilling

Part 2: How to Stop Chicken from Sticking on a Grill

Grilling chicken without sticking requires careful preparation and execution. Follow these detailed steps to ensure a non-stick grilling experience:

Step 1: Preheat the Grill

Preheat your grill to the recommended temperature for the type of chicken you’re grilling (e.g., boneless breasts, thighs, whole chicken). Allow the grill to reach the desired temperature for at least 10-15 minutes to ensure even heat distribution.

Step 2: Clean and Oil the Grates

Clean the grill grates using a grill brush to remove any residue from previous grilling sessions. Dip a folded paper towel in high-smoke-point oil (such as canola or vegetable oil) and, using tongs, rub it onto the grates. This creates a non-stick surface.

Step 3: Prepare the Chicken

Pat the chicken pieces dry with paper towels to remove excess moisture. Dry surfaces promote better searing and prevent sticking. Season the chicken with your preferred spices, herbs, or marinades. Lightly brush both sides of the chicken with a thin layer of oil. This further prevents sticking and enhances flavor.

Step 4: Arrange and Grill

Place the chicken on the preheated grill at a 45-degree angle to the grates. This creates attractive grill marks. Close the grill lid to retain heat and promote even cooking. Allow the chicken to sear on one side without moving it for a few minutes. This helps develop a non-stick crust.

Step 5: Proper Flipping

Gently lift the chicken with tongs to flip it over. If it resists, give it a bit more time to sear. Continue grilling on the other side until cooked through, ensuring no pink remains and the internal temperature reaches the recommended level.

Step 6: Monitor and Avoid Flare-Ups

Keep an eye on the chicken to prevent flare-ups caused by dripping oil or marinades.

If flare-ups occur, move the chicken to a cooler part of the grill temporarily. Once fully cooked, remove the chicken from the grill and let it rest for a few minutes before serving. Resting allows juices to redistribute, resulting in juicier meat.

By following these steps, you’ll master the art of non-stick grilling, yielding perfectly seared, flavorful, and tender chicken that’s a delight to savor and share.
brush oil to chicken

Part 3: 6 Grill Maintenance for Non-Stick Chicken

Maintaining your grill is paramount when cooking chicken. Follow these essential steps to ensure a safe and delicious grilling experience:

  1. Pre-Grilling Check: Before cooking the chicken, inspect your grill for debris, rust, or grease buildup. Clean any residue from previous grilling sessions.
  2. Clean Grates: Scrub grill grates with a grill brush to remove leftover food particles. Clean grates prevent sticking and promote even cooking.
  3. Season Grates: After cleaning, lightly oil the grates to create a non-stick surface. This enhances flavor and prevents chicken from adhering.
  4. Check Gas Levels: For gas grills, verify propane or natural gas levels before starting. Adequate fuel ensures consistent heat throughout the cooking process.
  5. Charcoal Management: If using a charcoal grill, ensure proper charcoal arrangement and distribution for even heat.
  6. Temperature Calibration: Confirm the grill thermometer’s accuracy. Make sure proper temperature control is vital for cooking chicken safely and evenly.
  7. Utensil Preparation: Have long-handled tongs, spatulas, and a meat thermometer ready. These tools aid in handling chicken and monitoring doneness.
  8. Post-Grilling Cleanup: After cooking, allow the grill to cool slightly. Then, brush the grates again to remove any remaining residue.

Regular grill maintenance ensures optimal performance, prevents sticking, and guarantees safe and flavorful chicken every time you fire up the grill.

Conclusion

To achieve non-stick perfection while grilling chicken, remember these vital steps. Begin with precise preheating to create a non-stick surface. Master the art of applying a thin layer of high-smoke-point oil to form a protective shield against sticking. Arrange chicken pieces with sufficient spacing for even cooking and optimal searing. Prioritize grill maintenance by cleaning and seasoning grates for enhanced non-stick properties. By incorporating these techniques, you ensure a hassle-free and delectable grilling adventure. Elevate your culinary game and savor the joy of perfectly grilled, non-stick chicken that’s bound to impress your taste buds and elevate your outdoor cooking endeavors.

FAQs

What’s the recommended spacing between chicken pieces on the grill?

Leave enough space between chicken pieces to allow for proper airflow and even cooking. Overcrowding can lead to sticking and uneven results.

How do I clean and maintain the grill grates to prevent sticking?

Clean grates with a grill brush before and after grilling. Season the grates by oiling them lightly after cleaning to enhance their non-stick properties.

Can I use non-stick cooking spray instead of oil?

Non-stick cooking sprays may contain additives that can create unwanted flavors or cause flare-ups. Using high-smoke-point oils is recommended.

from Fox Heights Shop – BBQ Recipes https://foxheightspubandgrill.com/blogs/bbq-recipes/why-is-my-chicken-sticking-to-the-grill-common-causes-and-proven-solutions
via IFTTT

from Fox Heights Pub and Grill https://foxheightspubandgrill.blogspot.com/2023/08/why-is-my-chicken-sticking-to-grill.html
via IFTTT

Mastering Grill Hygiene: How to Clean the Grease Trap on Your Traeger Grill

Maintaining a clean grease trap on your Traeger grill is of utmost importance. It ensures impeccable hygiene by preventing the buildup of rancid grease and food debris, safeguarding your culinary creations from contamination and ensuring the safety of your family and guests. Moreover, a clean grease trap significantly reduces the risk of flare-ups caused by accumulated grease, preventing potential accidents and ensuring a controlled cooking environment.

By upholding cleanliness, you extend the longevity of your Traeger grill, ensuring it remains a reliable companion for countless cookouts. Embracing this simple practice guarantees not only delectable dishes but also a safe, efficient, and durable grilling experience. Here is the concrete guide about cleaning the grease trap on your Traeger Grill from the article.

Part 1: Why Cleaning the Grease Trap on Your Traeger Grill

Regularly cleaning the grease trap of your Traeger grill is paramount to prevent unwanted flare-ups, uneven cooking, and potential damage. Accumulated grease can ignite and cause dangerous flare-ups, posing a safety risk. Additionally, excess grease can disrupt heat distribution, resulting in unevenly cooked dishes. Neglecting grease trap cleaning may also lead to clogs, affecting airflow and damaging vital components. Emphasizing regular cleaning as an integral part of grill maintenance ensures safe, consistent, and optimal performance, extending the life of your Traeger grill and enhancing your grilling experience.

Safety Tips before Cleaning the Grease Trap

Prior to tackling grease trap maintenance on your Traeger grill, prioritizing safety is essential. Begin by ensuring the grill is completely cool to avoid any burns or accidents. Wear protective gloves to shield your hands from grease and debris.

Gathering the necessary tools is vital for a hassle-free cleaning process. Arm yourself with a grill brush to scrub away stubborn residue, paper towels to wipe down surfaces, and a grease tray liner to facilitate easy disposal. These tools not only streamline the cleaning process but also safeguard you from potential mess and exposure to grime.

Remember, by adhering to these safety precautions and assembling the right tools, you ensure a secure and efficient grease trap cleaning routine, contributing to a safer, more enjoyable grilling experience. clean grease trap on traeger grill

Part 2: Step-by-Step Cleaning the Grease Trap Guide

Step 1: Remove the Grease Tray. To safely remove the grease tray from your Traeger grill, ensure the grill is cool, wear protective gloves, and locate the tray beneath the firepot. Gently slide the tray out of its housing, holding it level to prevent spills. Dispose of the grease properly. Clean the tray with a grill brush or paper towels before reinserting it. Always prioritize safety during this process.

Step 2: Dispose of Excess Grease. To dispose of excess grease from your Traeger grill safely and environmentally-friendly, let the grease cool and solidify in a disposable container. Once solid, seal the container and place it in the trash. Never pour grease down the sink or toilet, as it can clog pipes and harm the environment. Proper disposal ensures minimal impact on the ecosystem and plumbing systems. remove the grease tray

Step 3: Scrape and Brush. Using a grill brush or scraper, gently loosen and remove residual grease and food particles from the grease trap and tray of your Traeger grill. Hold the brush at an angle and apply light pressure to avoid damaging the surface. Work in a sweeping motion, directing debris into a disposable bag. Regular brush cleaning maintains optimal performance and hygiene, ensuring a clean and efficient grilling experience.

Step 4: Soapy Water Cleanse. For a thorough clean, prepare warm soapy water in a bucket. Dip a sponge or cloth into the soapy mixture and gently scrub the grease trap and tray of your Traeger grill. Focus on areas with stubborn residue. Rinse with clean water and wipe dry with a towel. Regular soapy water cleaning ensures a grease-free and hygienic cooking environment, prolonging the life of your grill.

warm soapy cleaning

Step 5: Rinse and Dry. Rinsing the cleaned components of your Traeger grill with water serves to remove any residual soap, grease, or debris, ensuring a completely clean surface. Allowing them to air dry thoroughly before reassembly prevents moisture buildup, which can lead to rust or other damage. This crucial step maintains hygiene, preserves the grill’s integrity, and guarantees optimal performance for safe and flavorful grilling experiences. 

Preventive Measures for Keeping Your Grease Trap Clean

To streamline cleanup and maintain the longevity of your Traeger grill, consider using a grease tray liner or aluminum foil. Placing a disposable liner or foil in the grease tray catches drippings and prevents direct contact with grease, making cleanup a breeze. This not only saves time but also promotes a cleaner cooking environment.

Furthermore, adopting a proactive approach by cleaning your grill’s components regularly, ideally after every few uses, is paramount. Heavy grease buildup can impede airflow, affect temperature consistency, and potentially lead to flare-ups or uneven cooking. By routinely removing residue and debris, you ensure optimal grill performance, enhance food flavor, and extend the lifespan of your grill.

When cleaning, follow the steps outlined earlier, using warm soapy water and a sponge or cloth to thoroughly clean the grease trap and tray. Rinse and air dry these components before reassembling your grill.

By incorporating these practices into your grilling routine, you’ll not only enjoy hassle-free cleanup but also relish in safe, delicious, and perfectly cooked meals. Regular maintenance guarantees that your Traeger grill remains a reliable and enjoyable culinary companion for years to come.

Conclusion

Clean your Traeger grill’s grease trap for optimal performance. After cooling, wear gloves and safely remove the tray. Use warm soapy water and a sponge to clean, then rinse and air dry. A clean grease trap prevents flare-ups, uneven cooking, and potential damage. It ensures tastier, safer meals and extends grill life. Regular cleaning elevates your grilling experience. Embrace these steps to effortlessly maintain a high-functioning Traeger grill, ensuring many satisfying and memorable cookouts to come.

FAQs

How does a clean grease trap impact my grilling experience?

A clean trap prevents flare-ups, ensures even cooking, and maintains grill efficiency, resulting in tastier, safer, and better-cooked meals.

Can I use harsh chemicals for cleaning?

It’s best to avoid harsh chemicals as they can damage the grill’s components and leave residue on cooking surfaces.

What are the benefits of maintaining a clean grease trap?

A clean trap enhances food flavor, prevents accidents, extends grill life, and makes grilling more enjoyable overall.

from Fox Heights Shop – BBQ Recipes https://foxheightspubandgrill.com/blogs/bbq-recipes/mastering-grill-hygiene-how-to-clean-the-grease-trap-on-your-traeger-grill
via IFTTT

from Fox Heights Pub and Grill https://foxheightspubandgrill.blogspot.com/2023/08/mastering-grill-hygiene-how-to-clean.html
via IFTTT

Design a site like this with WordPress.com
Get started