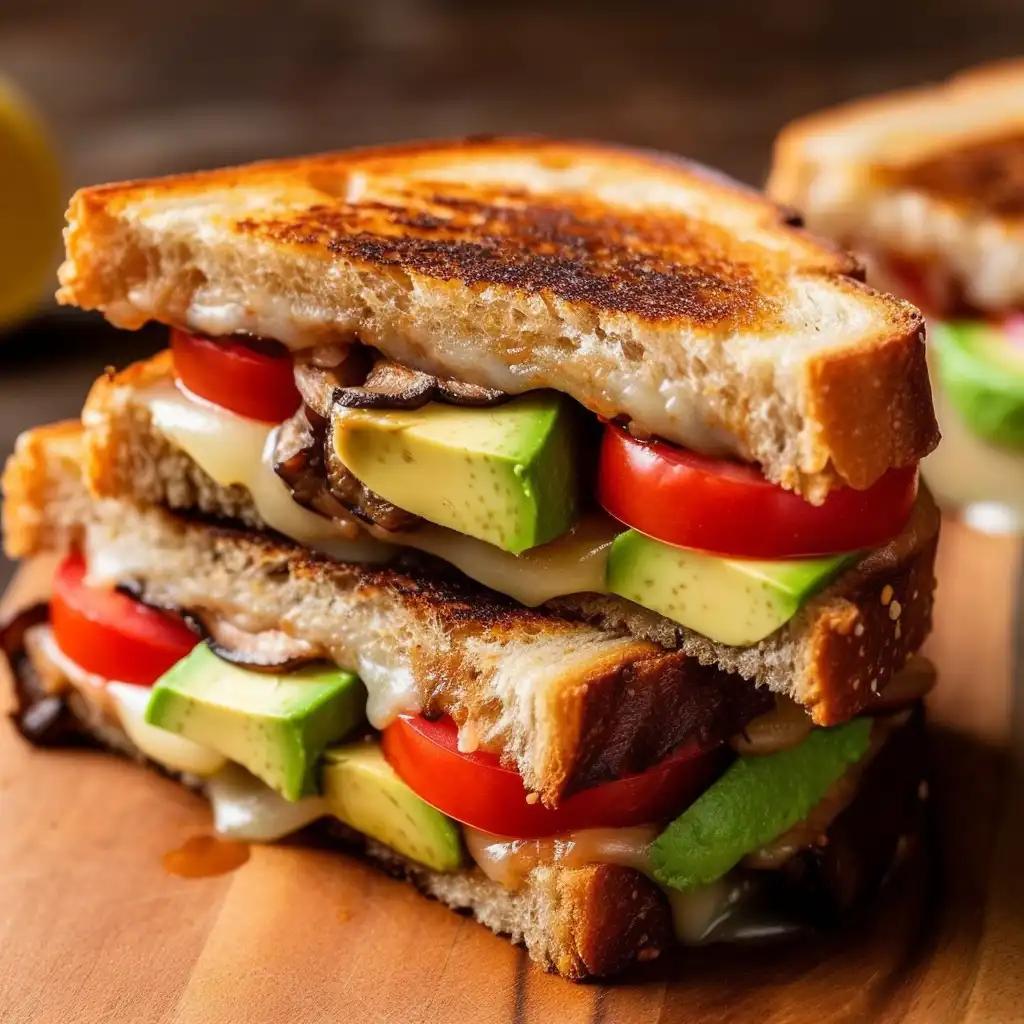
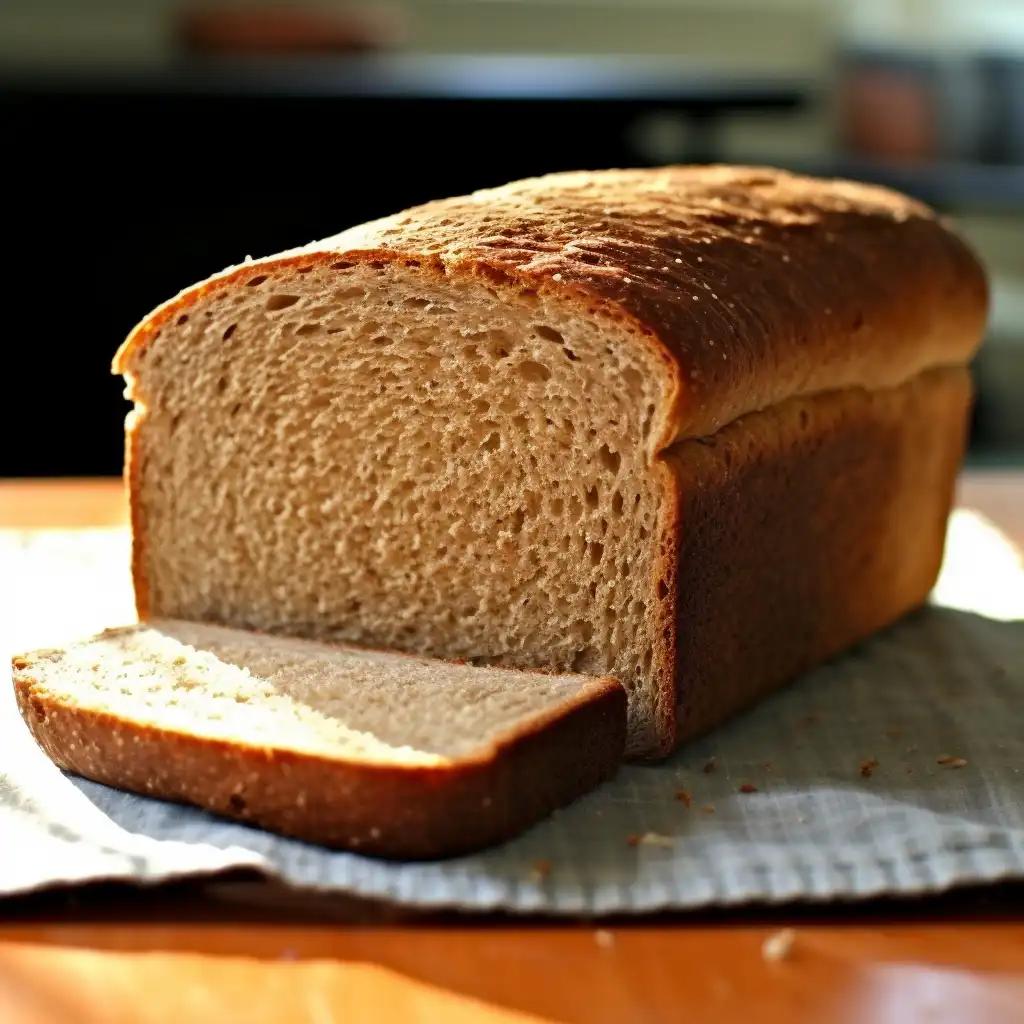
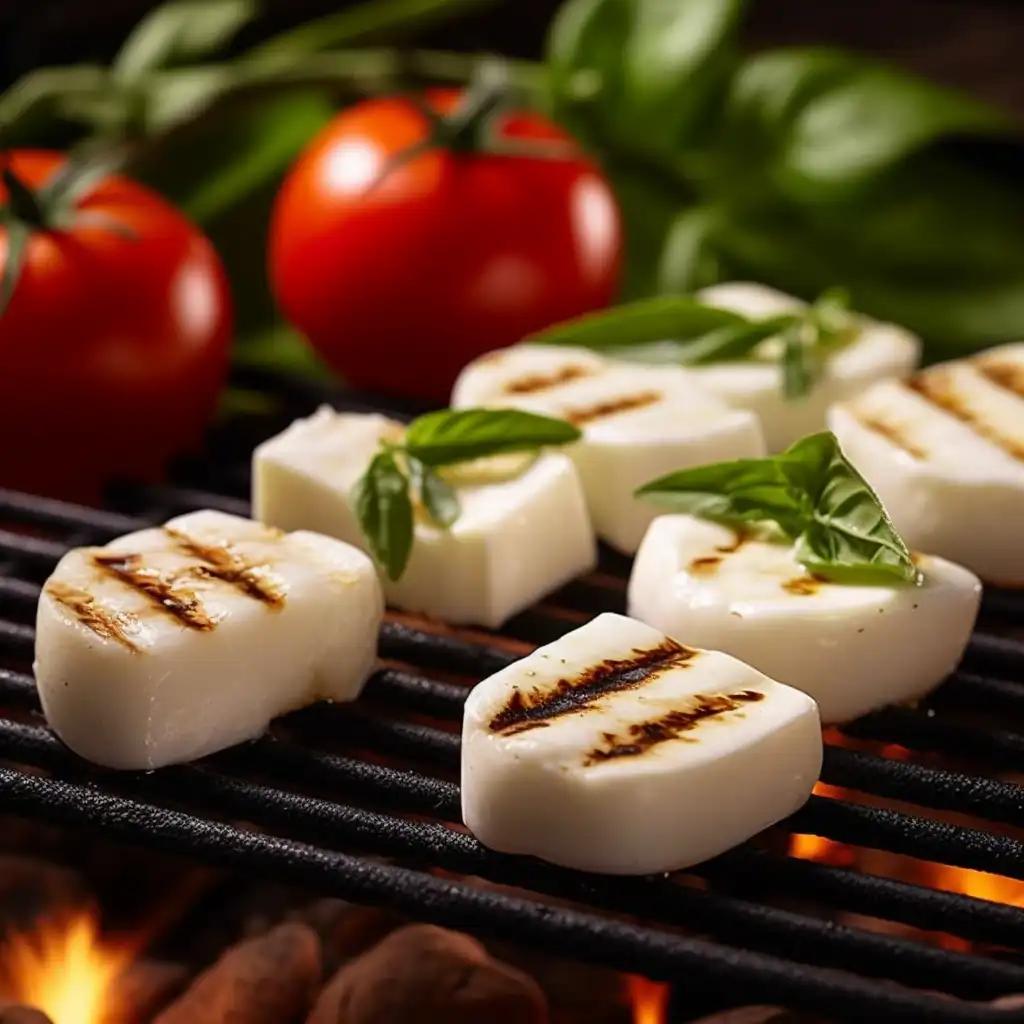
Is it safe to eat grilled cheese with braces? Having braces can sometimes feel like a culinary prison. The list of forbidden foods seems endless, and you may find yourself wondering if you will ever be able to enjoy your favorite meals again. But fear not, my cheese-loving friend! Today, we’re going to dive into the world of grilled cheese and explore whether you can still indulge in this gooey delight while wearing braces.Part 1: Why Grilled Cheese with Braces a Good ChoiceGrilled cheese sandwiches are a classic comfort food that many of us hold near and dear to our hearts. The combination of melty cheese and crispy bread is enough to make anyone’s mouth water. But what makes grilled cheese a potential winner for those with braces? Well, it’s all about the texture. When cooked just right, the cheese becomes soft and easy to chew, making it more braces-friendly than other, harder foods. So, let’s get ready to dive into the ooey-gooey world of grilled cheese with braces!Cheese: Friend or Foe for Braces?Let’s start with the star of the show: the cheese. Cheese is a great source of calcium, which is essential for maintaining strong and healthy teeth. However, not all cheeses are created equal when it comes to braces. Hard or aged cheeses, such as cheddar or Parmesan, can be quite tough and may cause discomfort when chewing. So, it’s best to opt for softer cheeses like mozzarella or Swiss when making your grilled cheese sandwich. These cheeses have a softer texture that is more forgiving on your braces.Choose Right Bread for BracesThe bread you choose for your grilled cheese can also make a difference. Hard, crusty breads can be challenging to bite into and may put unnecessary pressure on your braces. Instead, opt for softer bread options like white or whole wheat sandwich bread. These types of bread are easier to bite into and won’t cause unnecessary strain on your braces. If you’re feeling adventurous, you could even try using a soft tortilla or a pita pocket as an alternative to traditional bread.Add Special Soft IngredientsWhile the cheese and bread are the main attractions, you can also experiment with adding other soft ingredients to your grilled cheese. Thinly sliced tomato, avocado, or even cooked vegetables like mushrooms or spinach can add an extra burst of flavor and texture to your sandwich. Just be sure to chop them into small, manageable pieces to make them easier to chew and prevent any mishaps with your braces.
Part 2: The Detailed Process to Make Grilled Cheese with Braces1. Prepare Your Grilled Cheese CarefullyNow that you know which cheeses are braces-friendly, it’s time to choose the perfect one for your grilled cheese. Opt for a cheese that melts well, like mozzarella or American cheese. These cheeses will give you that gooey, melty goodness that we all love in a grilled cheese sandwich. Avoid using hard or aged cheeses as they may not melt as easily and could become a sticky mess to chew.When it comes to cooking your grilled cheese, it’s best to use gentle heat to ensure a softer outcome. Avoid high heat settings, as they can quickly turn your cheese into a rubbery mess. Instead, opt for medium-low heat and cook your sandwich slowly. This will give the cheese ample time to melt into a soft and chewable consistency, making it easier on your braces.
2. Eat Grilled Cheese with BracesTo make eating your grilled cheese easier and more comfortable with braces, cut your sandwich into manageable pieces. Smaller, bite-sized portions are not only easier to chew, but they also minimize the risk of getting food stuck in your braces. So, grab a knife and slice your sandwich into quarters or even smaller if needed. This way, you can savor each bite without worrying about any unwanted surprises.While the melted cheese may be soft and braces-friendly, that doesn’t mean you can go full speed ahead and chomp down on your grilled cheese like a ravenous beast. Take your time, chew slowly, and be mindful of your braces. It’s important to be gentle and avoid biting down with excessive force, as this can cause discomfort or even damage to your braces. Enjoy the flavors and textures of your grilled cheese, but remember to eat with caution.After you’ve savored every last bite of your grilled cheese, it’s crucial to clean your braces thoroughly. Food particles can easily get trapped in the nooks and crannies of your braces, leading to plaque buildup and potential oral health issues. So, grab your trusty toothbrush and give your braces a good scrubbing. Don’t forget to floss between your teeth and use mouthwash to ensure a thorough clean. Taking these steps will help maintain good oral hygiene and keep your braces in tip-top shape.
3: Post Grilled Cheese Oral HygieneMaintaining excellent oral hygiene is crucial when you have braces. The brackets and wires create more places for food particles and plaque to hide, increasing the risk of tooth decay and gum disease. So, it’s essential to establish a thorough oral hygiene routine to keep your teeth and braces clean. Regular brushing, flossing, and using mouthwash are all essential components of this routine.After enjoying your delicious grilled cheese, it’s important to clean your braces properly. Start by rinsing your mouth with water to remove any loose food particles. Then, using a soft-bristle toothbrush, gently brush your teeth, paying extra attention to the areas around your braces. Be sure to brush both the front and back of your teeth and spend a little extra time on the areas where your braces meet your teeth. Finish off by flossing and using mouthwash to ensure a thorough clean.In addition to your regular oral hygiene routine, there are a few products that can help make cleaning your braces easier. Interdental brushes are small, thin brushes that can reach between the wires and brackets to remove any stubborn food particles. Water flossers or oral irrigators can also be helpful in flushing out debris from hard-to-reach areas. Consult with your orthodontist to determine which products would be most beneficial for your specific needs.
4. Additional Tips for Grilled Cheese with BracesWhile grilled cheese is a delicious treat, it’s important to have a well-rounded diet that includes other teeth-friendly foods. Incorporate soft fruits like bananas or berries, steamed vegetables, yogurt, and lean proteins into your meals. These foods are not only braces-friendly, but they also provide essential nutrients for overall dental health.Even with the utmost care, issues with braces can still arise. If you experience any discomfort, pain, or notice a loose bracket or wire, it’s essential to contact your orthodontist right away. They will be able to assess the situation and provide the necessary adjustments or repairs to keep your braces on track.ConclusionEating with braces doesn’t have to mean sacrificing your favorite comfort foods. With a little creativity and a few adjustments, you can still enjoy a delicious grilled cheese sandwich. Remember to choose softer cheeses and bread, cook your sandwich with gentle heat, and cut it into manageable pieces. Take your time to chew carefully and clean your braces thoroughly after enjoying your meal. By following these tips, you can savor the simple pleasure of grilled cheese while still taking care of your orthodontic needs.FAQsCan I use any type of cheese for my grilled cheese sandwich with braces?While not all cheeses are created equal when it comes to braces, softer cheeses like mozzarella or Swiss are a better choice. Hard or aged cheeses can be tough to chew and may cause discomfort.How can I clean my braces properly after eating a grilled cheese sandwich?To clean your braces, start by rinsing your mouth with water to remove loose food particles. Then, use a soft-bristle toothbrush to brush your teeth, paying extra attention to the areas around your braces. Finish off with flossing and using mouthwash for a thorough clean.Can I eat grilled cheese with braces if I have a wire poking out?If you have a wire poking out or any other issues with your braces, it’s important to contact your orthodontist. They will be able to address the problem and make any necessary adjustments or repairs.Are there any other teeth-friendly foods I can incorporate into my diet with braces?Absolutely! Soft fruits like bananas or berries, steamed vegetables, yogurt, and lean proteins are all great options to include in your diet while wearing braces.Is it normal to feel discomfort while eating with braces?Some discomfort is normal when you first get braces or after adjustments. However, if the discomfort persists or becomes painful, it’s best to contact your orthodontist to ensure everything is in order.
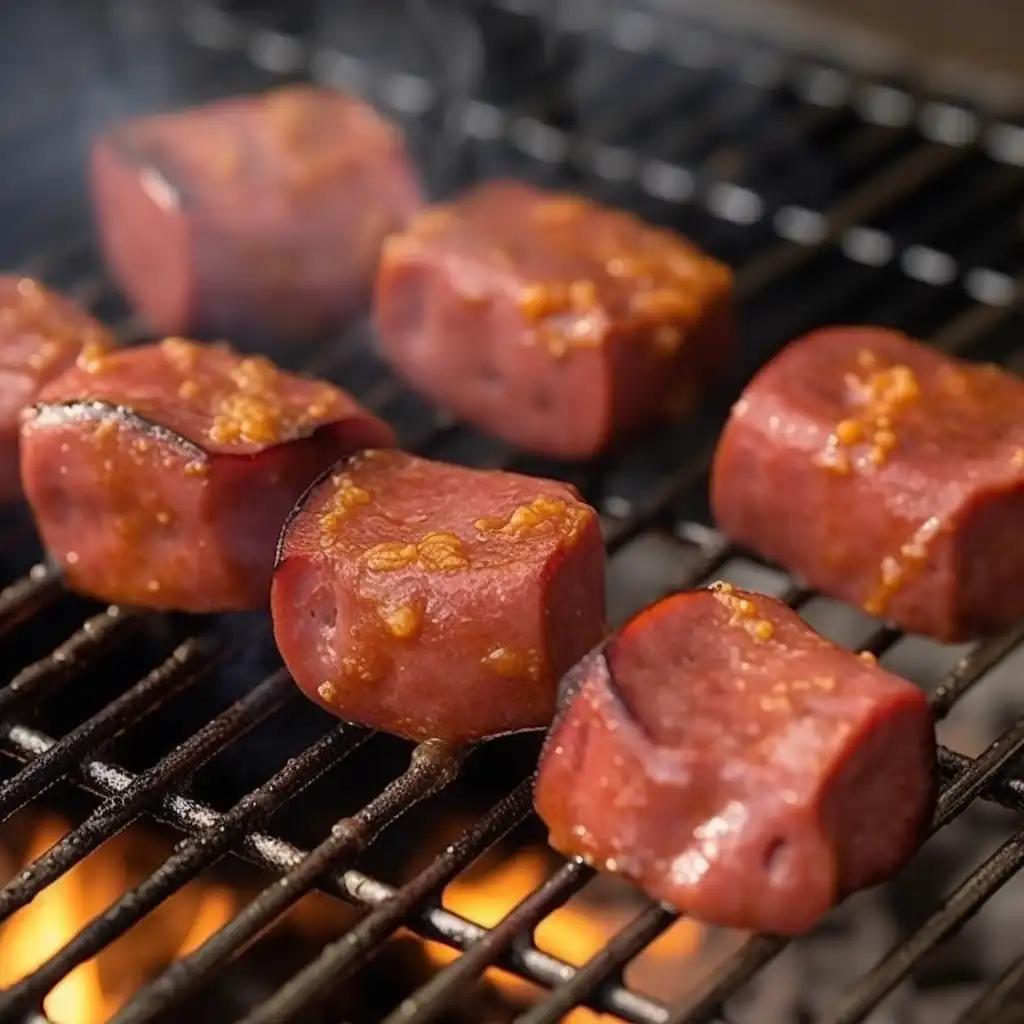
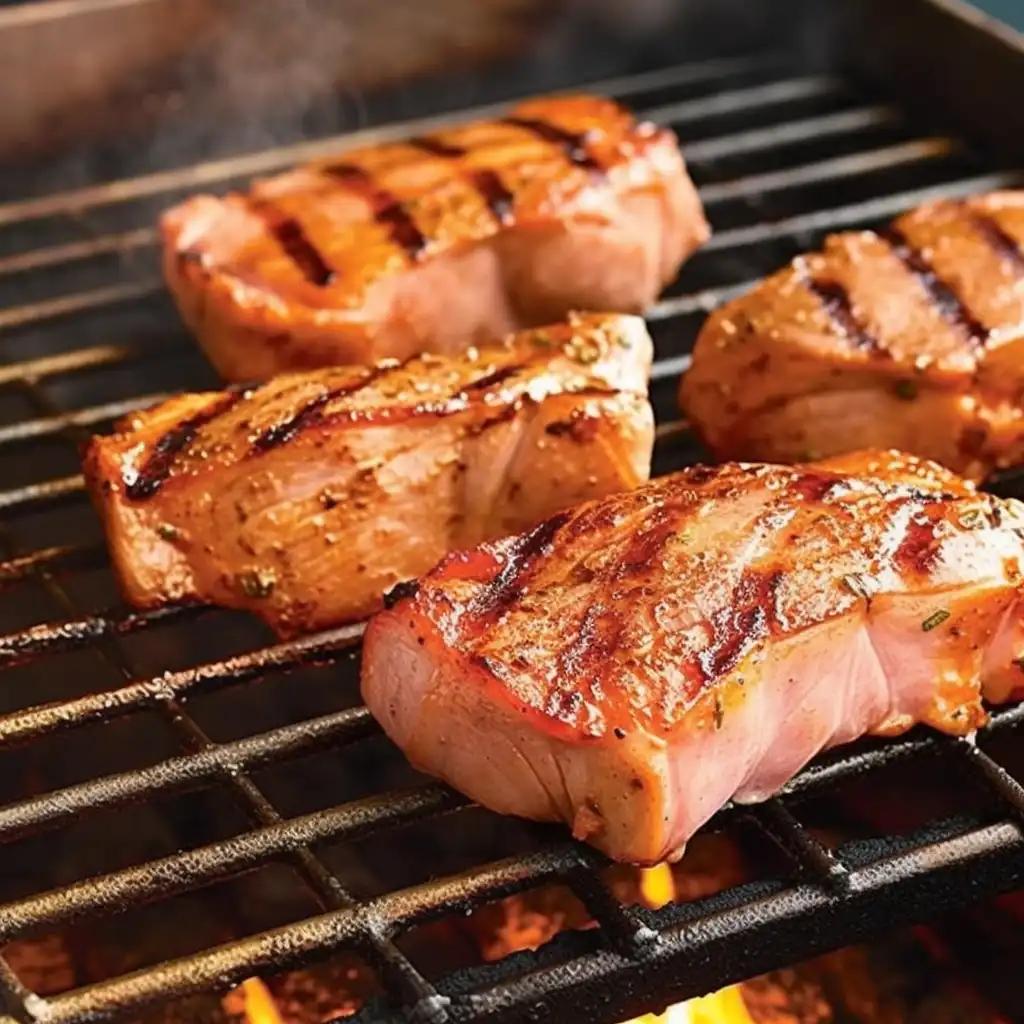
Smoking bologna on a pellet grill is a delicious twist on a classic deli favorite. It transforms ordinary bologna into a smoky, savory masterpiece that’s sure to impress your taste buds and those of your friends and family. A flavor-packed, tender delight that’s perfect for sandwiches, platters, or simply enjoying on its own.In this article, we’re going to dive into the world of smoked bologna, providing you with a comprehensive step-by-step guide and expert tips. Whether you’re a seasoned grillmaster or a beginner looking to explore the art of smoking, this guide will walk you through the entire process, from selecting the right bologna to mastering the pellet grill for that perfect smoky flavor. Get ready to embark on a culinary adventure that elevates your deli meat experience to a whole new level.Part 1: How to Select the Desired Bologna and PreparingSelecting the perfect bologna is the first step towards creating a delicious smoked delicacy on your pellet grill. Consider these factors when choosing the right type and size:Bologna Types You Should Choose for Pellet GrillRegular Bologna: This classic option delivers a mild, meaty flavor that pairs well with a variety of seasonings and sauces. It’s an excellent choice for those who prefer a balanced taste.Spicy Bologna: If you are looking to add a kick to your smoked bologna, opt for spicy varieties. Spicy bologna offers a zesty twist with a hint of heat, making it a great choice for those who love bold flavors.Bologna Size and Shape for SmokingWhole Bologna: Smoking a whole bologna is a popular choice. These come in various sizes, allowing you to serve a crowd or a smaller gathering. Whole bologna is versatile and can be sliced or served as-is.Sausage-Style: Some bologna is available in sausage-like shapes, making them ideal for smoking on a pellet grill. These are easy to handle and can be sliced into rounds or served whole.Pre-Sliced: If you prefer convenience, pre-sliced bologna is available in various thicknesses. While they may not be as common for smoking, they can still be used for a quick and easy smoked bologna sandwich.
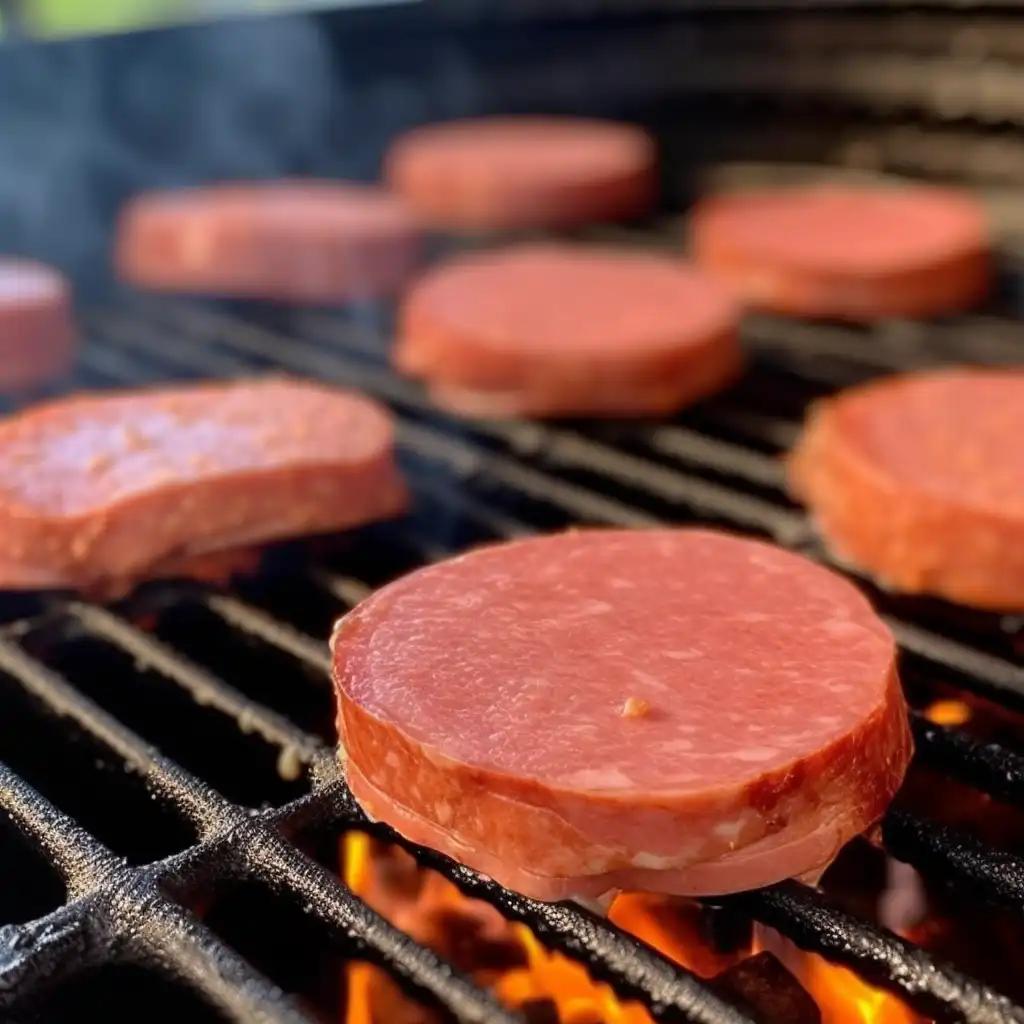
Part 2: 2 Different Recipes for Smoking Bologna on a Pellet GrillRecipe 1: Classic Smoked BolognaIngredients:1 whole regular bologna (approximately 4-5 pounds)1/4 cup of your favorite barbecue rubWood pellets (hickory or mesquite work well)Instructions:Prepare the Bologna: Start by unwrapping the whole bologna and patting it dry with paper towels. This helps the rub adhere better.Score the Bologna: Using a sharp knife, make diagonal cuts across the surface of the bologna. This not only enhances the flavor absorption but also gives it an attractive appearance.Apply the Rub: Generously coat the bologna with your chosen barbecue rub. Ensure you cover all sides, pressing the rub into the scores and the surface.Preheat the Pellet Grill: Set your pellet grill to a temperature of 225°F (107°C) and use hickory or mesquite wood pellets for that classic smoky flavor.Smoke the Bologna: Place the seasoned bologna directly on the grill grates. Close the lid and let it smoke for about 2-3 hours.Check Doneness: After the initial smoke, check the internal temperature of the bologna using a meat thermometer. It should reach around 160°F (71°C).Slice and Serve: Once done, remove the smoked bologna from the grill and allow it to rest for a few minutes. Slice it into rounds or chunks and serve. It’s excellent on sandwiches or as a stand-alone snack.
Recipe 2: Spicy Smoked Bologna BitesIngredients:1 spicy bologna sausage (about 2 pounds)1/4 cup of your preferred spicy barbecue rubWood pellets (applewood or cherrywood for a sweet and spicy flavor)Instructions:Prep the Bologna Sausage: Begin by removing the casing from the spicy bologna sausage. This allows the smoke and flavors to penetrate the meat more effectively.Apply the Rub: Coat the exposed sausage with a generous amount of spicy barbecue rub, ensuring it’s well-covered.Preheat the Pellet Grill: Set your pellet grill to a temperature of 250°F (121°C) and use wood pellets like applewood or cherrywood for a sweet and spicy kick.Smoke the Bologna Bites: Place the seasoned bologna sausage directly on the grill grates. Close the lid and let it smoke for about 1.5 to 2 hours.Check Doneness: Use a meat thermometer to monitor the internal temperature. It should reach approximately 160°F (71°C).Slice and Enjoy: Remove the smoked bologna from the grill, let it rest briefly, and then slice it into bite-sized rounds. These spicy smoked bologna bites make for a delectable appetizer or snack with a kick.
Part 3: Addressing Smoking Bologna Issues on a Pellet GrillFluctuating Temperature:Fix: Monitor pellet levels and ensure proper ventilation. Avoid frequent lid opening to maintain steady heat.Thin Smoke or No Smoke:Fix: Check pellet quality and ensure proper ignition. Adjust air intake and exhaust settings as needed.Over-Smoking or Bitter Taste:Fix: Use high-quality pellets and avoid excessive smoke by adjusting airflow. Follow recommended smoking times for balanced flavor.Uneven Cooking:Fix: Arrange food evenly on grill grates. Consider rotating or flipping items during smoking for uniform results.Maintaining Temperature and Smoke Consistency:Preheat Grill:Allow the pellet grill to reach the desired temperature before adding food. This ensures consistent heat throughout the smoking process.Pellet Selection:Choose pellets suited for your flavor preference. High-quality pellets provide steady smoke and temperature control.Ventilation Control:Adjust air intake and exhaust dampers to regulate airflow. This helps control temperature and smoke production.Check Pellet Hopper:Monitor pellet levels to prevent sudden drops in heat. Refill the hopper as needed to maintain steady smoke.Use Smoking Aids:Pellet tubes or boxes can supplement smoke production. Place them in the grill for additional smoke flavor.By addressing these issues and following temperature and smoke consistency tips, you’ll enhance your smoking experience and produce delicious, well-smoked dishes.
ConclusionSmoking bologna on a pellet grill is a delightful culinary adventure. Whether you prefer the classic appeal of regular bologna or the spicy kick of its counterpart, there’s a smoked bologna recipe for everyone. We invite you to try smoking bologna on your pellet grill and experiment with different flavors and techniques. Your unique variations and experiences can inspire others to embark on their own smoked bologna journey. Whether you’re a seasoned pitmaster or a novice griller, the world of smoked bologna is waiting to be explored and savored.FAQsCan I smoke bologna slices instead of a whole piece?While smoking a whole piece is common, you can also smoke pre-sliced bologna for a quicker and convenient option.How do I know when the bologna is done?Use a meat thermometer to check the internal temperature of the bologna. It should reach around 160°F (71°C).What are some creative ways to serve smoked bologna?Smoked bologna is versatile and can be used in sandwiches, wraps, platters, or enjoyed on its own with various condiments.
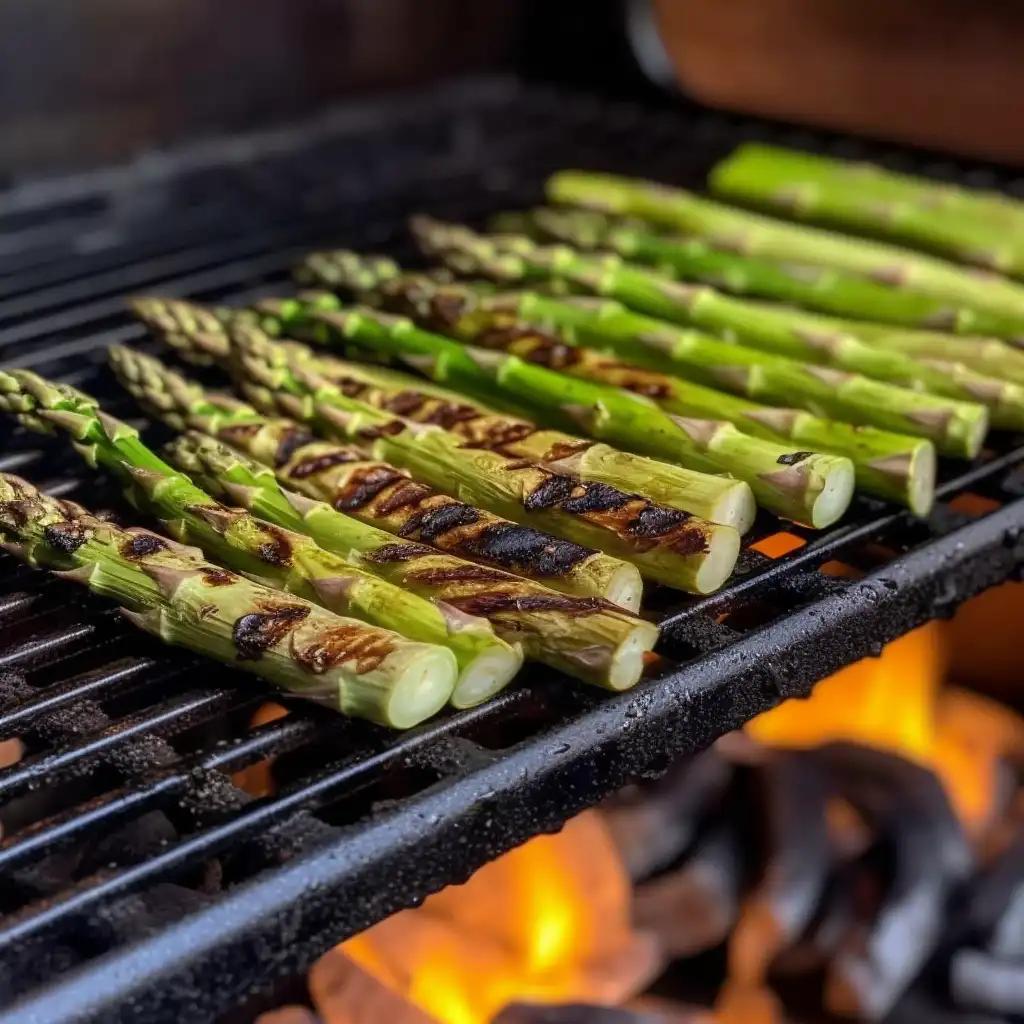
Smoking asparagus on a pellet grill is a culinary delight that elevates this humble vegetable to new heights of flavor. Imagine tender asparagus spears infused with a rich, smoky essence that complements their natural earthiness. It’s a culinary experience that’s as satisfying as it is impressive.In this guide, we’ll take you on a journey into the world of smoked asparagus, catering to both beginners and seasoned grill enthusiasts. Whether you’re just starting your grilling adventures or looking to add a unique twist to your repertoire, we’ve got you covered. We’ll walk you through the essentials – from selecting the freshest asparagus to mastering the art of pellet grill smoking.Prepare to unlock the secrets of perfectly smoked asparagus that will leave your taste buds tingling. This is the ultimate fusion of simplicity and sophistication, offering a smoky, flavorful appeal that’s bound to become a favorite on your grill.Part 1: How to Prepare Asparagus before Smoking on a Pellet GrillWashing and Trimming Asparagus before SmokingBegin by gently rinsing the asparagus under cold running water to remove any dirt or debris. Pat them dry with a clean kitchen towel or paper towels.To remove the tough and woody ends, hold a single asparagus spear between your hands and bend it gently. It will naturally snap at the point where the tough part ends; discard the snapped-off portion. Alternatively, you can use a knife to trim about 1-2 inches from the bottom of each spear.Selecting the Right Size and ThicknessWhen choosing asparagus for grilling, look for medium-sized spears, about 1/2 to 3/4 inch in diameter. These provide a good balance between tenderness and a satisfying crunch after grilling. Extremely thin asparagus may cook too quickly and become overly soft, while very thick ones can be tough to eat.
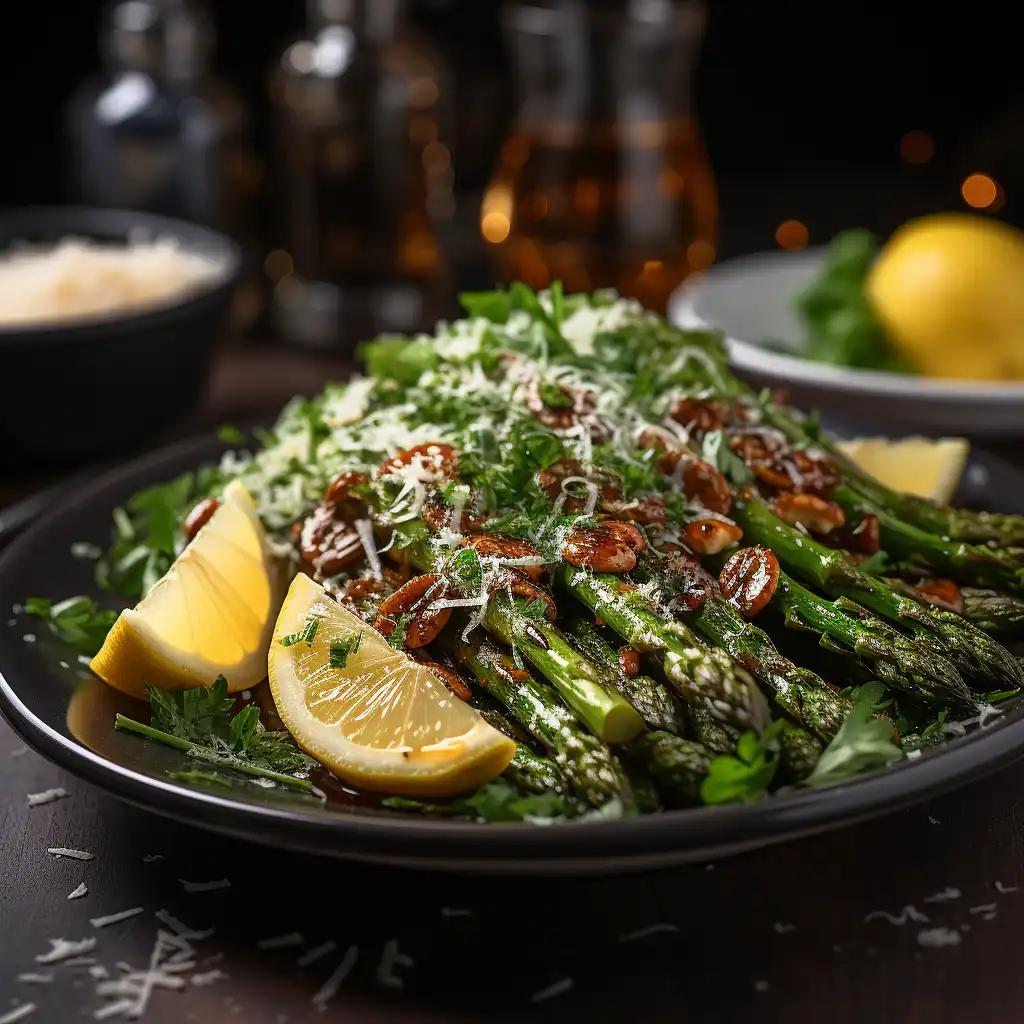
Recipe 1: Smoked Asparagus with Garlic and ParmesanIngredients:1 bunch of fresh asparagus spears2 tablespoons of olive oil2 cloves of garlic, minced1/4 cup grated Parmesan cheeseSalt and black pepper to tasteLemon wedges (for garnish)Instructions:Step 1: Prepare the Asparagus: Wash the asparagus and trim the tough ends. In a large bowl, toss the asparagus with olive oil, minced garlic, salt, and black pepper.Step 2: Preheat the Pellet Grill: Preheat your pellet grill to 225-250°F (107-121°C) using your choice of wood pellets (hickory or oak work well for this recipe).Step 3: Smoke the Asparagus: Place the seasoned asparagus directly on the grill grates or in a grill basket. Smoke for about 20-30 minutes or until the asparagus is tender, with a slight crispiness.Step 4: Add Parmesan Cheese: About 5 minutes before the asparagus is done, sprinkle the grated Parmesan cheese evenly over the spears.Step 5: Serve: Remove the smoked asparagus from the pellet grill. Garnish with lemon wedges. Serve hot as a delightful side dish.
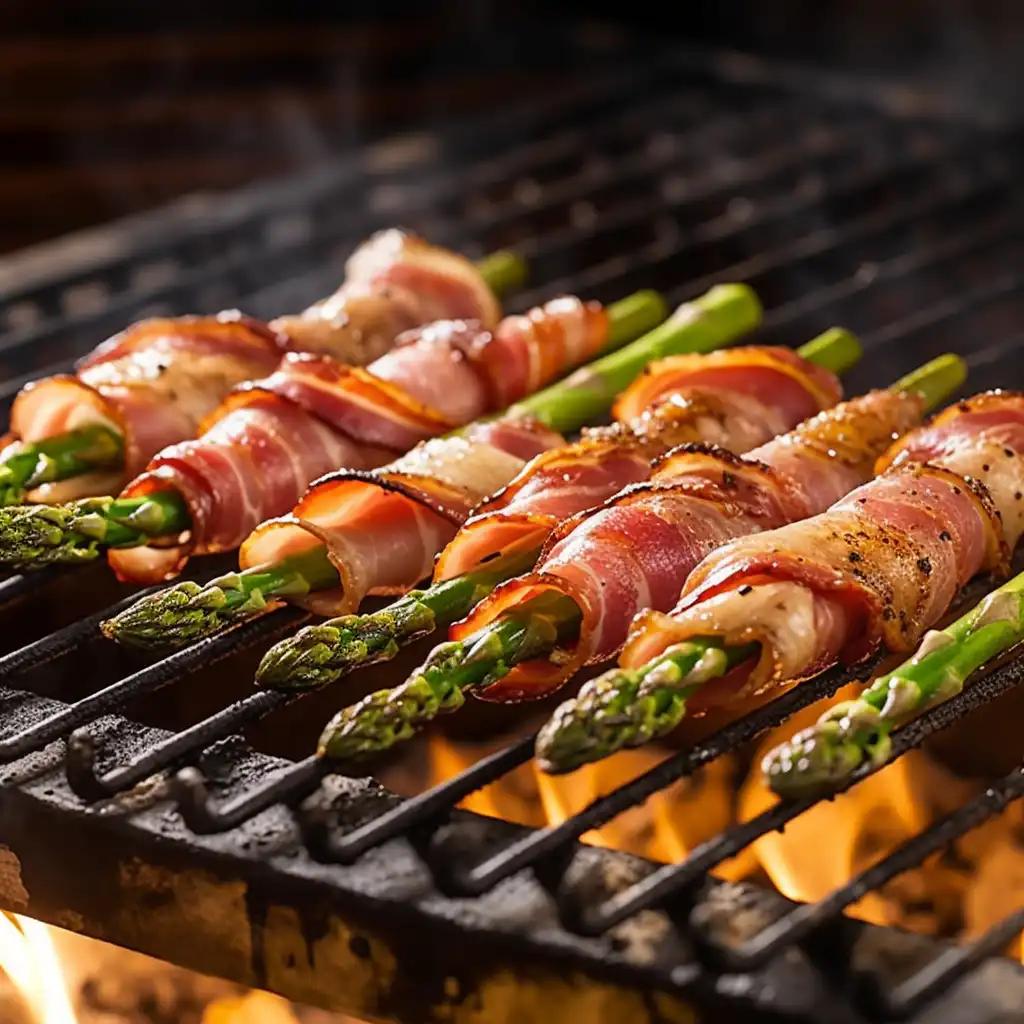
Recipe 2: Smoked Asparagus Wrapped in ProsciuttoIngredients:1 bunch of fresh asparagus spears6-8 slices of prosciuttoOlive oil for drizzlingSalt and black pepper to tasteBalsamic glaze (optional, for serving)Instructions:Step 1: Prepare the Asparagus: Wash and trim the asparagus, removing the tough ends.Step 2: Wrap in Prosciutto: Take 3-4 asparagus spears and wrap them in a slice of prosciutto. Repeat until all asparagus spears are wrapped.Step 3: Preheat the Pellet Grill: Preheat your pellet grill to 375-400°F (190-204°C) using your preferred wood pellets (fruitwood like cherry or apple works well).Step 4: Smoke the Asparagus Bundles: Place the prosciutto-wrapped asparagus bundles directly on the grill grates. Smoke for approximately 10-15 minutes or until the prosciutto is crispy, and the asparagus is tender.Step 5: Drizzle and Serve: Remove the smoked asparagus bundles from the grill. Drizzle with a bit of olive oil and season with salt and black pepper to taste. For added flavor, serve with a drizzle of balsamic glaze.
Part 3: Useful Tips for Perfectly Smoked Asparagus on a Pellet GrillAchieving perfectly smoked asparagus on your pellet grill requires attention to detail and a few pro tips to ensure exceptional results. Here’s how to take your smoked asparagus game to the next level:Rotate for Even Cooking: To ensure even smoking, gently rotate the asparagus spears every 10-15 minutes. This helps all sides of the asparagus get that delicious smoky flavor.Use a Grill Basket: Consider using a grill basket or perforated foil to keep smaller asparagus spears from falling through the grill grates. This also makes flipping and rotating easier.Maintain Consistent Temperature: Pellet grills are known for their temperature consistency, but it’s still important to monitor and maintain a steady smoking temperature. Fluctuations can affect the final outcome.Check for Doneness: Test for doneness by inserting a fork or toothpick into the thickest part of the asparagus. It should go in easily, but the asparagus should still have a slight firmness (al dente).Avoid Overcooking: Be vigilant not to overcook the asparagus. Overcooked asparagus becomes mushy and loses its appealing texture. Keep an eye on it as it smokes.
Common Mistakes to Avoid for Smoking Asparagus on a Pellet GrillUsing Old Asparagus: Always choose fresh, firm asparagus. Older asparagus can be tough and fibrous.Neglecting Seasoning: Don’t forget to season your asparagus before smoking. Olive oil, garlic, salt, and pepper are simple but effective choices.Skipping Preheating: Ensure your grill is properly preheated before adding the asparagus. This guarantees a good sear and smoky flavor.Overcrowding the Grill: Avoid overcrowding the grill, which can lead to uneven cooking. Leave enough space between the spears for proper airflow.By following these tips and avoiding common mistakes, you’ll consistently create perfectly smoked asparagus that’s packed with flavor and has that ideal tender-crisp texture.ConclusionThis article has delved into the delectable world of smoking asparagus on a pellet grill. We’ve explored two enticing recipes, from the savory allure of garlic and Parmesan to the salty-sweet embrace of prosciutto. Emphasizing the smoky, flavorful appeal that grilling brings to asparagus, we’ve provided a comprehensive step-by-step guide suitable for both beginners and seasoned grill enthusiasts.FAQsIs it possible to overcook asparagus on a pellet grill?Yes, be cautious not to overcook the asparagus, as it can become mushy. Keep a close eye on it to maintain that ideal tender-crisp texture.Can I smoke other vegetables alongside asparagus on the pellet grill?Yes, you can smoke other vegetables like bell peppers, zucchini, or mushrooms alongside asparagus. Just be mindful of their individual cooking times.What are some serving suggestions for smoked asparagus?Smoked asparagus makes a fantastic side dish. Consider garnishing with lemon zest, parmesan cheese, or a drizzle of balsamic glaze for extra flavor.
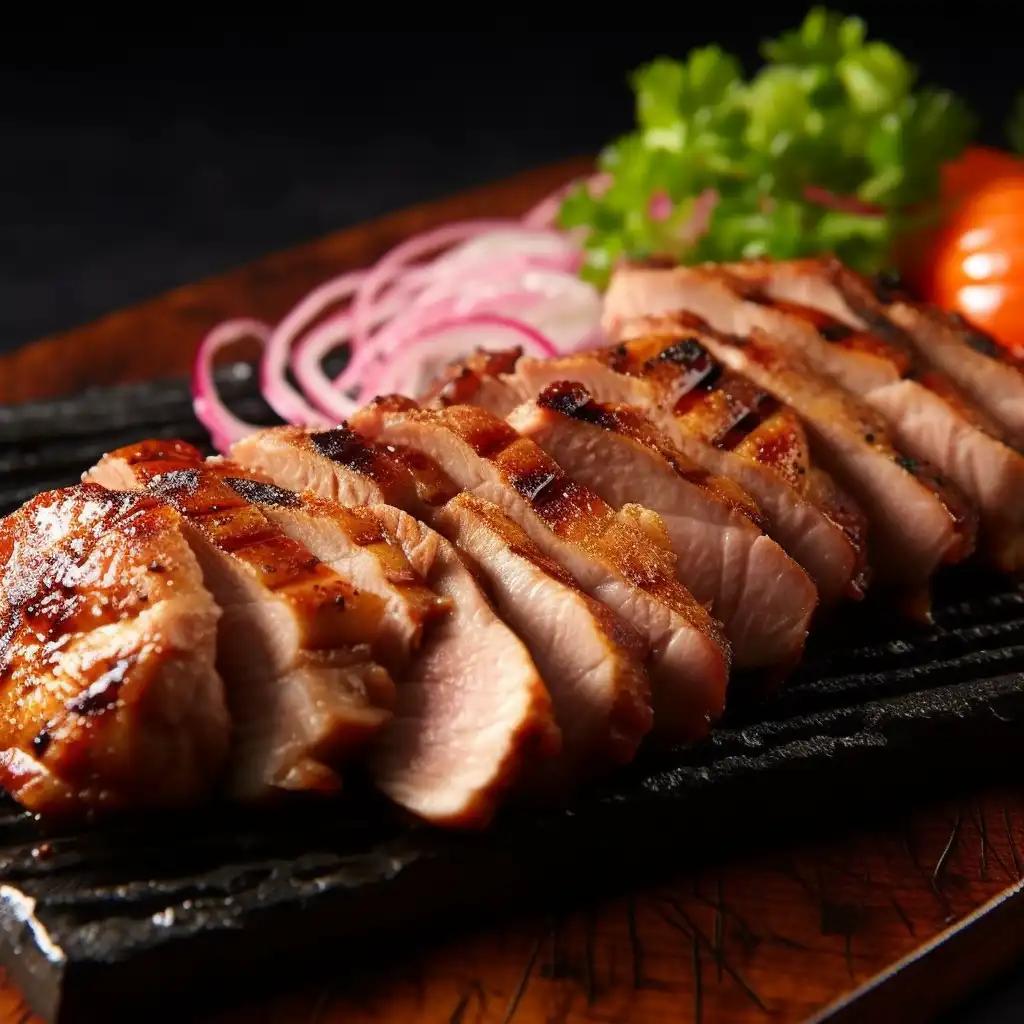
Step into the realm of culinary satisfaction with the enticing allure of smoked tri-tip. Renowned for its rich flavor and tender texture, tri-tip is a beloved cut that graces the plates of many enthusiasts. Imagine infusing this delectable meat with the tantalizing embrace of smoky aromas, enhancing its natural taste to new heights. Enter the pellet grill – a modern marvel that effortlessly balances convenience and excellence.The pellet grill’s automated temperature control and consistent heat distribution transform the art of smoking tri-tip into a seamless experience. No more tending to flames; just set it, forget it, and await the mouthwatering results. In this guide, we delve into the magic of smoking tri-tip on a pellet grill. From preparing the perfect rub to achieving the ideal smoke ring, you’ll master the techniques that ensure a sumptuous and unforgettable culinary journey. With each bite, savor the symphony of flavors that only a pellet grill can offer.Part 1: Why Choose a Pellet Grill for Smoking Tri-Tip?Selecting the right equipment is essential when embarking on a journey to smoke the perfect tri-tip, and a pellet grill stands is the ideal choice.Automated Temperature Control: Pellet grills are renowned for their precise temperature control. They operate with a digital thermostat, ensuring that the cooking temperature remains consistent throughout the smoking process. This reliability eliminates the need for constant adjustments, allowing you to focus on the flavors.Set It and Forget It: With a pellet grill, you can set your desired cooking temperature and let the grill do the rest. This “set it and forget it” convenience frees you from the need to constantly monitor and tend to the fire, granting you the gift of time to enjoy other aspects of your culinary adventure.Delicious Smoky Infusion: Pellet grills are designed to use flavored wood pellets, infusing your tri-tip with a rich and nuanced smoky flavor. You have the flexibility to choose from a variety of wood pellet flavors, from hickory to mesquite, allowing you to customize your meat’s taste profile.Part 2: The Detailed Process to Smoke Tri-Tip on a Pellet GrillIngredientsTri-Tip Roast: A tri-tip roast typically weighs between 2.5 to 3.5 pounds, depending on your serving needs.Wood Pellets: You’ll require about 1 to 2 pounds of wood pellets for a flavorful smoky infusion. The choice of wood pellets (e.g., hickory, oak, mesquite) depends on your flavor preferences.Olive Oil: For seasoning and creating a flavorful crust, you’ll need approximately 2 tablespoons of olive oil.Seasoning Rub: Prepare a dry rub using a blend of herbs and spices. Common ingredients include:2 tablespoons of kosher salt1 tablespoon of black pepper1 tablespoon of garlic powder1 tablespoon of onion powder1 tablespoon of paprika1 teaspoon of dried thyme1 teaspoon of dried rosemaryOptional Marinade: If desired, you can marinate the tri-tip for added flavor. A typical marinade might include soy sauce, Worcestershire sauce, olive oil, garlic, and herbs. Approximately 1 cup of marinade should suffice.Wood Chips (Optional): Some pellet grills allow you to add wood chips for extra smoke flavor. If using wood chips, you’ll need about 1 cup.Aluminum Foil: You’ll need aluminum foil to wrap the tri-tip during resting. A standard roll should be sufficient.
How to Smoke Tri-Tip on a Pellet Grill Step-to-Step GuideStep 1: Prepare the Tri-tip. Trim excess fat, leaving a thin layer. Pat dry, then drizzle with olive oil. Mix a rub of salt, pepper, garlic powder, onion powder, paprika, thyme, and rosemary. Massage rub onto all sides. Just marinate in soy sauce, worcestershire, oil, garlic, and herbs for extra flavor.Step 2: Set Up the Grill. Ensure your pellet grill is set for indirect cooking. This means only one side of the grill has heat, while the other side remains unlit. Place a drip pan beneath the grill grates on the unlit side to catch drippings and prevent flare-ups. After that, you can start smoking the tri-tip on the pellet grill.Step 3: Preheat and Add Wood Pellets. Just preheat your grill to the optimal smoking temperature, usually around 225-250°F. As it heats up, the wood pellets will ignite, creating that wonderful smoky flavor. The slow, even cooking process allows the meat’s flavors to develop while ensuring a tender and juicy result.
Step 4: Place the Tri-Tip. Carefully place the seasoned tri-tip on the unlit side of the grill grates, directly over the drip pan. This positioning ensures that the meat receives indirect heat, allowing for slow and even cooking without direct flame contact, which is key to achieving perfectly smoked tri-tip.Step 5: Lid Closed, Smoke Flowing. Close the grill lid to trap the smoky goodness. This step is crucial for infusing the tri-tip with a rich smoky flavor. Resist the temptation to lift the lid too frequently, as it can disrupt the cooking process and your culinary masterpiece is well on its way to perfection.
Step 6: Maintain Consistency. Keep an eye on the grill’s temperature to ensure it stays within the desired range. Most pellet grills have a digital control panel that simplifies this task. Adjust the settings as needed to maintain a steady temperature before getting the delicious dish.Part 3: How to Get a Delicious Smoked Tri-Tip on a Pellet GrillMonitoring and Temperature Control Tips: Smoky Consistency is KeyUse a Thermometer: Invest in a quality meat thermometer with a probe to monitor the tri-tip’s internal temperature. This helps you avoid overcooking and ensures it reaches the desired doneness.Check Pellet Levels: Periodically inspect the pellet hopper to ensure an adequate supply of wood pellets. Running out of pellets mid-smoke can disrupt the cooking process.Wind and Weather: Be mindful of external factors like wind and cold weather, which can impact the grill’s temperature. Consider using a wind barrier or insulation blanket for consistent cooking.Maintain the Drip Pan: Keep an eye on the drip pan under the grill grates. If it fills up with grease, it can affect the grill’s temperature. Empty it as needed to prevent flare-ups.Adjust Settings Gradually: If you need to make temperature adjustments, do so gradually. Small changes in pellet feed rate can have a significant impact. Avoid sudden, large adjustments to maintain stable smoking conditions.
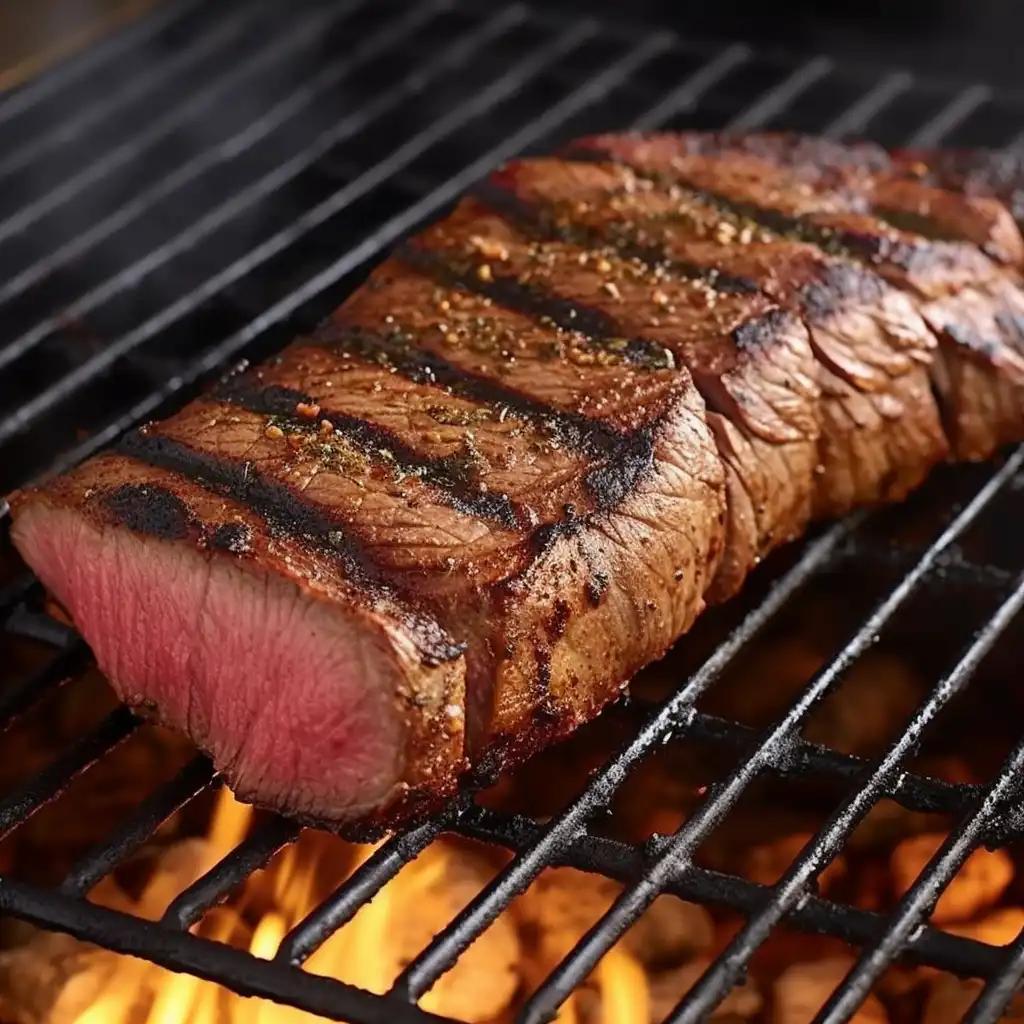
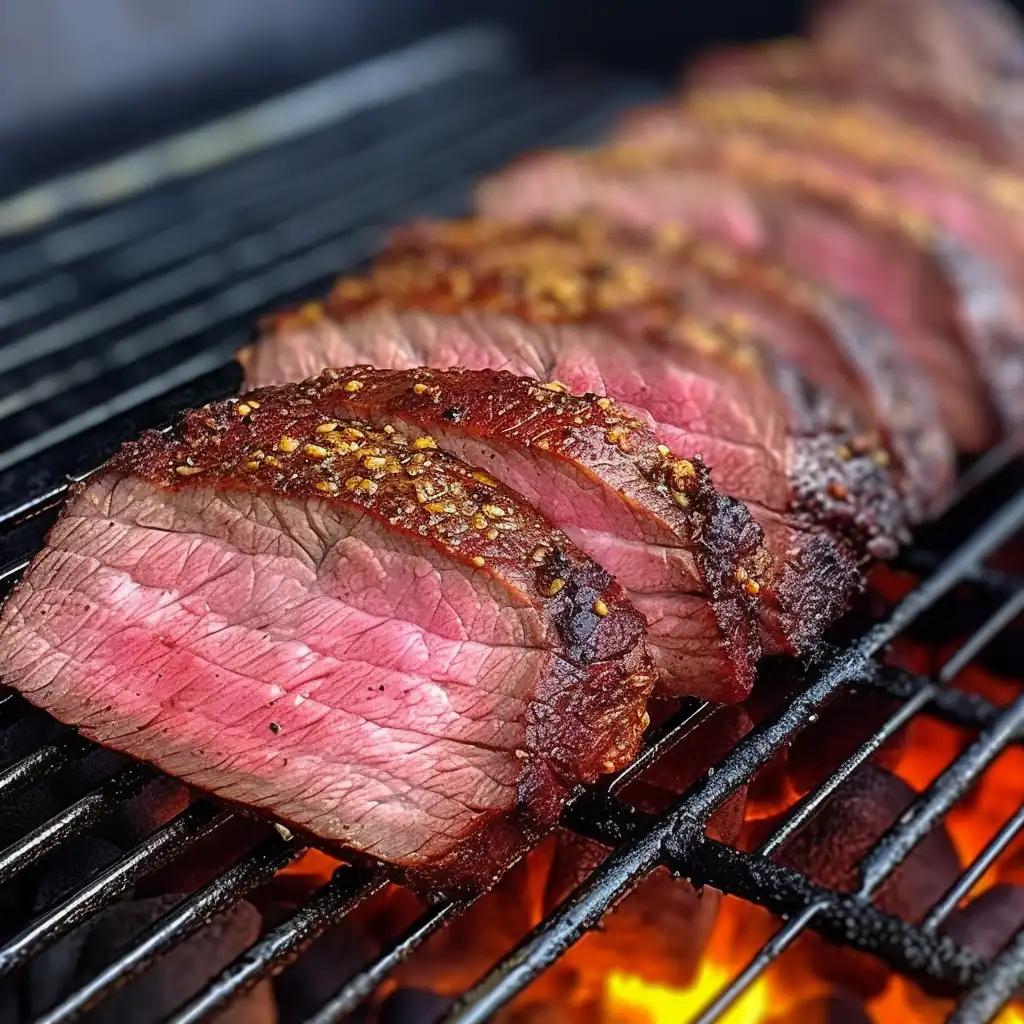
Perfecting Tri-Tip’s Internal Temperature and the Smoke RingThe ideal internal temperature for tri-tip typically ranges between 135-145°F (57-63°C) for medium-rare to medium doneness. To achieve this, probe the meat with a thermometer and remove it from the grill when it reaches your desired temperature.The smoke ring, a pinkish layer beneath the surface of smoked meats, forms when nitrogen dioxide from wood combustion combines with myoglobin in the meat. While it’s not an indicator of doneness, it’s a sign of successful smoking. Achieving the ideal smoke ring enhances flavor, adding a subtle smokiness that complements the rich taste of the tri-tip.Resting and Slicing for Juicy Perfection for Smoked Tri TipAfter the smoky journey, it’s crucial to let your smoked tri-tip rest for about 10-15 minutes before slicing. Resting allows the juices to redistribute within the meat, ensuring a juicy, flavorful result.When it’s time to slice, remember to cut against the grain. Slicing against the grain shortens the muscle fibers, making each bite incredibly tender. Identify the direction of the grain (the lines running through the meat) and slice perpendicular to it. This simple technique guarantees that your smoky masterpiece is as tender as it is delicious.Part 4: Flavor Variations and Enhancements for Smoked Tri TipExperimenting with different wood pellet flavors allows you to create a customized smoky profile for your tri-tip. Pairing these profiles with complementary sauces or marinades elevates the flavor to new heights, turning your smoked tri-tip into a culinary masterpiece.
Unknown block type “tables”, please specify a serializer for it in the `serializers.types` prop
ConclusionThe reward? A mouthwatering, smoky masterpiece. Now, embark on your smoked tri-tip journey, experimenting with wood pellet flavors and seasonings. Your culinary adventures are bound to yield delicious, customized results that will leave your taste buds craving more. Just learn more about the reason for smoking tri-tip with a pellet grill, the detailed process, and the best tips.FAQsCan I sear the tri-tip after smoking on a pellet grill?Yes, after smoking, you can sear the tri-tip briefly over direct heat to create a flavorful crust.What’s the best way to keep the pellet grill’s temperature steady?Avoid frequent lid opening and make small temperature adjustments. Wind barriers and insulation blankets can help in challenging weather conditions.How do I prevent the tri-tip from drying out?Rest the tri-tip after smoking and slice against the grain for maximum tenderness. This ensures juiciness and flavor retention.
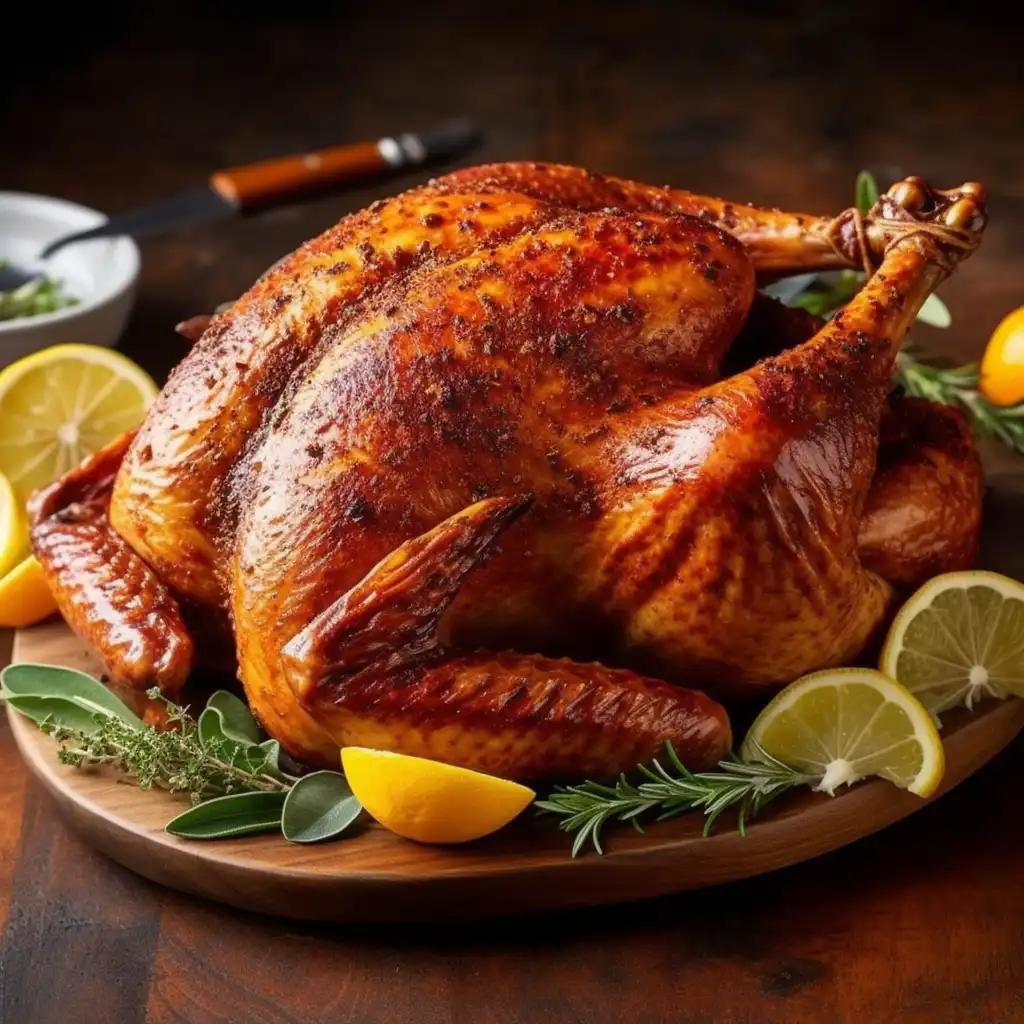
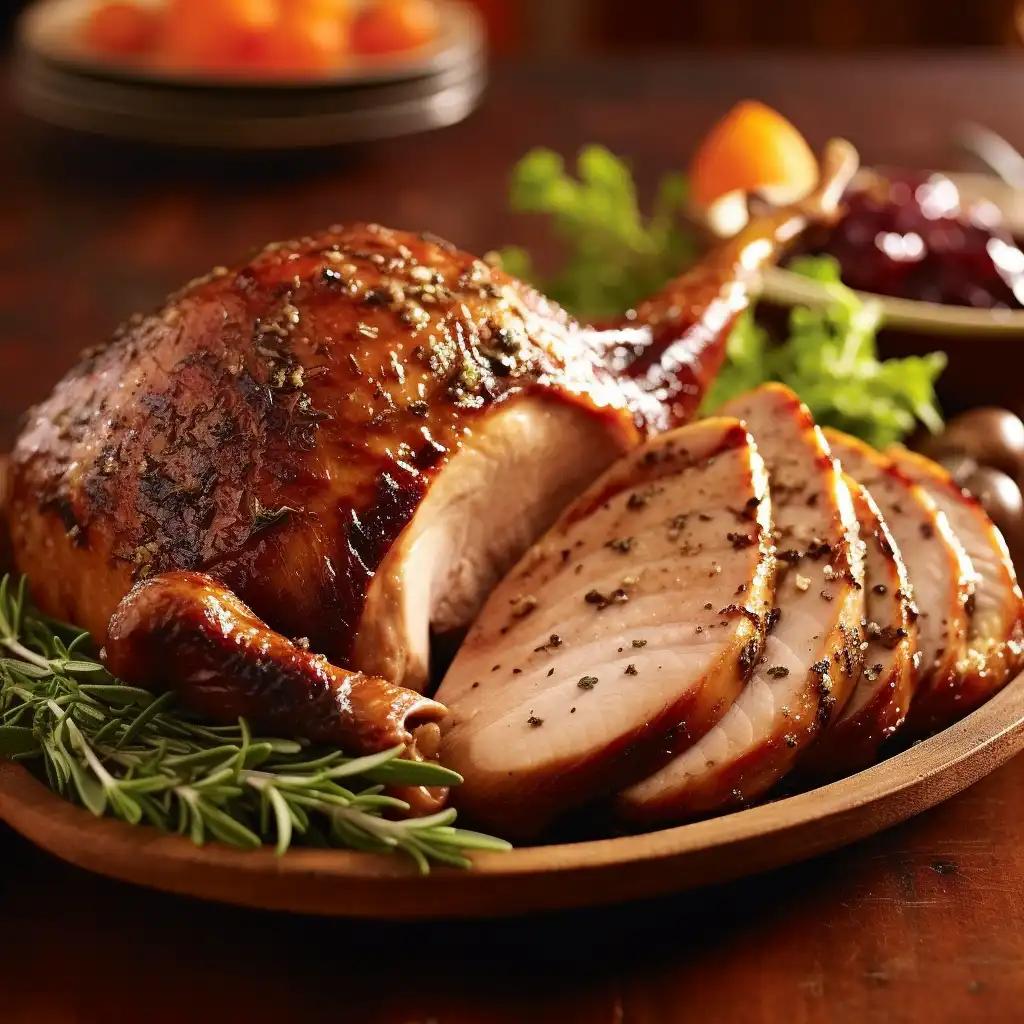
Have you ever experienced the mouthwatering aroma of smoked turkey? The tantalizing blend of smoky flavors, tender meat, and perfectly crisp skin is enough to make anyone’s taste buds dance with delight. And today, I’m here to take you on a journey to smoked turkey perfection on a Primo Grill.Part 1: Why Choose a Primo Grill for Smoking TurkeyWhen it comes to smoking turkey, the choice of grill is crucial. And that’s where the Primo Grill steals the show. With its unique design and superior quality, the Primo Grill is a game-changer in the world of outdoor cooking. Its versatility and precise temperature control make it the perfect companion for smoking turkey to perfection.How a Primo Grill Enhances the Smoked Turkey ExperienceBefore we dive into the art of smoking turkey on a Primo Grill, let’s take a moment to appreciate the unique attributes that set this grill apart. The Primo Grill is crafted from premium-grade ceramics, which helps to retain heat and moisture, creating an environment that is ideal for slow and even cooking. Its oval shape provides ample space for cooking large cuts of meat, like a whole turkey, without compromising on flavor.The Primo Grill takes the smoking experience to a whole new level. Its ability to maintain a consistent temperature throughout the cooking process ensures that your turkey is cooked to perfection, with juicy meat and a smoky flavor that will have your guests begging for seconds. The ceramic construction also helps to lock in moisture, resulting in a turkey that is incredibly tender and succulent.What Makes Smoked Turkey a Gastronomic DelightThere’s something magical about the flavor profile of smoked turkey. The slow cooking process allows the smoky flavors to penetrate the meat, infusing it with a depth of flavor that is truly irresistible. The combination of the smokiness, the tenderness of the meat, and the perfectly crisp skin creates a gastronomic delight that is sure to impress even the most discerning palates.Not only is smoked turkey a culinary delight, but it also offers a range of health benefits. Turkey is a lean source of protein, making it an excellent choice for those looking to maintain a healthy diet. It is also rich in essential nutrients such as vitamins B6 and B12, which support brain function and promote overall well-being. So, when you indulge in a plate of smoked turkey, you can feel good about nourishing your body.
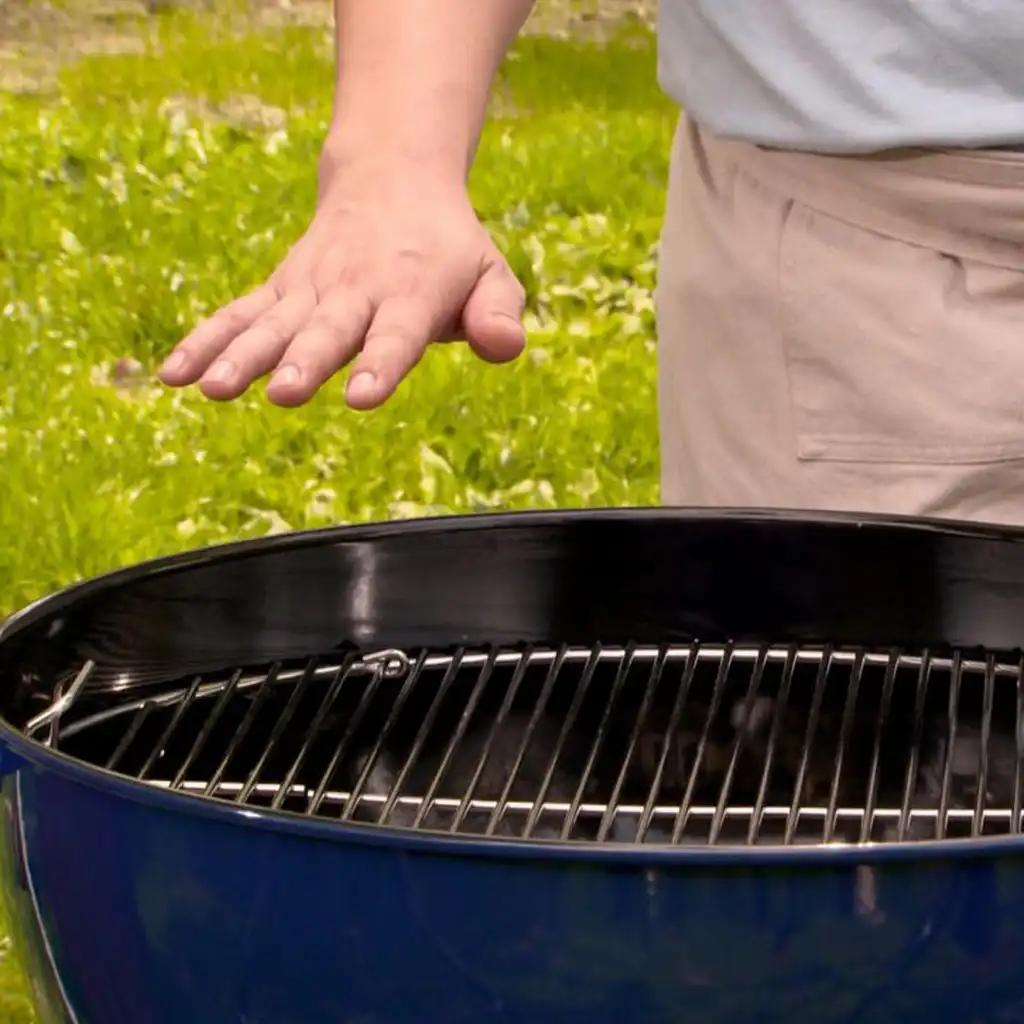
Part 2: Guided Walkthrough on Smoking a Turkey in a Primo GrillPrepping the Primo Grill. Before you begin your smoked turkey adventure, it’s essential to prep your Primo Grill. Start by cleaning the grill grates and removing any residue from previous cookouts. Fill the firebox with lump charcoal, leaving enough space for airflow. Light the charcoal to reaches your desired temperature.Choosing the Right Turkey. Selecting the right turkey is key to a successful smoking experience. Look for a fresh, high-quality turkey that is free-range and preferably organic. The size of the turkey will depend on the number of guests you’re serving, but as a general rule, plan for about 1 pound of turkey per person.Necessary Equipment for Smoking a Turkey. To ensure a smooth smoking process, gather all the necessary equipment. You’ll need a meat thermometer to monitor the internal temperature of the turkey, as well as a drip pan to catch any drippings. Additionally, a good pair of heat-resistant gloves and long-handled tongs will come in handy when handling the hot turkey and charcoal.Now that everything is prepped and ready, it’s time to dive into the smoking process. Start by seasoning the turkey with your favorite rub or marinade, ensuring that it is evenly coated. Place the turkey on the grill grates, directly over the drip pan. Close the lid of the Primo Grill and let the magic happen. Maintain a temperature of around 225°F to 250°F and allow the turkey to smoke for approximately 30 minutes per pound, or until the internal temperature reaches 165°F.Part 3: Smoked Turkey Recipes Worth Trying on a Primo GrillSmoked and Spiced: A Red Hot Turkey DelightIf you’re a fan of bold flavors and a little kick of heat, this smoked and spiced turkey recipe is perfect for you. Start by preparing a dry rub with a blend of smoked paprika, chili powder, garlic powder, onion powder, brown sugar, salt, and black pepper. Generously coat the turkey with the rub, ensuring that every inch is covered. Let the turkey sit in the refrigerator for at least 2 hours, or overnight for maximum flavor infusion. Then, follow the smoking process outlined above for a turkey that is bursting with smoky and spicy goodness.
Sweet and Smoky: An Unforgettable Honey-Glazed Turkey FeastFor those with a sweet tooth, this honey-glazed turkey recipe is a must-try. Begin by preparing a glaze with a combination of honey, Dijon mustard, soy sauce, apple cider vinegar, and a pinch of cayenne pepper for a hint of heat. Brush the glaze all over the turkey, making sure to get into every nook and cranny. Smoke the turkey using the same process as before, and during the last hour of cooking, brush on additional glaze every 15 minutes. The result? A turkey that is perfectly sweet, smoky, and utterly unforgettable.
Herbed & Savory: A Mouthwatering Thyme-Garlic Smoked TurkeyFor a classic and herbaceous flavor profile, try this thyme-garlic smoked turkey recipe. Start by creating a marinade with fresh thyme, minced garlic, olive oil, lemon juice, salt, and black pepper. Place the turkey in a large ziplock bag and pour the marinade over it, ensuring that it is evenly coated. Allow the turkey to marinate in the refrigerator for at least 4 hours, or overnight. When it’s time to smoke the turkey, follow the same steps as before, and prepare to be amazed by the mouthwatering combination of thyme, garlic, and smoky goodness.
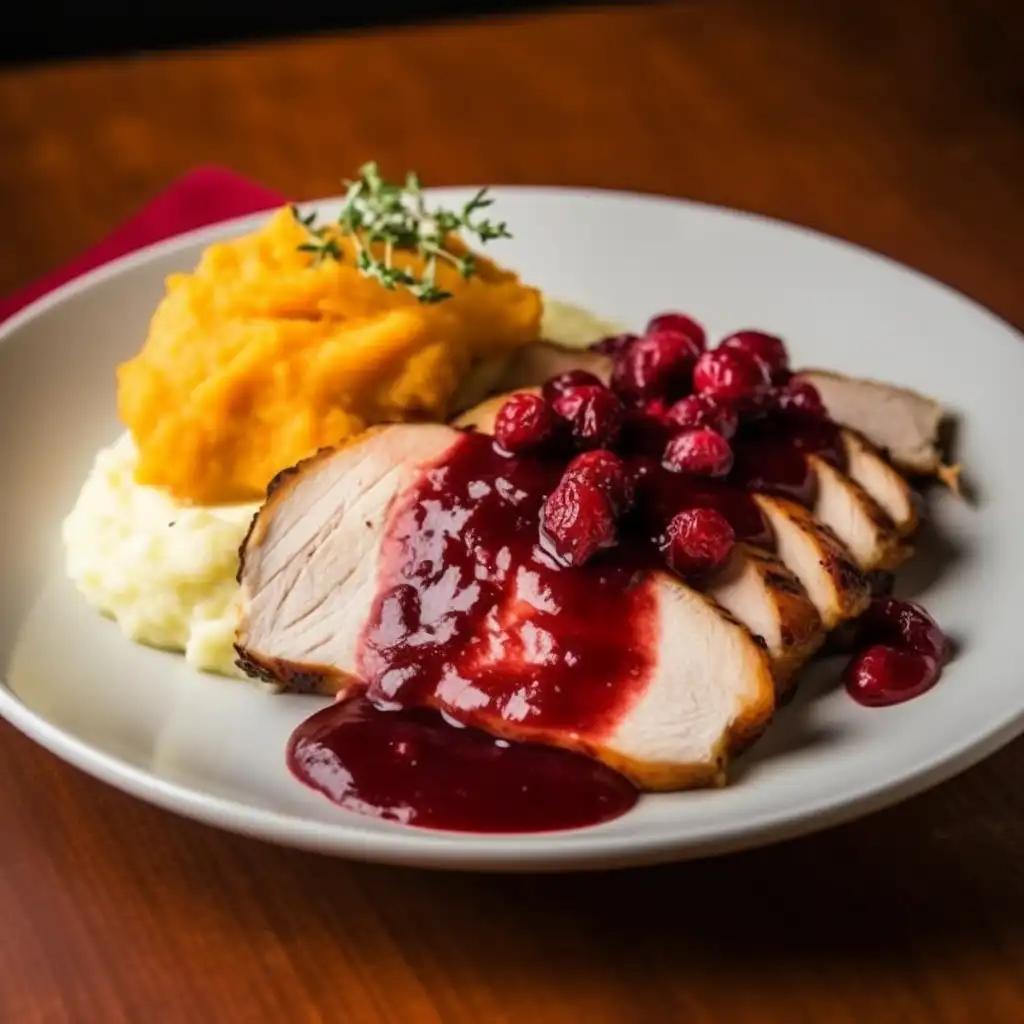
Tips for Perfect Grilling on a Primo GrillMaintaining the Right Temperature. One of the keys to successful grilling on a Primo Grill is maintaining the right temperature. Use the bottom and top vents to control the airflow and adjust the temperature accordingly. If the temperature starts to rise too high, partially close the vents to reduce the oxygen flow. On the other hand, if the temperature drops, open the vents wider to increase the airflow.Ensuring the Turkey is Properly Smoked. To ensure that your turkey is properly smoked, it’s important to monitor the smoke levels throughout the cooking process. Ideally, you want a thin, wispy smoke that imparts flavor without overpowering the meat. If you notice thick, billowing smoke, it’s a sign that the fire is not getting enough oxygen. Adjust the vents accordingly to achieve the perfect balance of smoke.The Art of Basting.Part 4: Special Pairings with Smoked Turkey You Should KnowBest Sides for Your Grilled TurkeyNo smoked turkey feast is complete without a selection of delicious sides. Consider serving up classics like creamy mashed potatoes, buttery cornbread, tangy cranberry sauce, and a crisp green salad. For an extra special touch, try grilling some seasonal vegetables, such as asparagus or sweet potatoes, to complement the smoky flavors of the turkey.
Drink Pairings that Elevate the Smoked Turkey TasteTo elevate the flavors of your smoked turkey, pair it with the perfect drink. A full-bodied red wine, such as a Cabernet Sauvignon or Syrah, will complement the rich and smoky flavors of the turkey. If you prefer something lighter, a crisp and refreshing white wine, like a Sauvignon Blanc or Chardonnay, will do the trick. And for those who prefer non-alcoholic options, a glass of apple cider or a sparkling water infused with citrus fruits will provide a refreshing contrast to the smoky flavors.
ConclusionYou’re now armed with the knowledge and recipes to embark on your Primo Grill smoked turkey adventure. Whether you choose to try the bold and spicy, sweet and smoky, or herbaceous and savory route, one thing is for sure – your taste buds are in for a treat. So fire up that Primo Grill, grab your apron, and get ready to impress your family and friends with a perfectly smoked turkey that will have them coming back for more.FAQsCan I use a different type of grill to smoke turkey?While it’s possible to smoke turkey on different types of grills, the Primo Grill offers unique benefits like precise temperature control and superior heat retention, which can greatly enhance the smoking process.How long does it take to smoke a turkey on a Primo Grill?The smoking time will vary depending on the size of the turkey, but as a general rule, you can expect it to take around 30 minutes per pound at a temperature of 225°F to 250°F.Can I use wood chips for smoking turkey on a Primo Grill?Yes, you can use wood chips to add additional flavor to your smoked turkey. Soak the wood chips in water for at least 30 minutes before adding them to the charcoal to create a smoky aroma.Should I brine the turkey before smoking it on a Primo Grill?Brining can help to enhance the flavor and juiciness of the turkey. Consider brining the turkey overnight in a solution of water, salt, sugar, and your choice of herbs and spices before smoking it on the Primo Grill.Can I smoke a turkey on a Primo Grill in cold weather?Yes, you can smoke a turkey on a Primo Grill in cold weather. However, keep in mind that colder temperatures may affect the cooking time, so it’s important to monitor the internal temperature of the turkey regularly.
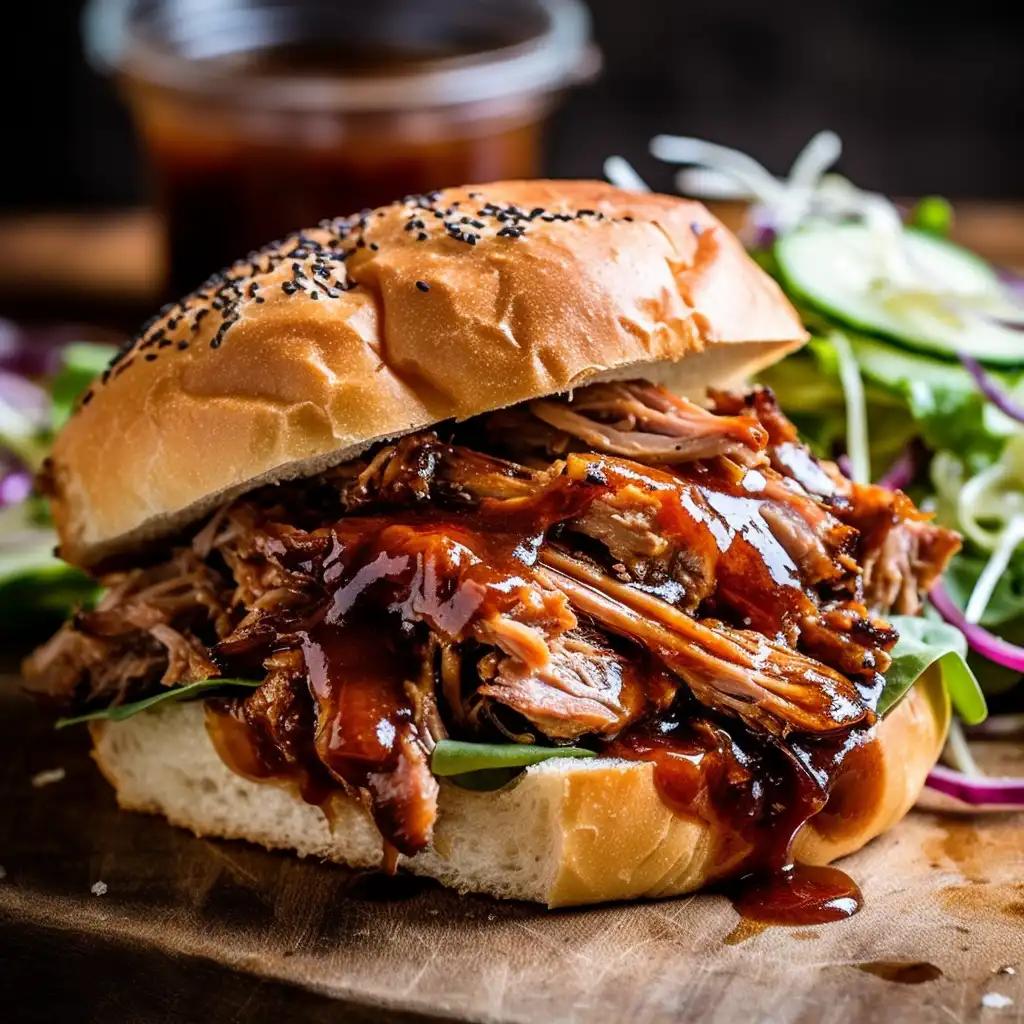
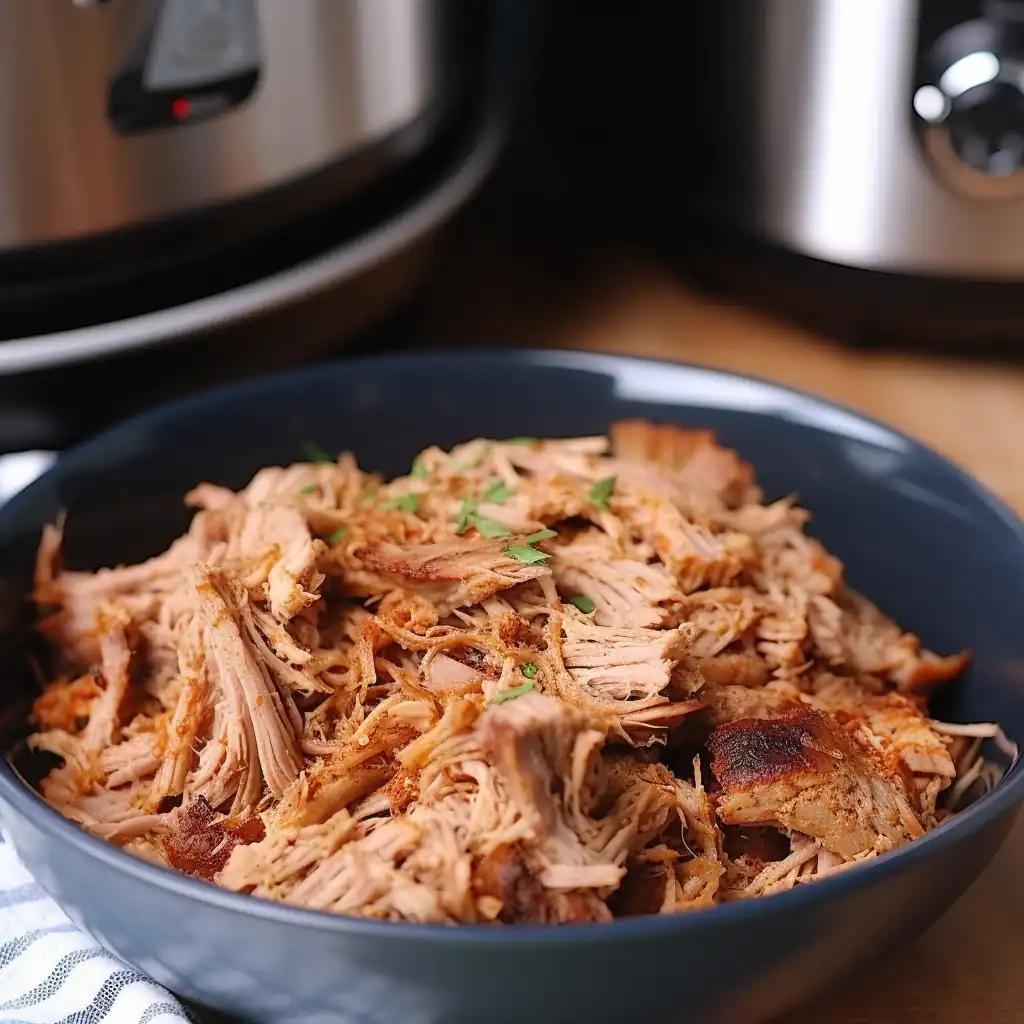
Ah, pulled pork – the succulent, flavorful meat that has captured the hearts (and taste buds) of people all around the world. Whether you’re a fan of slow-cooked barbecue or a lover of smoky grilled dishes, pulled pork is a dish that never fails to impress. But what’s the secret to achieving that mouthwatering tenderness and flavor? It all comes down to the cooking temperature.In the world of pulled pork, there are two main camps: those who swear by cooking at 225 degrees and those who prefer a slightly higher temperature of 275 degrees. Today, we’re going to dive deep into the great debate and explore the pros and cons of each method. So, grab your meat thermometer and let’s get cooking!Part 1: The Great Debate for Tender Pulled Pork: 225 or 275?When it comes to cooking pulled pork, the temperature you choose has a significant impact on the final product. Cooking at 225 degrees is often hailed as the traditional method, while 275 degrees is considered a more modern approach. Both temperatures have their merits, so let’s take a closer look at what sets them apart.Cooking at 225 degrees gives you the benefit of slow and steady cooking. This low temperature allows the collagen in the pork to break down slowly, resulting in an incredibly tender and juicy end product. Plus, cooking at a lower temperature gives the flavors more time to develop, resulting in a more complex and well-rounded taste. However, this slow-cooking method also means that it takes longer to cook the meat. You’ll need to plan ahead and set aside plenty of time for the magic to happen.On the other hand, cooking at 275 degrees offers a slightly faster cooking time, which can be a game-changer for those with less patience or a time crunch. The higher temperature helps to render the fat more quickly, resulting in a slightly crisper exterior. Additionally, cooking at a higher temperature can help to achieve a smokier flavor, as the meat spends less time in the smoker or on the grill. However, the higher heat can also increase the risk of the meat drying out if not careful.
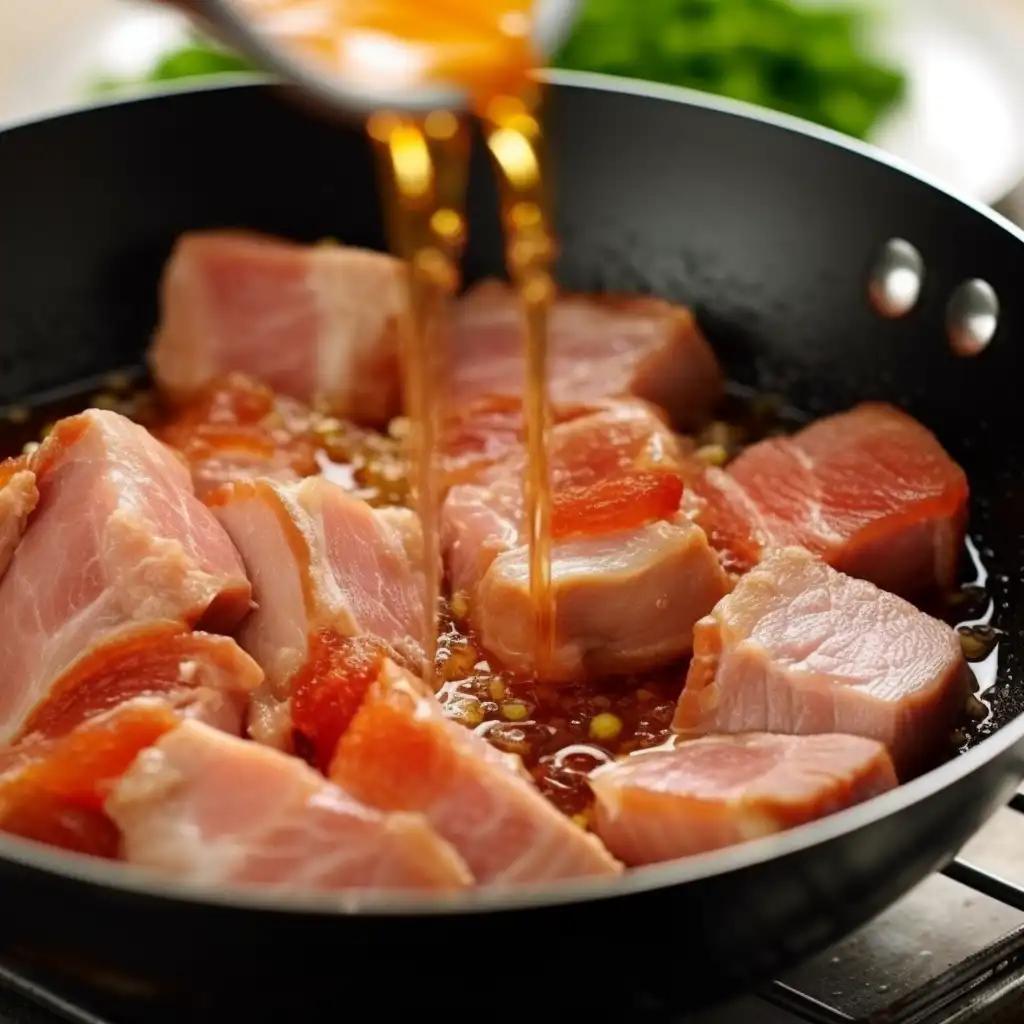
Part 2: Unraveling the Science behind Cooking TemperaturesNow that we’ve explored the differences between 225 and 275 degrees, let’s delve into the science behind these cooking temperatures. When you cook pulled pork at a low temperature like 225 degrees, the collagen in the meat slowly breaks down over time. This collagen is what gives meat its toughness, so by cooking it slowly, you’re allowing it to transform into gelatin, resulting in tender, melt-in-your-mouth pulled pork.On the other hand, cooking at a higher temperature like 275 degrees can still yield delicious results. The higher heat helps to break down the collagen more quickly, resulting in a slightly different texture. The meat may be slightly firmer and have a crisper exterior, while still remaining tender and juicy on the inside.Ultimately, the choice between 225 and 275 degrees comes down to personal preference. If you have the time and patience, cooking at 225 degrees will reward you with incredibly tender and flavorful pulled pork. But if time is of the essence or you prefer a slightly different texture, cooking at 275 degrees is a fantastic option.Sous Vide Pulled Pork: A Tribute to Temperature ControlBefore we dive into the specific recipes, let’s take a moment to appreciate the wonders of sous vide cooking. Sous vide is a French cooking technique that involves vacuum-sealing food in a bag and cooking it in a water bath at a precise temperature. This method allows for unparalleled temperature control, ensuring that your pulled pork is cooked to perfection every time.To make sous vide pulled pork, start by seasoning your pork shoulder with your favorite spices and herbs. Place it in a vacuum-sealed bag and cook it in a water bath set to 165 degrees Fahrenheit for 24 hours. Yes, you read that right – a whole day of slow, low-temperature cooking. The result? Fork-tender pulled pork that will make you question every other cooking method you’ve ever tried.Once the pork shoulder is done cooking, remove it from the bag and shred it using two forks. You can then add your favorite barbecue sauce or seasoning to enhance the flavor. If you prefer a crispier exterior, you can finish the pulled pork on a hot grill or under the broiler for a few minutes.Sous vide pulled pork is a game-changer, allowing you to achieve the perfect cooking temperature with ease. Plus, the long cooking time allows the flavors to meld together beautifully, resulting in a truly unforgettable dish.
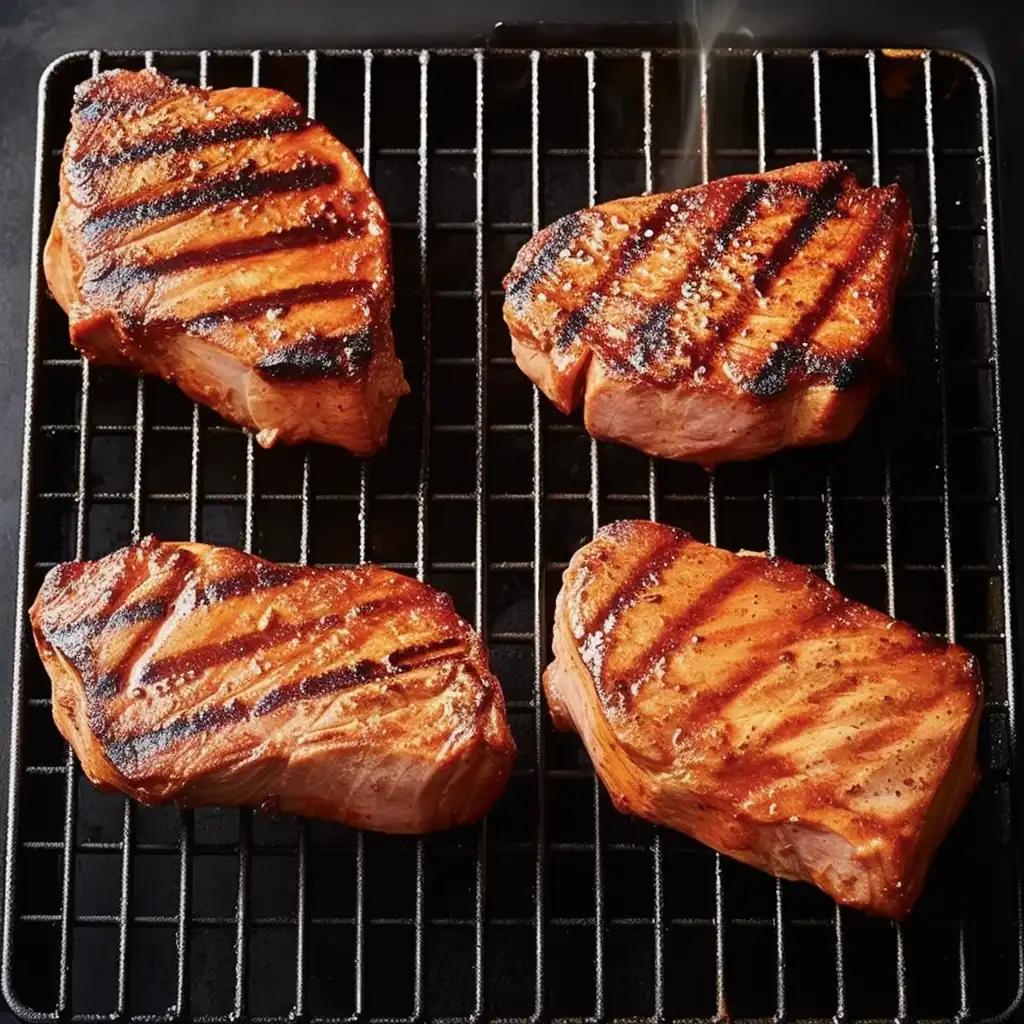
Part 3: The 225 Degree Magic: Slow and Steady Wins the TasteNow that we’ve covered sous vide pulled pork, let’s explore the slow and steady method of cooking at 225 degrees. This temperature is often favored by pitmasters and barbecue enthusiasts for its ability to produce incredibly tender and flavorful pulled pork. The low heat allows the meat to cook slowly, giving the collagen ample time to break down and create that signature melt-in-your-mouth texture.To make honey-glazed pulled pork at 225 degrees, start by preparing your pork shoulder. Rub it generously with a mixture of salt, black pepper, garlic powder, and paprika. Let the meat marinate in the refrigerator for at least 4 hours, or overnight for maximum flavor.When it’s time to cook, preheat your smoker or grill to 225 degrees Fahrenheit. Place the pork shoulder on the grate and let it cook for about 1 hour per pound, or until the internal temperature reaches 195-205 degrees Fahrenheit. Remember to use a meat thermometer to ensure accuracy.While the pork is cooking, you can prepare a simple honey glaze to complement the flavors. In a small saucepan, combine honey, apple cider vinegar, Dijon mustard, and a pinch of red pepper flakes. Heat the mixture over low heat until it becomes slightly thickened.Once the pork is done cooking, remove it from the smoker or grill and let it rest for 15-20 minutes. This allows the juices to redistribute and ensures a moist and tender end result. After the resting period, use two forks to shred the pork, discarding any excess fat. Drizzle the honey glaze over the shredded meat and toss to coat.The result? A mouthwatering plate of honey-glazed pulled pork that will have your taste buds singing. The slow and steady cooking method at 225 degrees allows the flavors to develop beautifully, resulting in a dish that is succulent, tender, and bursting with smoky goodness.
Preparation and Brining Tips for 225 Degree Pulled PorkBefore we move on to the next recipe, let’s take a moment to discuss some preparation and brining tips for cooking pulled pork at 225 degrees. These tips will help you achieve the best possible results and ensure that your meat is tender, flavorful, and moist.Choose the right cut of meat: When it comes to pulled pork, the ideal cut is a pork shoulder or pork butt. These cuts are well-marbled and contain enough fat to keep the meat moist during the long cooking process.Brine the meat: Brining is a process that involves soaking the meat in a saltwater solution before cooking. This helps to infuse the meat with flavor and ensures that it stays moist during the cooking process. To brine your pork shoulder, simply dissolve 1 cup of kosher salt and 1/2 cup of brown sugar in 1 gallon of water. Place the pork shoulder in the brine and refrigerate for at least 4 hours, or overnight.Use a flavor-infusing rub: A good rub can take your pulled pork to the next level. Mix together your favorite spices and herbs, such as paprika, garlic powder, onion powder, brown sugar, and black pepper. Rub the mixture all over the pork shoulder, making sure to get into all the nooks and crannies. Let the meat sit with the rub for at least 30 minutes before cooking to allow the flavors to penetrate.Maintain a consistent temperature: When cooking at 225 degrees, it’s important to maintain a consistent temperature throughout the entire cooking process. Fluctuations in temperature can result in uneven cooking and dry meat. Use a quality smoker or grill that allows for precise temperature control, and keep an eye on the thermometer to ensure it stays steady.By following these tips, you’ll be well on your way to achieving tender, flavorful pulled pork cooked at 225 degrees.
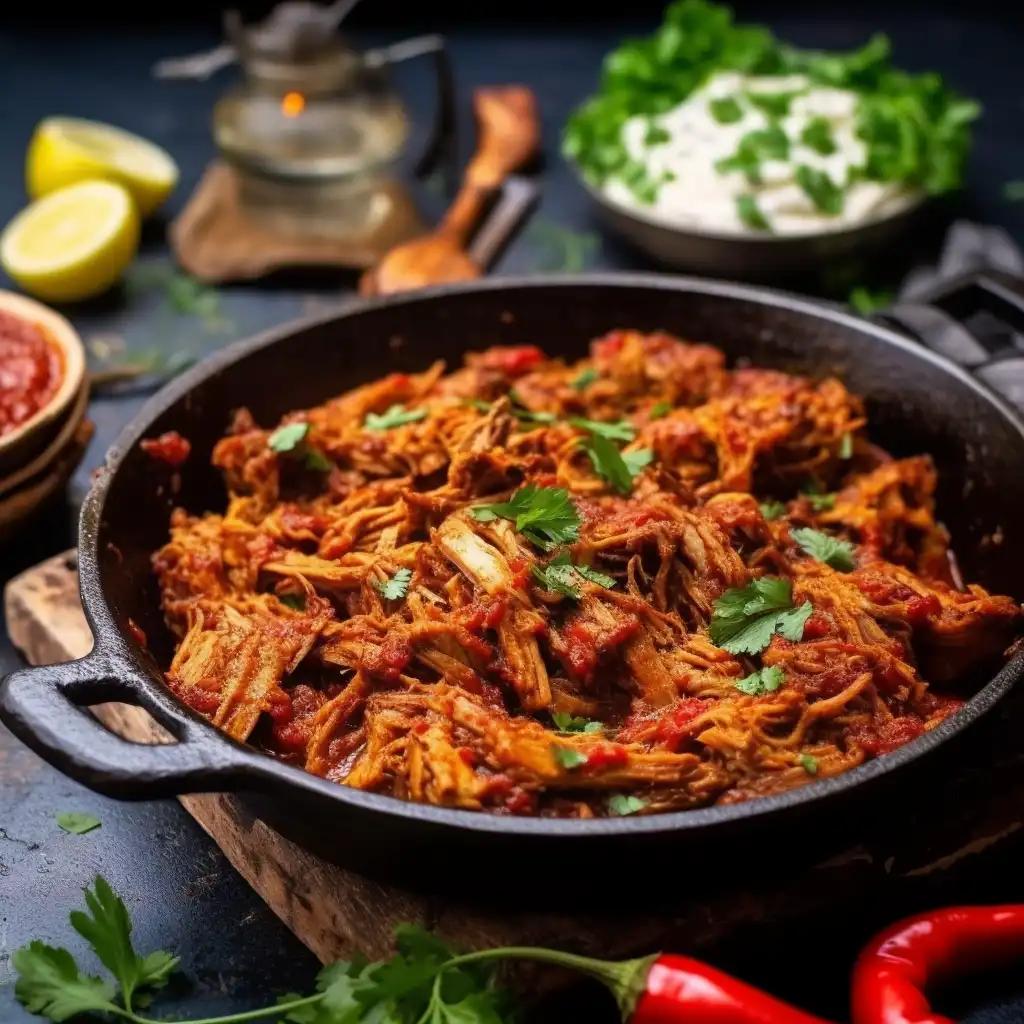
Part 4: The 275 Degree Heat: Spicy Paprika Pulled PorkNow that we’ve explored the slow and steady method at 225 degrees, let’s turn up the heat and explore the bolder flavors of cooking pulled pork at 275 degrees. This slightly higher temperature offers a faster cooking time and can result in a slightly different texture and flavor profile.To make spicy paprika pulled pork at 275 degrees, start by preparing a spice rub. In a small bowl, combine paprika, chili powder, cayenne pepper, brown sugar, salt, and black pepper. Mix well to combine.Rub the spice mixture all over the pork shoulder, making sure to cover every inch. Let the meat sit with the rub for at least 30 minutes to allow the flavors to penetrate.Preheat your smoker or grill to 275 degrees Fahrenheit. Place the pork shoulder on the grate and let it cook for about 45 minutes to 1 hour per pound, or until the internal temperature reaches 195-205 degrees Fahrenheit.While the pork is cooking, you can prepare a tangy barbecue sauce to complement the spicy flavors. In a saucepan, combine ketchup, apple cider vinegar, Worcestershire sauce, brown sugar, mustard, and a pinch of cayenne pepper. Heat the sauce over low heat until it thickens slightly.Once the pork is done cooking, remove it from the smoker or grill and let it rest for 15-20 minutes. This allows the juices to redistribute and ensures a moist and tender end result. After the resting period, use two forks to shred the pork, discarding any excess fat. Toss the shredded meat with the tangy barbecue sauce, coating it evenly.The result? A plate of spicy paprika pulled pork that packs a punch. The higher cooking temperature of 275 degrees helps to render the fat more quickly, resulting in a slightly crispier exterior. The spice rub adds a delicious kick, while the tangy barbecue sauce balances out the heat with its sweet and tangy flavors.
Sauce and Spice Rub Preparation for 275 Degree Pulled PorkBefore we move on to the next section, let’s take a moment to discuss the preparation of sauce and spice rub for cooking pulled pork at 275 degrees. These components play a crucial role in enhancing the flavors of the meat and creating a well-rounded and delicious end result.Spice rub: A good spice rub can take your pulled pork to the next level. Mix together your favorite spices and herbs, such as paprika, chili powder, cayenne pepper, brown sugar, salt, and black pepper. Adjust the amounts of each ingredient to suit your taste preferences. Rub the mixture all over the pork shoulder, making sure to get into all the nooks and crannies. Let the meat sit with the rub for at least 30 minutes before cooking to allow the flavors to penetrate.Barbecue sauce: A tangy barbecue sauce can add a burst of flavor to your pulled pork. In a saucepan, combine ketchup, apple cider vinegar, Worcestershire sauce, brown sugar, mustard, and any other seasonings you like, such as garlic powder or onion powder. Heat the sauce over low heat until it thickens slightly. Adjust the sweetness, tanginess, and spiciness to your liking.By preparing a flavorful spice rub and a tangy barbecue sauce, you’ll be able to elevate the flavors of your pulled pork cooked at 275 degrees.
Part 5: The Texture Balance: Understanding Moisture in Pulled PorkNow that we’ve explored the differences between 225 and 275 degrees, let’s take a moment to discuss the role of moisture in pulled pork. Moisture is a key component in achieving that perfect balance of tenderness and juiciness in your meat.When cooking pulled pork at 225 degrees, the slow and steady cooking process allows the meat to retain more moisture. The collagen in the pork breaks down slowly at this temperature, resulting in a more gelatinous texture that helps to trap the moisture inside. The result is incredibly tender and juicy pulled pork that practically melts in your mouth.On the other hand, cooking at 275 degrees can result in a slightly different texture. The higher heat helps to render the fat more quickly, resulting in a slightly crisper exterior. While this can add a nice textural contrast, it also means that the meat may be slightly drier compared to cooking at 225 degrees. To combat this, it’s important to choose a well-marbled cut of meat and to monitor the internal temperature closely to prevent overcooking.Ultimately, the choice between 225 and 275 degrees comes down to personal preference. If you prefer a more tender and juicy texture, cooking at 225 degrees is the way to go. But if you enjoy a slightly firmer texture with a crisper exterior, cooking at 275 degrees can deliver fantastic results.As the Smoke Rolls: Cooking Pulled Pork at Variable TemperaturesNow that we’ve explored the benefits of cooking pulled pork at 225 and 275 degrees, let’s dive into the concept of cooking at variable temperatures over time. This method involves starting the cooking process at a lower temperature and then gradually increasing the heat to finish the meat. The result is a combination of tenderness, smokiness, and complex flavors.To make smoky mesquite pulled pork with temperature transition, start by preparing a marinade for your pork shoulder. In a bowl, combine olive oil, apple cider vinegar, Worcestershire sauce, brown sugar, garlic powder, onion powder, smoked paprika, mesquite seasoning, salt, and black pepper. Mix well to combine.Place the pork shoulder in a large resealable bag and pour the marinade over it. Seal the bag and refrigerate for at least 4 hours, or overnight for maximum flavor.When it’s time to cook, preheat your smoker or grill to 225 degrees Fahrenheit. Remove the pork shoulder from the marinade and place it on the grate. Let it cook at 225 degrees for the first 3-4 hours, allowing the flavors to develop and the collagen to break down.After the initial cooking period, increase the temperature to 275 degrees Fahrenheit. Continue cooking the pork shoulder until the internal temperature reaches 195-205 degrees Fahrenheit, or until the meat is tender and easily shreds with a fork.While the pork is cooking, you can prepare a smoky mesquite barbecue sauce to complement the flavors. In a saucepan, combine ketchup, apple cider vinegar, brown sugar, smoked paprika, mesquite seasoning, and a pinch of cayenne pepper. Heat the sauce over low heat until it thickens slightly.Once the pork is done cooking, remove it from the smoker or grill and let it rest for 15-20 minutes. This allows the juices to redistribute and ensures a moist and tender end result. After the resting period, use two forks to shred the pork, discarding any excess fat. Toss the shredded meat with the smoky mesquite barbecue sauce, coating it evenly.The result? A plate of smoky mesquite pulled pork that combines the best of both worlds – the tenderness and flavor development of slow-cooking at 225 degrees, and the slightly crisper exterior and smoky flavor of cooking at 275 degrees. The temperature transition allows for a more complex flavor profile and creates a truly unique and delicious dish.Marination and Temperature Transition Tips for Variable Temperature Pulled PorkBefore we move on to the conclusion, let’s take a moment to discuss some marination and temperature transition tips for cooking pulled pork at variable temperatures. These tips will help you achieve the best possible results and ensure that your meat is tender, flavorful, and perfectly cooked.Marination: Marinating your pork shoulder before cooking is a great way to infuse it with flavor and enhance the taste. Be sure to choose a marinade that complements the flavors of the meat and contains a balance of acidic, sweet, and savory elements. Let the meat marinate for at least 4 hours, or overnight for maximum flavor penetration.Temperature transition: When transitioning from one temperature to another during cooking, it’s important to do so gradually. Sudden changes in temperature can result in uneven cooking and dry meat. Increase the temperature by 25-50 degrees at a time and allow the meat to adjust before making the next temperature change. This will ensure that the meat cooks evenly and retains its moisture.By following these tips, you’ll be able to achieve perfectly marinated and cooked pulled pork with a unique flavor profile.
ConclusionIn the world of pulled pork, the temperature you choose can make all the difference. Whether you opt for the slow and steady method at 225 degrees or the slightly higher heat of 275 degrees, both temperatures offer their own unique benefits and flavors.Cooking pulled pork at 225 degrees allows for slow and gradual collagen breakdown, resulting in tender and juicy meat that practically melts in your mouth. The low temperature also allows the flavors to develop more fully, resulting in a complex and well-rounded taste.On the other hand, cooking at 275 degrees offers a faster cooking time and can result in a slightly firmer texture with a crisper exterior. The higher heat helps to render the fat more quickly, resulting in a smokier flavor and a slightly different flavor profile.Ultimately, the choice between 225 and 275 degrees comes down to personal preference. Whether you prefer the slow and steady approach or the slightly bolder flavors of higher heat, experimenting with different temperatures is part of the joy of cooking pulled pork. So, grab your smoker or grill, fire it up to your preferred temperature, and let the magic happen.FAQsCan I cook pulled pork at a higher temperature like 300 degrees?While you can certainly cook pulled pork at a higher temperature like 300 degrees, it’s important to keep in mind that the higher heat can result in a faster cooking time and a slightly different texture. The meat may be slightly drier compared to cooking at lower temperatures. If you choose to cook at 300 degrees, be sure to monitor the internal temperature closely to prevent overcooking.How long does it take to cook pulled pork at 225 degrees?The cooking time for pulled pork at 225 degrees can vary depending on the size of the meat. As a general rule of thumb, you can estimate about 1 hour per pound of meat. However, it’s always best to rely on a meat thermometer to determine when the pork is done. The internal temperature should reach 195-205 degrees Fahrenheit for perfectly tender pulled pork.Can I brine the pork shoulder overnight before cooking at 275 degrees?Yes, you can definitely brine the pork shoulder overnight before cooking at 275 degrees. Brining helps to infuse the meat with flavor and keep it moist during the cooking process. Simply dissolve 1 cup of kosher salt and 1/2 cup of brown sugar in 1 gallon of water, and let the pork shoulder soak in the brine overnight in the refrigerator.Can I combine the slow and steady method with the temperature transition method?Absolutely! Combining different cooking methods can result in unique and delicious flavors. To combine the slow and steady method with the temperature transition method, you can start by cooking the pork shoulder at 225 degrees for the first few hours to allow the flavors to develop. Then, increase the temperature to 275 degrees to finish the cooking process. This can result in a combination of tenderness, smokiness, and complex flavors.Can I use a gas grill instead of a smoker to cook pulled pork at 225 or 275 degrees?Yes, you can use a gas grill instead of a smoker to cook pulled pork at 225 or 275 degrees. Gas grills offer precise temperature control, making them a great option for slow-cooking meats like pulled pork. Simply adjust the burners to achieve the desired temperature and follow the same cooking method as you would with a smoker. Just be sure to monitor the internal temperature of the meat to ensure it cooks evenly and reaches the desired doneness.
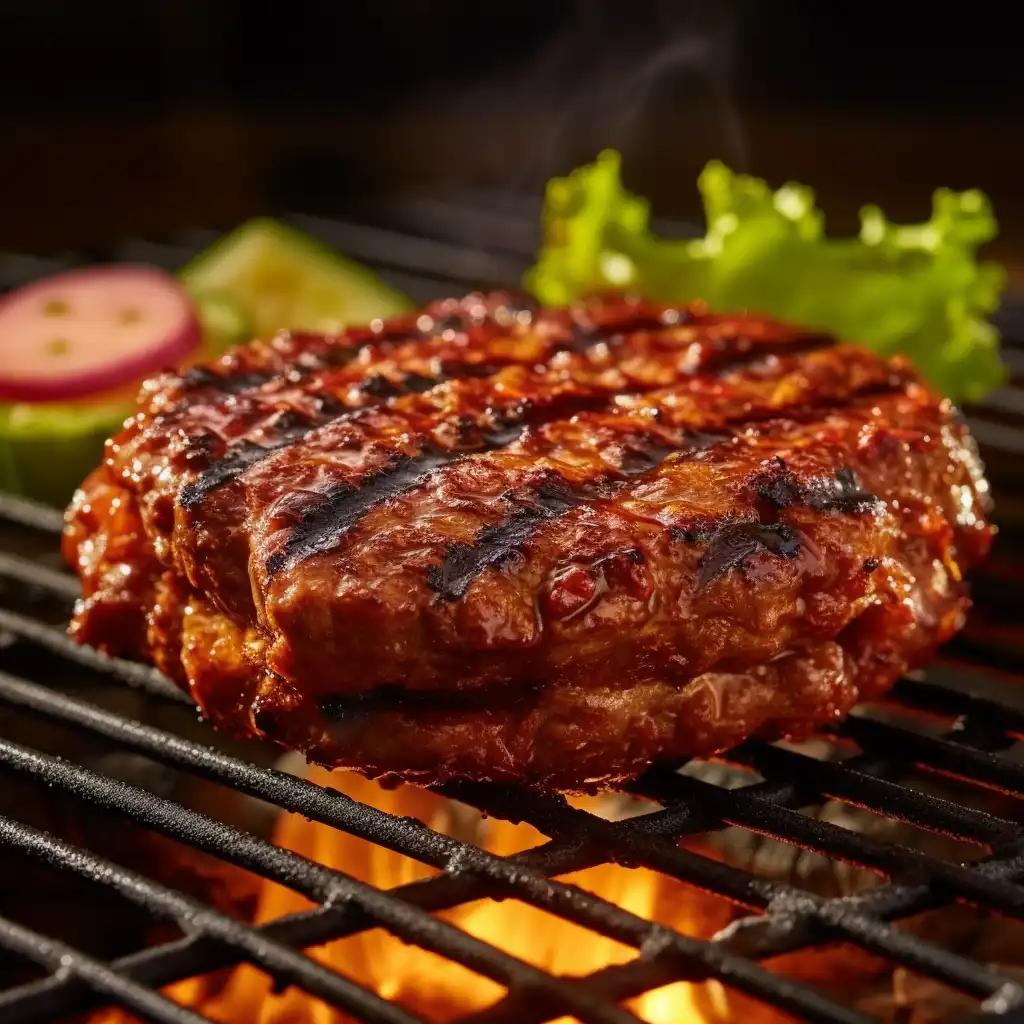
Welcome to the sizzling world of barbecue smash burgers on grill grates! If you’re a fan of juicy, flavorful burgers with a deliciously crispy crust, then you’re in for a treat. In this article, we’ll dive deep into the culture of barbecue smash burgers and explore the techniques and recipes that will help you create mouthwatering burgers on your grill grates. So, fire up your grill and get ready to elevate your burger game to a whole new level!Part 1: Why BBQ Smash Burger on Grill GratesBefore we get started, let’s talk about the importance of quality grill grates. Grill grates play a crucial role in achieving that perfect crust on your barbecue smash burgers. They provide even heat distribution, prevent sticking, and give those beautiful grill marks that make your burgers look and taste amazing.When it comes to choosing grill grates, there are a few options to consider. Cast iron grates are known for their excellent heat retention and even cooking. Stainless steel grates are durable and resistant to rust, making them a popular choice among grill enthusiasts. Whichever type you choose, make sure they are well-maintained and clean to ensure the best cooking experience.Beginners Guide to Barbecue Smash BurgersNow that we have our grill grates ready, let’s dive into the basics of making a classic barbecue smash burger. The beauty of a smash burger lies in its simplicity. With just a few key ingredients, you can create a mouthwatering burger that will have your taste buds dancing.
Part 2: Advanced Techniques for Barbecue Smash Burgers on Grill GratesNow that you’ve mastered the basics of barbecue smash burgers, let’s take it up a notch with some advanced techniques to elevate your burger game even further.Mastering the “Smash” for a Perfect BurgerThe key to achieving a perfect crust on your smash burger lies in the art of the “smash.” This technique involves pressing the ball of ground beef onto the grill grates with enough force to create a thin patty. The goal is to maximize the contact between the meat and the hot grates, resulting in a deliciously crispy exterior.To achieve the perfect smash, make sure your grill grates are preheated to the right temperature. A medium-high heat works well for most burgers. Use a burger press or a sturdy spatula to press down firmly on the ball of ground beef. Be careful not to press too hard, as this can cause the patty to become too thin and dry out.Smash Burgers Skillful Grate Handling TipsGrill grate handling is an art that can make a significant difference in the outcome of your barbecue smash burgers. Here are some tips to help you handle your grill grates like a pro:Keep your grill grates clean: Before and after grilling, make sure to clean your grill grates thoroughly to prevent any residue from sticking to your burgers.Oil your grates: To prevent sticking, lightly oil your grill grates before placing your patties on them. This will also help create a beautiful sear on your burgers.Use indirect heat: If you’re cooking thicker burgers or want to melt the cheese on top, consider using indirect heat. This involves placing the patties on one side of the grill and cooking them with the lid closed. This will ensure that the burgers cook evenly without burning.Avoid excessive flipping: Flipping your burgers too often can lead to uneven cooking and loss of juiciness. Ideally, flip your burgers only once, allowing them to develop a nice crust on one side before flipping.Making the Most of your Grill GratesTo keep your grill grates in top condition and ensure the best cooking experience, it’s essential to know how to maintain and clean them properly. Here are some tips to help you make the most of your grill grates:After each use, brush your grill grates with a grill brush to remove any food particles or residue. This will prevent buildup and ensure a clean surface for your next grilling session.For a more thorough cleaning, soak your grill grates in warm soapy water and scrub them with a sponge or grill brush. Rinse them thoroughly and allow them to dry before using them again.If your grill grates are cast iron, make sure to season them regularly to prevent rust and maintain their non-stick properties. To season your grill grates, coat them with a thin layer of oil and heat them on the grill until the oil starts to smoke. Remove them from the grill and let them cool before using.If you notice any rust or corrosion on your grill grates, use a wire brush or sandpaper to remove it. Once the rust is removed, season your grates to prevent future rusting.
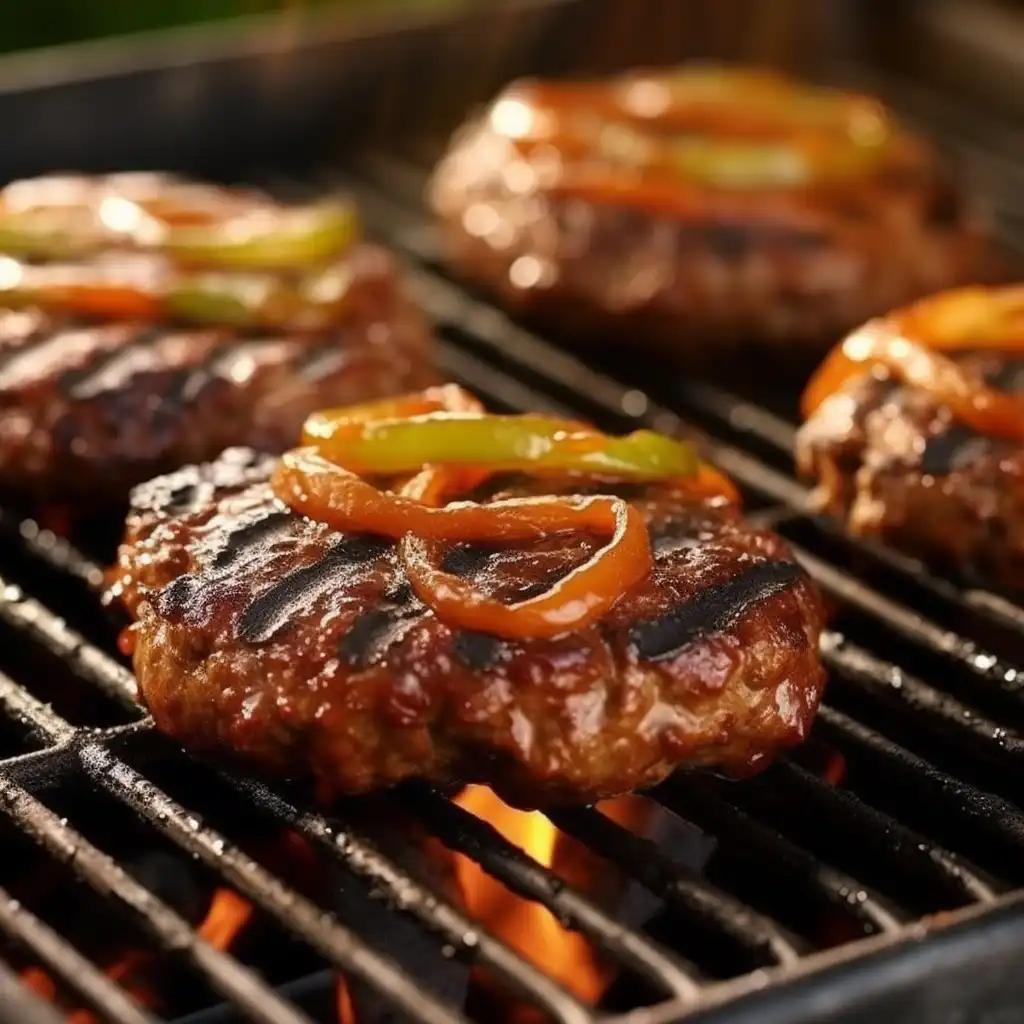
Part 3: 3 Simple Recipes for BBQ Smash Burger on Grill GratesRecipe 1: Classic BBQ Smash BurgerIngredients:- 1 pound ground beef (80% lean, 20% fat)- Salt and pepper to taste- Hamburger buns- Cheese slices (optional)- Condiments and toppings of your choice (lettuce, tomato, onions, pickles, etc.)Instructions:1. Preheat your grill to medium-high heat.2. Divide the ground beef into equal portions and shape them into balls.3. Season each ball with salt and pepper.4. Place a ball of ground beef onto the heated grill grates and immediately smash it down using a burger press or a sturdy spatula.5. Cook for 2-3 minutes, then flip the patty and cook for an additional 2-3 minutes.6. If desired, add a slice of cheese to the patty during the last minute of cooking.7. Remove the patties from the grill and let them rest for a few minutes.8. Assemble your burgers by placing the patties on the buns and adding your favorite condiments and toppings.9. Serve and enjoy!
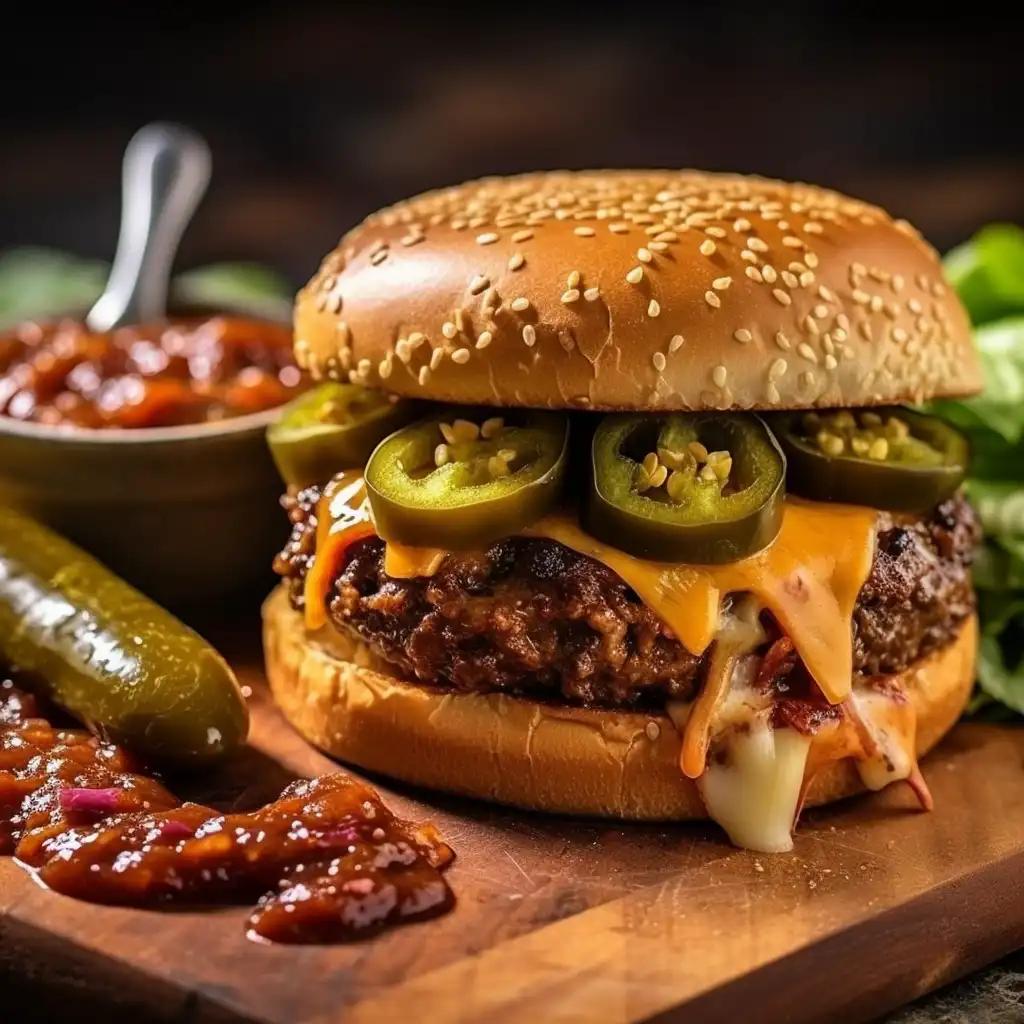
Recipe 2: Sensational Jalapeno Cheddar BBQ Smash BurgerIngredients:- 1 pound ground beef (80% lean, 20% fat)- Salt and pepper to taste- Hamburger buns- Jalapeno slices- Cheddar cheese slices- Condiments and toppings of your choice (lettuce, tomato, onions, etc.)Instructions:1. Preheat your grill to medium-high heat.2. Divide the ground beef into equal portions and shape them into balls.3. Season each ball with salt and pepper.4. Place a ball of ground beef onto the heated grill grates and immediately smash it down using a burger press or a sturdy spatula.5. Cook for 2-3 minutes, then flip the patty and cook for an additional 2-3 minutes.6. During the last minute of cooking, add a slice of cheddar cheese on top of the patty to melt.7. Remove the patties from the grill and let them rest for a few minutes.8. Assemble your burgers by placing the patties on the buns, adding jalapeno slices, and any other condiments and toppings you desire.9. Serve and enjoy the spicy, cheesy goodness!
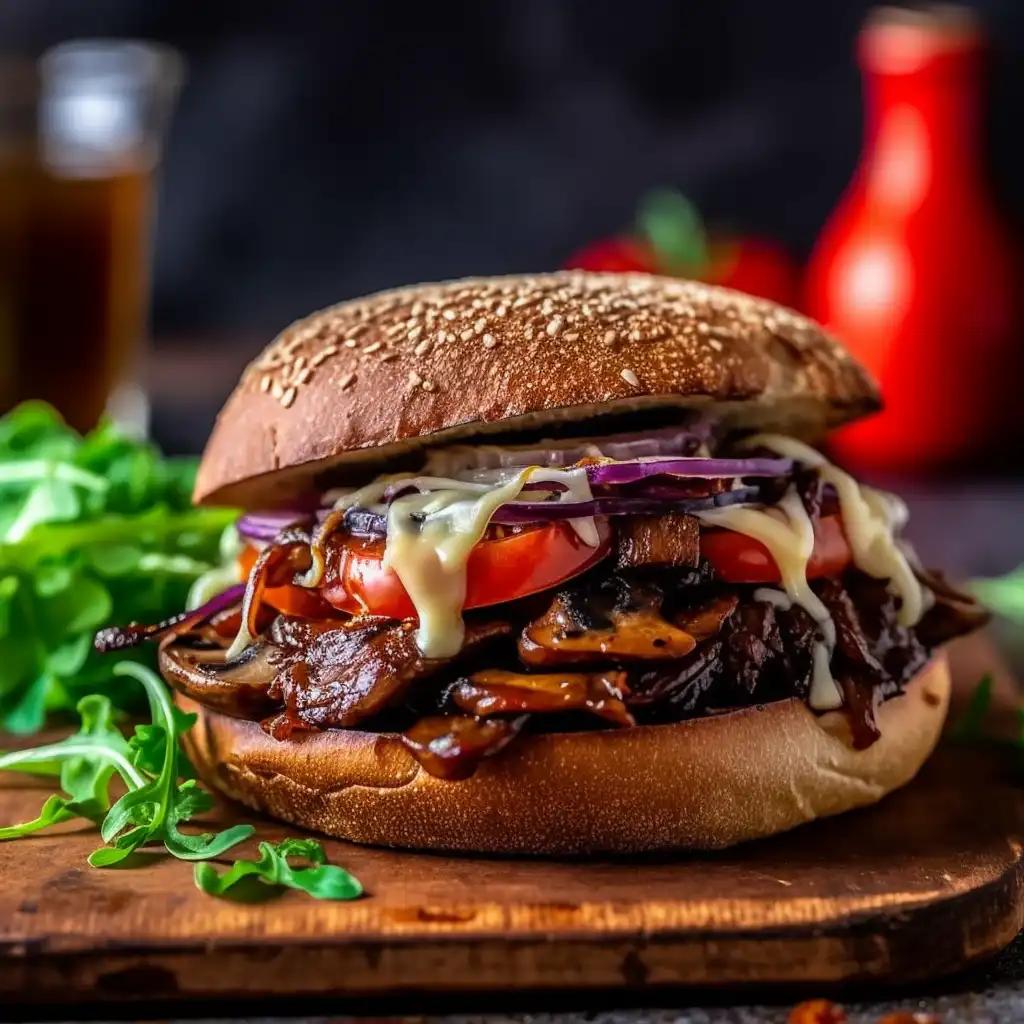
Recipe 3: Ultimate Portobello Mushroom BBQ Smash BurgerIngredients:- 2 large portobello mushrooms, stems removed- 2 tablespoons balsamic vinegar- 2 tablespoons olive oil- Salt and pepper to taste- Hamburger buns- Swiss cheese slices- Condiments and toppings of your choice (lettuce, tomato, onions, etc.)Instructions:1. Preheat your grill to medium-high heat.2. In a small bowl, whisk together the balsamic vinegar, olive oil, salt, and pepper.3. Brush the portobello mushrooms with the balsamic mixture on both sides.4. Place the mushrooms on the heated grill grates, gill side down.5. Cook for 4-5 minutes, then flip the mushrooms and cook for an additional 4-5 minutes.6. During the last minute of cooking, add a slice of Swiss cheese on top of each mushroom to melt.7. Remove the mushrooms from the grill and let them rest for a few minutes.8. Assemble your burgers by placing the mushrooms on the buns, adding any condiments and toppings you desire.9. Serve and enjoy the meaty, flavorful goodness of this vegetarian smash burger!
ConclusionBarbecue smash burgers on grill grates are a delicious and satisfying way to enjoy a classic favorite with a twist. The combination of the crispy crust, juicy patty, and flavorful toppings is sure to leave you craving more. So, fire up your grill, gather your favorite ingredients, and get ready to embark on a mouthwatering culinary adventure. Remember, the art of barbecue is all about experimentation and discovering new flavors, so don’t be afraid to get creative and make these recipes your own. Happy grilling!FAQsCan I use different types of meat for smash burgers?While beef is the traditional choice, you can experiment with other meats like turkey, chicken, or even plant-based options for unique flavors.What toppings go well with BBQ smash burgers?Classic toppings like cheese, lettuce, tomato, onions, pickles, and condiments work well. Feel free to get creative with your favorite burger fixings.What type of meat is best for smash burgers?Ground beef with a higher fat content, around 80% lean, is ideal for achieving the juiciness and flavor characteristic of smash burgers.
Introductory Trimmings: Understanding Bonafide Chili SeasoningBonafide Chili Seasoning has taken the culinary world by storm, adding a burst of flavor to countless dishes. But what makes this seasoning so special? In this in-depth review, we’ll take a deep dive into the tastes, aromas, and ingredients that make Bonafide Chili Seasoning a must-have in your pantry. Get ready to tantalize your taste buds and discover new chili recipes that will leave you craving for more.The Journey of Bonafide Chili SeasoningBonafide Chili Seasoning was born out of a passion for bold flavors and a love for chili. Its creators, a team of seasoned chefs and spice enthusiasts, embarked on a mission to craft the perfect blend of spices that would elevate any chili dish to new heights. After countless hours of experimentation and taste testing, they finally struck gold with Bonafide Chili Seasoning.What Sets Bonafide Chili Seasoning Apart?What sets Bonafide Chili Seasoning apart from other chili seasonings on the market is its meticulous blend of spices. Each ingredient is carefully selected and blended in just the right proportions to create a harmonious symphony of flavors. From the smoky heat of chipotle to the earthy depth of cumin, every bite of chili seasoned with Bonafide Chili Seasoning is a delight for the taste buds.Unboxing the Flavor Profile: Bonafide Chili SeasoningThe Taste Test: Unveiling the Superstar of SeasoningsWhen it comes to taste, Bonafide Chili Seasoning delivers in spades. It strikes the perfect balance between savory and spicy, with a hint of sweetness that rounds out the flavor profile. The combination of spices creates a complex and robust taste that will leave you wanting more. Whether you prefer mild or fiery chili, Bonafide Chili Seasoning can be tailored to your desired level of heat, making it suitable for all chili lovers.Respecting the Heat: Analyzing Bonafide Chili Seasoning’s KickOne of the hallmarks of a great chili seasoning is its ability to bring the heat. Bonafide Chili Seasoning does not disappoint in this regard. It packs a punch without overwhelming the palate, allowing the other flavors to shine through. The heat builds gradually, intensifying with each bite, creating a chili experience that is both satisfying and exhilarating. So whether you’re a spice aficionado or someone who prefers a milder chili, Bonafide Chili Seasoning has got you covered.Nose Dive Into Aromas: Bonafide Chili SeasoningProfiling the Aromatic Intricacies of Bonafide Chili SeasoningThe aroma of a dish is often the first thing that entices us, and Bonafide Chili Seasoning knows how to make a grand entrance. As soon as you open the jar, you’re greeted with a captivating blend of fragrances that will transport you to a Tex-Mex kitchen. The smoky notes of paprika mingle with the warm, earthy scent of cumin, while the hint of sweetness from brown sugar adds a touch of allure. The combination of aromas is a sensory delight that will awaken your appetite and set the stage for a truly memorable chili experience.Aroma Variation: Comparison with Other Popular BrandsWhile Bonafide Chili Seasoning stands out in terms of aroma, it’s always interesting to compare it with other popular brands. In a blind sniff test, Bonafide Chili Seasoning emerges as the clear winner, with a more complex and inviting aroma. Some other brands may have a more one-dimensional smell, lacking the depth and intrigue that Bonafide Chili Seasoning offers. So if you’re looking to elevate your chili game, there’s no doubt that Bonafide Chili Seasoning is the way to go.Deconstructing Bonafide Chili Seasoning: Ingredients BreakdownThe Composition of This Flavorful MasterpieceThe secret to Bonafide Chili Seasoning’s success lies in its carefully selected ingredients. Let’s take a closer look at what makes this seasoning so special:
Chili powder: Adds a rich, smoky flavor and a hint of heat.
Cumin: Provides an earthy and slightly nutty taste.
Paprika: Brings a smoky and sweet flavor to the mix.
Garlic powder: Enhances the savory profile of the seasoning.
Onion powder: Adds a subtle sweetness and depth of flavor.
Brown sugar: Balances out the heat with a touch of sweetness.
Salt: Enhances the overall taste and brings out the flavors of the other ingredients.
Black pepper: Adds a mild heat and a peppery kick.
Health Considerations: Assessing Bonafide Chili Seasoning’s NutritionWhen it comes to health considerations, Bonafide Chili Seasoning is a winner. It is gluten-free, vegan, and does not contain any artificial additives or preservatives. It’s also low in sodium, making it a healthier alternative to some other chili seasonings on the market. However, like any seasoning, moderation is key. So while Bonafide Chili Seasoning can add a burst of flavor to your dishes, it’s important to use it in moderation and balance it with other nutritious ingredients.Exclusive Chili Recipes Featuring Bonafide Chili SeasoningNow that we’ve explored the wonders of Bonafide Chili Seasoning, it’s time to put it to good use with some delicious chili recipes. These recipes are guaranteed to showcase the full potential of this seasoning and leave you craving for more.Traditional Bonafide Chili – A Classic DelightIngredients: – 1 lb ground beef – 1 onion, diced – 2 cloves garlic, minced – 2 cans (14 oz) diced tomatoes – 1 can (15 oz) kidney beans, drained and rinsed – 2 tablespoons Bonafide Chili Seasoning – Salt and pepper to tasteInstructions: 1. In a large pot, brown the ground beef over medium heat until fully cooked. Drain any excess fat. 2. Add the diced onion and minced garlic to the pot and sauté until the onion is translucent. 3. Stir in the diced tomatoes, kidney beans, and Bonafide Chili Seasoning. Season with salt and pepper to taste. 4. Bring the chili to a simmer and let it cook for 30 minutes to allow the flavors to meld together. 5. Serve the chili hot with your favorite toppings, such as shredded cheese, sour cream, and chopped green onions.Bonafide Chili Infused Cheddar Cornbread – A Rustic EnsembleIngredients: – 1 cup cornmeal – 1 cup all-purpose flour – 1 tablespoon baking powder – 1 teaspoon salt – 1/4 cup sugar – 1 cup buttermilk – 1/4 cup melted butter – 2 eggs – 1 cup shredded cheddar cheese – 2 tablespoons Bonafide Chili SeasoningInstructions: 1. Preheat your oven to 400°F (200°C) and grease a 9-inch square baking dish. 2. In a large bowl, whisk together the cornmeal, flour, baking powder, salt, and sugar. 3. In a separate bowl, whisk together the buttermilk, melted butter, and eggs. 4. Add the wet ingredients to the dry ingredients and stir until just combined. 5. Fold in the shredded cheddar cheese and Bonafide Chili Seasoning. 6. Pour the batter into the prepared baking dish and smooth the top. 7. Bake for 20-25 minutes, or until a toothpick inserted into the center comes out clean. 8. Allow the cornbread to cool for a few minutes before serving. Cut into squares and enjoy with a bowl of chili.Bonafide Southwestern Chicken Chili – A Hearty EnsembleIngredients: – 1 lb boneless, skinless chicken breasts, cubed – 1 onion, diced – 1 red bell pepper, diced – 1 green bell pepper, diced – 2 cloves garlic, minced – 1 can (14 oz) diced tomatoes – 1 can (15 oz) black beans, drained and rinsed – 1 can (15 oz) corn, drained – 2 tablespoons Bonafide Chili Seasoning – Salt and pepper to taste – Fresh cilantro, chopped (for garnish)Instructions: 1. Heat a tablespoon of oil in a large pot or Dutch oven over medium heat. Add the chicken and cook until browned on all sides. Remove the chicken from the pot and set aside. 2. In the same pot, add the diced onion, red bell pepper, green bell pepper, and minced garlic. Sauté until the vegetables are tender. 3. Stir in the diced tomatoes, black beans, corn, and Bonafide Chili Seasoning. Season with salt and pepper to taste. 4. Return the chicken to the pot and bring the chili to a simmer. Cover and let it cook for 20-25 minutes, or until the chicken is cooked through and tender. 5. Serve the chili hot, garnished with fresh cilantro. Enjoy with a side of cornbread or rice.The Art of Seasoning: Optimizing Bonafide Chili Seasoning in Your RecipesPro Tips: Understanding the Magic RatioWhile Bonafide Chili Seasoning is a flavor powerhouse on its own, it can also be combined with other spices to create a custom blend that suits your taste preferences. Experiment with different ratios of Bonafide Chili Seasoning to other spices like oregano, smoked paprika, or cayenne pepper to create your signature chili seasoning. Start with a 1:1 ratio and adjust to your liking. Remember, the key is to find the perfect balance of flavors that brings out the best in your chili.How to Store Bonafide Chili Seasoning for LongevityTo ensure the longevity of Bonafide Chili Seasoning, it’s important to store it properly. The best way to store this seasoning is in an airtight container in a cool, dry place away from direct sunlight. This will help preserve the flavors and keep the seasoning fresh for longer. Avoid storing it near the stove or other sources of heat, as exposure to heat and moisture can cause the spices to lose their potency. With proper storage, Bonafide Chili Seasoning will continue to add a burst of flavor to your dishes for months to come.A Step Beyond Tasting: Buying the Bonafide Chili SeasoningPlatform Review: Best Places to Buy Bonafide Chili SeasoningWhen it comes to buying Bonafide Chili Seasoning, you have a few options. You can purchase it directly from the official Bonafide Chili Seasoning website, where you’ll find the freshest product and often exclusive deals. Another option is to check your local grocery stores or specialty spice shops. Many online retailers also carry Bonafide Chili Seasoning, so you can conveniently order it from the comfort of your own home. No matter where you choose to buy it, make sure to check the expiration date and ensure that you’re purchasing the authentic Bonafide Chili Seasoning.Reading the Label: Ensuring Authentic Bonafide Chili Seasoning PurchaseTo ensure that you’re purchasing authentic Bonafide Chili Seasoning, it’s important to read the label carefully. Look for the Bonafide Chili Seasoning logo and branding on the packaging. Check the ingredients list to make sure it matches the composition mentioned earlier in this review. Avoid purchasing any seasoning that contains artificial additives, preservatives, or fillers. If you’re unsure about the authenticity of the product, reach out to the manufacturer or the official Bonafide Chili Seasoning website for clarification. Remember, authentic Bonafide Chili Seasoning is the key to unlocking the full potential of your chili dishes.Conclusion: A Recap of Bonafide Chili Seasoning Review and RecipesIn conclusion, Bonafide Chili Seasoning is a true gem in the world of spices. Its carefully crafted blend of flavors and aromas elevates any chili dish to new heights. Whether you’re a fan of mild or spicy chili, Bonafide Chili Seasoning can be tailored to suit your taste preferences. With its high-quality ingredients and health considerations, it’s a seasoning that you can feel good about using in your cooking.We also explored three exclusive chili recipes that were designed to showcase the full potential of Bonafide Chili Seasoning. From the classic traditional chili to the rustic cheddar cornbread and the hearty Southwestern chicken chili, these recipes are sure to impress your family and friends.So why wait? Embark on a culinary adventure with Bonafide Chili Seasoning and discover a world of bold flavors and savory delights. Your taste buds will thank you!FAQs (Frequently Asked Questions)1. Is Bonafide Chili Seasoning spicy? Yes, Bonafide Chili Seasoning does have a kick to it, but it can be customized to your desired level of heat. Start with a smaller amount and gradually add more if you prefer a spicier chili.2. Can I use Bonafide Chili Seasoning in other dishes besides chili? Absolutely! While Bonafide Chili Seasoning is perfect for chili, it can also be used in other dishes like tacos, soups, and stews to add a burst of flavor.3. Is Bonafide Chili Seasoning gluten-free? Yes, Bonafide Chili Seasoning is gluten-free, making it suitable for those with gluten sensitivities or dietary restrictions.4. Can I use Bonafide Chili Seasoning as a rub for meats? Yes, Bonafide Chili Seasoning can be used as a dry rub for meats like chicken, beef, or pork. It adds a delicious smoky flavor and a hint of heat.5. How long does Bonafide Chili Seasoning last? When stored properly in an airtight container in a cool, dry place, Bonafide Chili Seasoning can last up to a year. However, for the best flavor, it’s recommended to use it within 6-8 months.
It’s a lazy Sunday morning, and the tantalizing aroma of sizzling bacon fills your kitchen. You can practically taste that crispy, savory goodness. But in a moment of distraction, you realize that you’ve let your bacon go a little too far. It’s burnt. Panic sets in. All your breakfast dreams shattered in an instant. But fear not, my friend, because burnt bacon doesn’t have to be a culinary catastrophe. In fact, it can be the gateway to a whole new world of deliciousness to revive your burnt bacon.Part 1: Unveiling the Potentials of Burnt BaconBurnt bacon may not be what you intended, but it can be a happy accident that leads to unexpected culinary creations. The charred edges and smoky flavor can add depth and complexity to dishes that would otherwise be ordinary. So, instead of tossing that burnt bacon in the trash, let’s explore the possibilities and discover how we can transform this mistake into a gastronomical delight.Understanding Burnt Bacon: A Symmetrical Serenade of TasteWhat is Burnt Bacon Exactly?Burnt bacon is simply bacon that has been cooked for too long or at too high a temperature, resulting in a crispy and sometimes charred texture. While burnt bacon may not be visually appealing, it can offer a unique flavor profile that can elevate your dishes to a whole new level.The Process of Making Bacon and How it Gets Burnt:To understand burnt bacon, we must first understand the process of making bacon itself. Bacon is typically made from pork belly, which is cured and then smoked. During the cooking process, the fat in the bacon renders, creating that irresistible crispiness we all know and love. However, if left unattended or cooked at too high a temperature, the fat can burn, resulting in a less desirable outcome.Health perspective of Burnt Bacon:While burnt bacon may not be the healthiest option due to the potential formation of carcinogens when food is burned, enjoying it in moderation can still be a delightful treat. The key is to strike a balance between indulgence and mindful consumption.Showcasing Culinary Creativity with Burnt BaconThe Importance of Imagination and Experimentation in Cooking:Cooking is not just about following a recipe; it’s about embracing your creativity and taking risks. Burnt bacon provides the perfect opportunity to step out of your comfort zone and experiment with flavors and textures. So, don’t be afraid to let your imagination run wild in the kitchen.The Appeal of Burnt Flavors: Understanding Maillard Reaction:The Maillard reaction is a chemical reaction that occurs between amino acids and sugars when exposed to heat. It is responsible for the browning and flavor development in many cooked foods, including burnt bacon. The complex flavors that arise from this reaction can add depth and richness to your dishes, giving them a unique and unforgettable taste.Part 2: Burnt Bacon Infused OilIngredients for Burnt Bacon Infused Oil:1 cup of burnt bacon bits1 cup of neutral cooking oil (such as vegetable or canola oil)Step-by-step preparation guide:1. Place the burnt bacon bits in a saucepan and heat over low heat to release their oils.2. Once the bacon bits have rendered their fat, strain the oil to remove any solids.3. In a clean jar or bottle, combine the bacon-infused oil with the neutral cooking oil.4. Store the infused oil in a cool, dark place for at least a week to allow the flavors to meld together.5. Use the burnt bacon infused oil as a flavorful base for dressings, marinades, or even drizzle it over roasted vegetables for a smoky twist.
Part 3: Burnt Bacon CarbonaraIngredients for Burnt Bacon Carbonara:8 ounces of spaghetti or your preferred pasta4 slices of burnt bacon, crumbled2 cloves of garlic, minced2 large eggs1/2 cup of grated Parmesan cheeseSalt and pepper to tasteFresh parsley, chopped (optional)Making the Burnt Bacon Carbonara: An Italian Delight:1. Cook the pasta according to package instructions until al dente. Drain and set aside.2. In a large skillet, sauté the minced garlic in a little bit of olive oil until fragrant.3. Add the crumbled burnt bacon to the skillet and cook for a few minutes to heat through.4. In a bowl, whisk together the eggs, grated Parmesan cheese, salt, and pepper.5. Pour the egg mixture over the cooked pasta and toss to coat evenly.6. Add the bacon and garlic mixture to the pasta and toss again.7. Serve the burnt bacon carbonara immediately, garnished with fresh parsley if desired. Enjoy the smoky goodness!
Part 4: Crispy Bacon Crumble ToppingIngredients for Crispy Bacon Crumble Topping:1 cup of burnt bacon bits1/2 cup of breadcrumbs2 tablespoons of melted butter1 teaspoon of dried herbs (such as thyme, oregano, or rosemary)Salt and pepper to tasteSteps to create the ultimate topping:1. Preheat your oven to 350°F (175°C) and line a baking sheet with parchment paper.2. In a bowl, combine the burnt bacon bits, breadcrumbs, melted butter, dried herbs, salt, and pepper. Mix well to ensure everything is evenly coated.3. Spread the mixture onto the prepared baking sheet in an even layer.4. Bake for about 15 minutes or until the crumble topping is crispy and golden brown.5. Allow the crispy bacon crumble topping to cool before using it as a delicious garnish for salads, soups, mac and cheese, or any dish that could use a crunchy and smoky twist.
Part 5: Kitchen Hacks: Other Uses for Burnt BaconIf you find yourself with more burnt bacon than you can use immediately, fear not. You can store it for future use. Simply allow the burnt bacon to cool completely, then transfer it to an airtight container and store it in the refrigerator. It will keep for up to a week. You can sprinkle it on salads, soups, or even use it as a topping for baked potatoes.
Part 6: Other Innovative Burnt Bacon Recipe IdeasBurnt Bacon Jam: Simmer burnt bacon bits with onions, brown sugar, vinegar, and spices to create a sweet, tangy, and smoky jam that’s perfect for spreading on sandwiches or serving with cheese.Burnt Bacon Butter: Mix burnt bacon bits with softened butter and a pinch of salt to create a flavorful compound butter. Spread it on warm bread or use it to cook eggs for an extra burst of bacon goodness.Burnt Bacon and Cheese Stuffed Mushrooms: Fill mushroom caps with a mixture of burnt bacon, cream cheese, shredded cheddar, and herbs. Bake until the mushrooms are tender and the filling is melted and bubbly.
ConclusionCooking is an art, and like any art form, it’s all about embracing the unexpected and finding beauty in the imperfections. Burnt bacon may not be what you initially set out to create, but with a little creativity and imagination, it can become the star ingredient in dishes that will surprise and delight your taste buds.So, the next time you accidentally burn your bacon, don’t despair. Embrace the opportunity to experiment and discover new flavors. Remember, some of the greatest culinary creations were born out of mistakes. And who knows, you might just stumble upon your next favorite dish.FAQsCan I still eat burnt bacon?Absolutely! While burnt bacon may not be the healthiest option due to potential formation of carcinogens, enjoying it in moderation is perfectly fine. Just be mindful of the level of burn and consume it as part of a balanced diet.Can I use burnt bacon in salads?Yes, burnt bacon can add a smoky and crispy texture to salads. Simply crumble it over your favorite greens for an extra burst of flavor.Can I use burnt bacon in baking?Definitely! You can incorporate burnt bacon into baked goods such as savory tarts, quiches, or even biscuits for a unique twist on traditional recipes.Can I freeze burnt bacon?Yes, you can freeze burnt bacon. Allow it to cool completely, then place it in a freezer-safe container or bag. It will keep for up to three months. Thaw it in the refrigerator before using.Can I repurpose burnt bacon grease?Absolutely! Burnt bacon grease can be used to add a smoky flavor to dishes or as a cooking fat for frying or sautéing. Just be mindful of the strong flavor and adjust accordingly in your recipes.
Welcome to the world of smoked banana peppers! If you’re a fan of bold flavors and a hint of smokiness, then you’re in for a treat. In this ultimate guide, we’ll explore the wonders of smoked banana peppers and how they can elevate your dishes to new heights. Whether you’re looking for an appetizer to impress your guests or a main course that will leave a lasting impression, we’ve got you covered. So, let’s dive in and discover the smoky sensations of crafting delightful dishes with smoked banana peppers!Part 1: The Fascinating Origin of Banana PeppersBefore we delve into the world of smoked banana peppers, let’s take a moment to appreciate their origin. Banana peppers, also known as yellow wax peppers, have a rich history and a vibrant culinary presence. These mild and slightly sweet peppers are believed to have originated in Central and South America. They were named “banana peppers” due to their resemblance to the shape of a banana.Banana peppers have been a staple in many cuisines around the world for centuries. They add a pop of color and a mild heat to dishes, making them a versatile ingredient in various recipes. But what makes smoked banana peppers so special? Well, let’s find out!Part 2: The Art of Making Smoked Banana PeppersSmoking banana peppers is an art form that requires patience and precision. The process involves exposing the peppers to low heat and smoke for a prolonged period, infusing them with a rich smoky flavor. Here’s a step-by-step guide on how to smoke banana peppers:Start by selecting fresh and firm banana peppers. Make sure they are free from any blemishes or soft spots.Preheat your smoker to a temperature of around 225°F (107°C).Rinse the peppers under cold water and pat them dry with a paper towel.Place the peppers directly on the smoker rack or use a vegetable grilling basket to prevent them from falling through the grates.Close the lid of the smoker and let the peppers smoke for approximately 1 to 2 hours, or until they are tender and have absorbed a smoky flavor.Once the peppers are smoked to your liking, remove them from the smoker and let them cool.Now that you have perfectly smoked banana peppers, the possibilities are endless! Let’s explore some recipes that will make your taste buds dance with joy.Harmonizing Flavors: Complementing Ingredients for Smoked Banana PeppersWhen it comes to cooking with smoked banana peppers, it’s all about creating a harmonious balance of flavors. The smokiness of the peppers pairs beautifully with a wide range of ingredients. Here are some suggestions to enhance your dishes:Creamy cheeses: The creaminess of cheeses like cream cheese, goat cheese, or feta balances out the smokiness of the peppers.Meats: Smoked banana peppers are the perfect companion for meats like bacon, sausage, or grilled chicken. The combination of smoky and savory flavors is simply heavenly.Citrus: The bright and tangy flavors of citrus fruits such as lemon or lime can add a refreshing element to your dishes.Fresh herbs: Herbs like cilantro, parsley, or basil can add a burst of freshness to your smoked banana pepper creations.Spices: Experiment with spices like cumin, paprika, or chili powder to add depth and complexity to your dishes.Now that you have an idea of the flavors that complement smoked banana peppers, let’s dive into some mouthwatering recipes!
Recipe I – Smoked Banana Pepper Poppers: Perfect Appetizer for Any GatheringThese smoked banana pepper poppers are the ultimate crowd-pleaser. They are cheesy, smoky, and packed with flavor. Here’s how to make them:Ingredients:- 6 smoked banana peppers, halved and seeds removed- 4 ounces cream cheese, softened- 1 cup shredded cheddar cheese- 6 slices bacon, cooked and crumbled- 1 teaspoon garlic powder- Salt and pepper to tasteInstructions:1. Preheat your oven to 375°F (190°C).2. In a bowl, mix together the cream cheese, shredded cheddar cheese, crumbled bacon, garlic powder, salt, and pepper.3. Fill each smoked banana pepper half with the cheese mixture.4. Place the filled pepper halves on a baking sheet and bake for 15-20 minutes, or until the cheese is melted and bubbly.5. Remove from the oven and let them cool for a few minutes before serving.These smoked banana pepper poppers are perfect for any gathering or as a tasty appetizer. Serve them with a dipping sauce of your choice, and watch them disappear in no time!
Recipe II – Smokey Banana Peppers and Sausage: A Main Course to RememberIf you’re looking for a hearty and flavorful main course, this recipe is for you. Smokey banana peppers and sausage make a delightful combination that will leave you craving for more. Here’s how to prepare this mouthwatering dish:Ingredients:- 4 smoked banana peppers, sliced- 1 pound Italian sausage, casings removed- 1 onion, sliced- 4 cloves garlic, minced- 1 can diced tomatoes- 1 teaspoon dried oregano- 1 teaspoon dried basil- Salt and pepper to taste- Grated Parmesan cheese for garnishInstructions:1. In a large skillet, cook the Italian sausage over medium heat until browned and cooked through. Remove from the skillet and set aside.2. In the same skillet, add the sliced onions and minced garlic. Sauté until the onions are translucent and fragrant.3. Add the sliced smoked banana peppers to the skillet and cook for a few minutes until they start to soften.4. Stir in the diced tomatoes, dried oregano, dried basil, salt, and pepper. Simmer for 10-15 minutes, allowing the flavors to meld together.5. Add the cooked Italian sausage back to the skillet and stir to combine. Cook for an additional 5 minutes.6. Serve the smokey banana peppers and sausage over cooked pasta or as a filling for sandwiches. Garnish with grated Parmesan cheese for an extra flavor boost.This smokey banana peppers and sausage dish is a crowd-pleaser and perfect for a cozy family dinner or a gathering with friends. The smokiness of the peppers adds a unique twist to a classic combination.
Recipe III – Vegan-friendly Stuffed Smoked Banana PeppersFor all the vegan food enthusiasts out there, we have a delicious recipe that will make your taste buds sing. These vegan-friendly stuffed smoked banana peppers are bursting with flavor and are a healthier alternative. Here’s how to make them:Ingredients:- 6 smoked banana peppers, halved and seeds removed- 1 cup cooked quinoa- 1 cup black beans, rinsed and drained- 1 cup corn kernels- 1/2 cup diced tomatoes- 1/2 cup chopped cilantro- 1 tablespoon lime juice- 1 teaspoon cumin- Salt and pepper to tasteInstructions:1. Preheat your oven to 375°F (190°C).2. In a bowl, mix together the cooked quinoa, black beans, corn kernels, diced tomatoes, chopped cilantro, lime juice, cumin, salt, and pepper.3. Fill each smoked banana pepper half with the quinoa and bean mixture.4. Place the filled pepper halves on a baking sheet and bake for 15-20 minutes, or until the peppers are tender and the filling is heated through.5. Remove from the oven and let them cool for a few minutes before serving.These vegan-friendly stuffed smoked banana peppers are not only delicious but also packed with nutrients. They make a great appetizer or a light meal option for those following a plant-based diet.
Part 4: The Health Benefits of Smoked Banana PeppersAside from their incredible flavor, smoked banana peppers also offer a range of health benefits. Here are some reasons why you should consider adding them to your diet:Rich in vitamins: Banana peppers are a good source of vitamins A and C, which are essential for a healthy immune system and vibrant skin.Antioxidant powerhouse: The vibrant yellow color of banana peppers is a sign of their high antioxidant content. Antioxidants help protect the body against free radicals and reduce the risk of chronic diseases.Anti-inflammatory properties: The capsaicin compound found in banana peppers has anti-inflammatory properties that may help reduce inflammation in the body.Digestive health: The fiber content in banana peppers promotes healthy digestion and may help prevent constipation.Weight management: Banana peppers are low in calories and can be a great addition to a weight loss or weight management plan.It’s important to note that the health benefits of smoked banana peppers are similar to fresh banana peppers. However, smoking them adds a unique flavor profile that can enhance your overall dining experience.Pepper Your Way ForwardNow that you have a repertoire of recipes and the knowledge to smoke your own banana peppers, it’s time to unleash your culinary creativity. The versatility of smoked banana peppers allows you to experiment with a wide variety of dishes. Add them to pizzas, sandwiches, salads, or even stir-fries. The smoky flavor will elevate your meals and leave your taste buds wanting more.So, gather your ingredients, fire up your smoker, and let the smoky sensations of smoked banana peppers take your dishes to new heights. Get creative, have fun, and enjoy the burst of flavors that these delightful peppers bring to your table. Happy cooking!FAQsCan I use other types of peppers for smoking?Yes, you can! While banana peppers are often used for their mild heat and sweet flavor, you can experiment with other types of peppers like jalapenos, poblanos, or even bell peppers.Can I smoke the peppers on a grill instead of a smoker?Absolutely! If you don’t have a smoker, you can still achieve a smoky flavor by using a charcoal or gas grill. Simply follow the same steps for smoking the peppers but adjust the temperature and cooking time accordingly.Can I adjust the level of spiciness in the recipes?Definitely! If you prefer a milder flavor, you can remove the seeds and membranes from the smoked banana peppers before using them in the recipes. This will reduce the level of spiciness.